Custom Flyers
The following guide will introduce you to our brand new Custom Flyers section. This section allows you to apply both your customers and your own logo to a flyer and then either email it directly to your customer or save the artwork ready to market it.
STEP 1 - From your dashboard click on Marketing and then Custom Flyers.

STEP 2 - You will see the new menu shown below. You can scroll through the different flyers under each category and also search by supplier, category or product using the search bar at the top right.
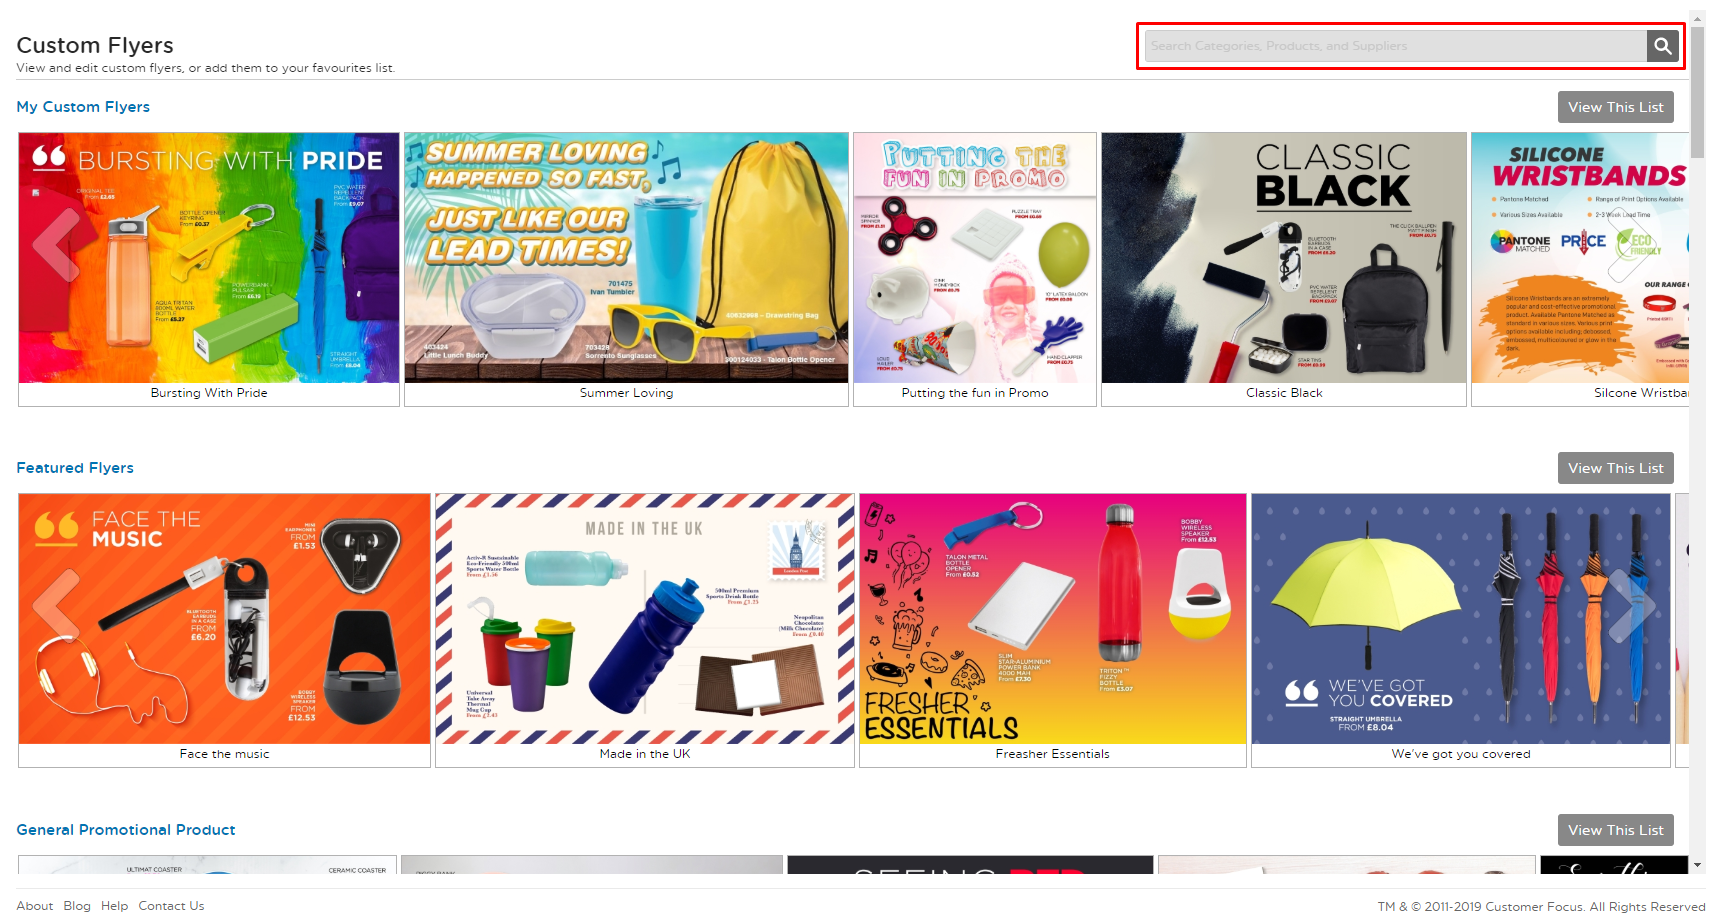
STEP 3 - When you find a flyer you wish to use click on it as shown below.

STEP 4 - You will now see the below window for the flyer you have selected. You can like the flyer by clicking the 'Thumbs Up' icon below. This will let the supplier know you like what they have uploaded.
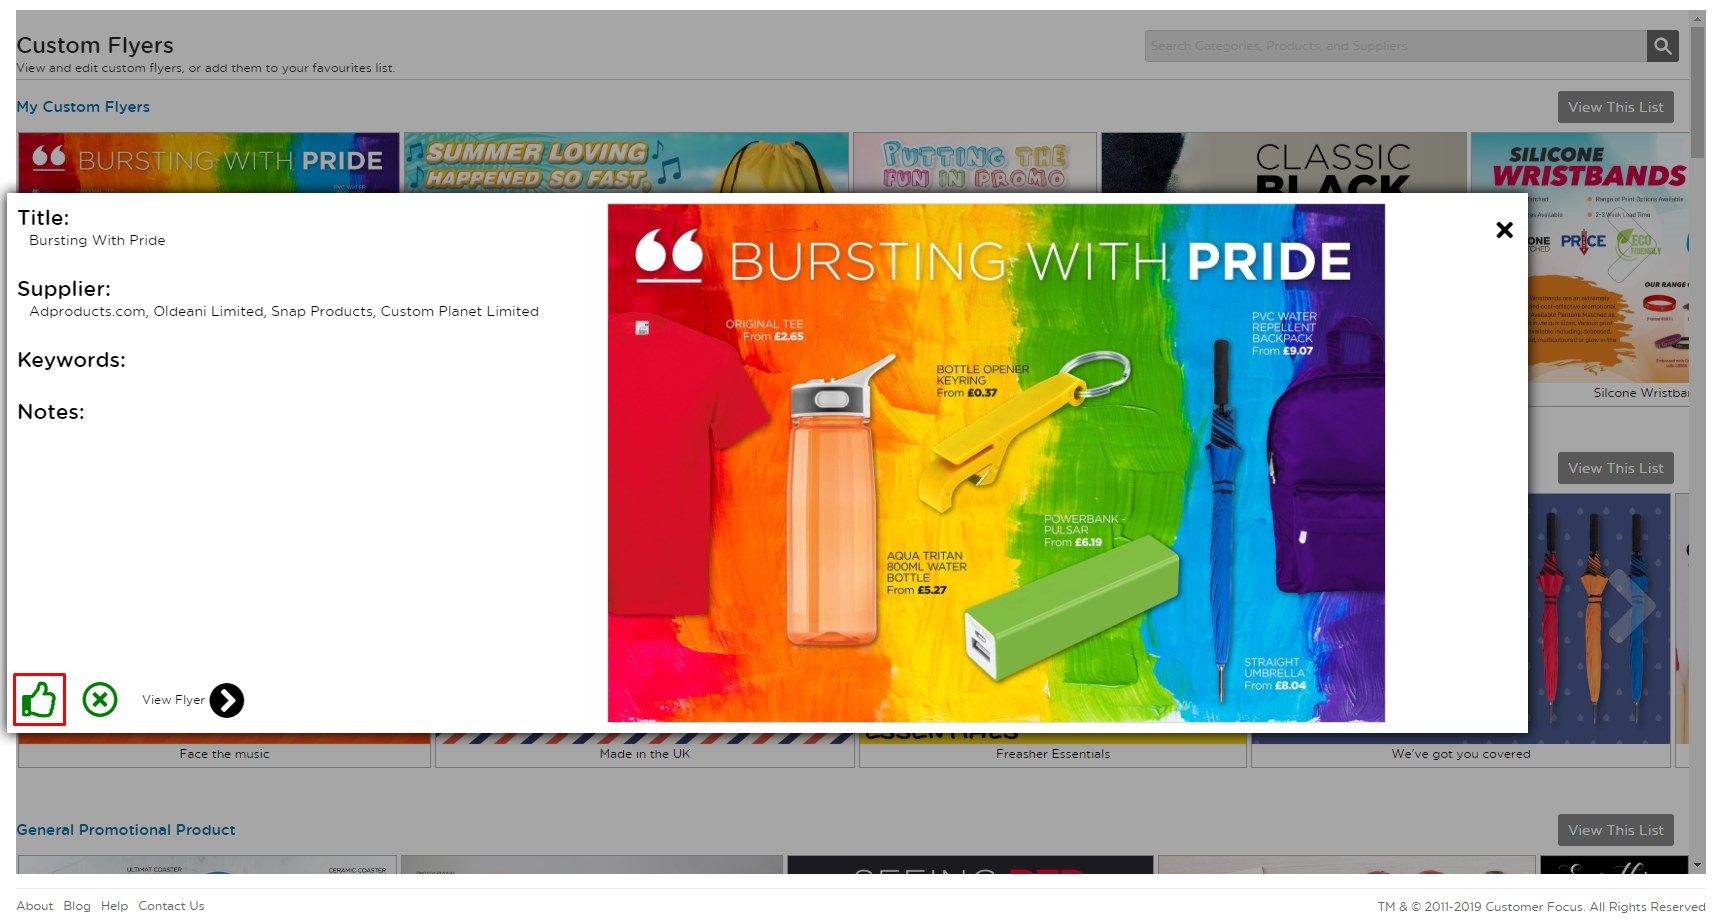
STEP 5 - Click the plus button to add the flyer you are looking at to your own 'My Flyers' section.

STEP 6 - Click 'View Flyer' to customise it.

STEP 7 - You can now upload your customers logo by clicking the Select Logo button. You can upload a file from your desktop and the logo will show on all products on the flyer.

STEP 8 - You have the option to remove the white from the edges of the logo. You will see the logo I have selected is now displaying on the flyer.
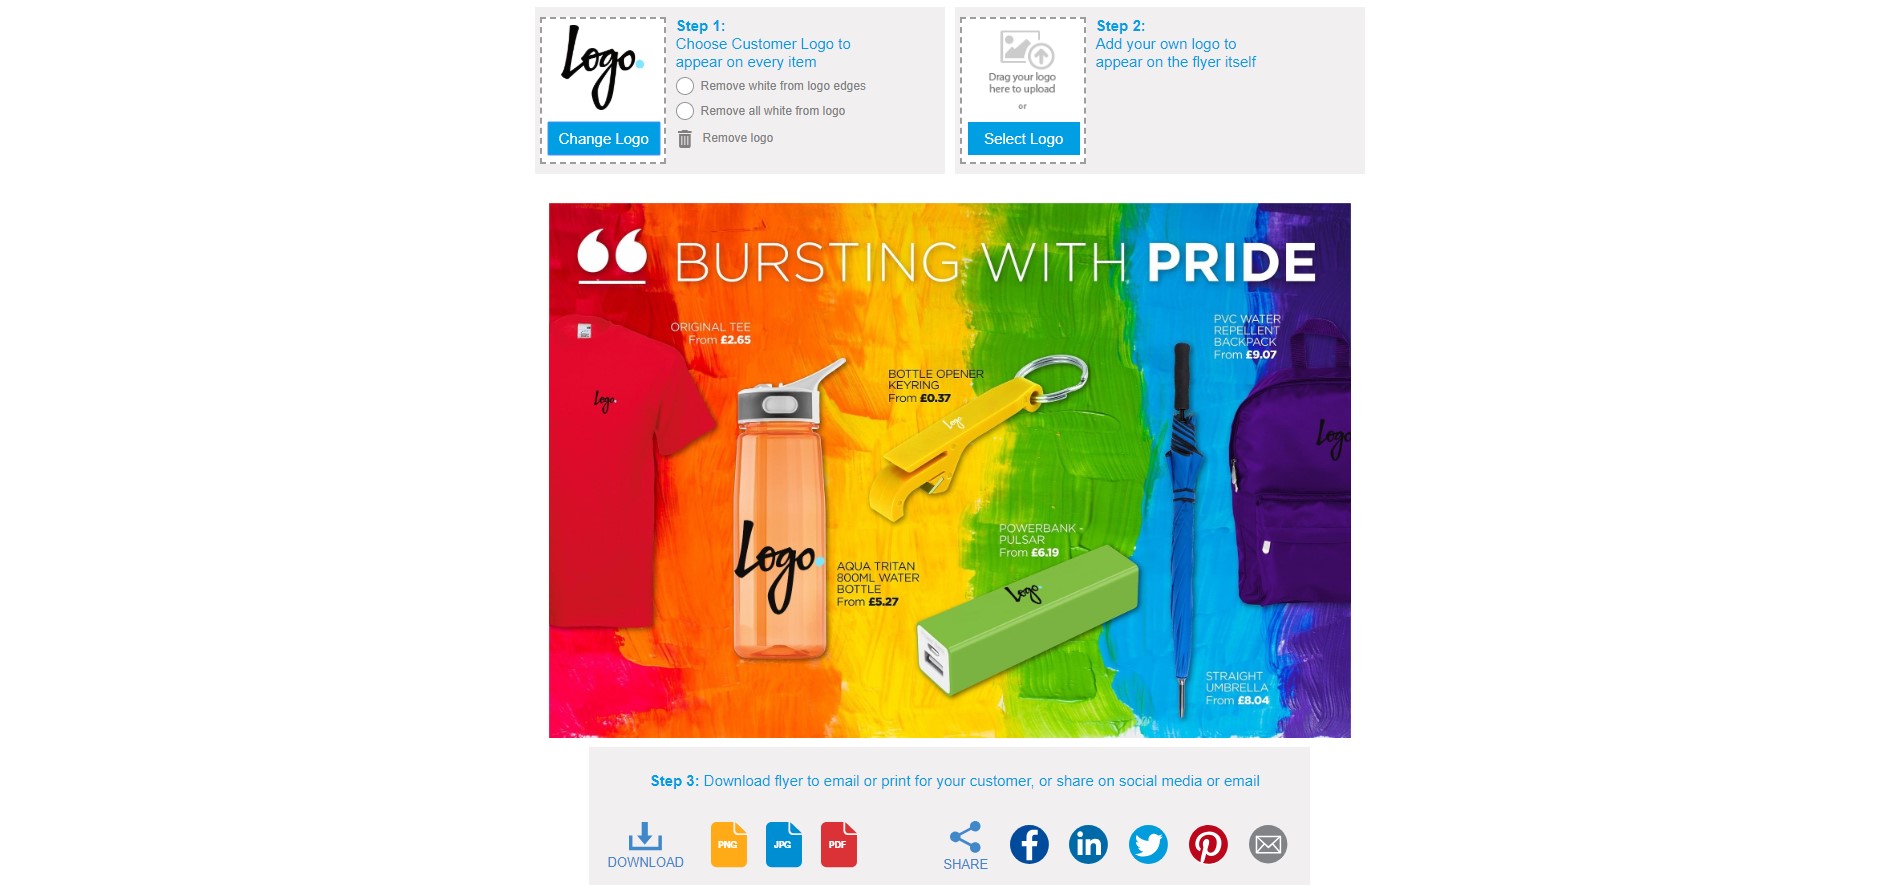
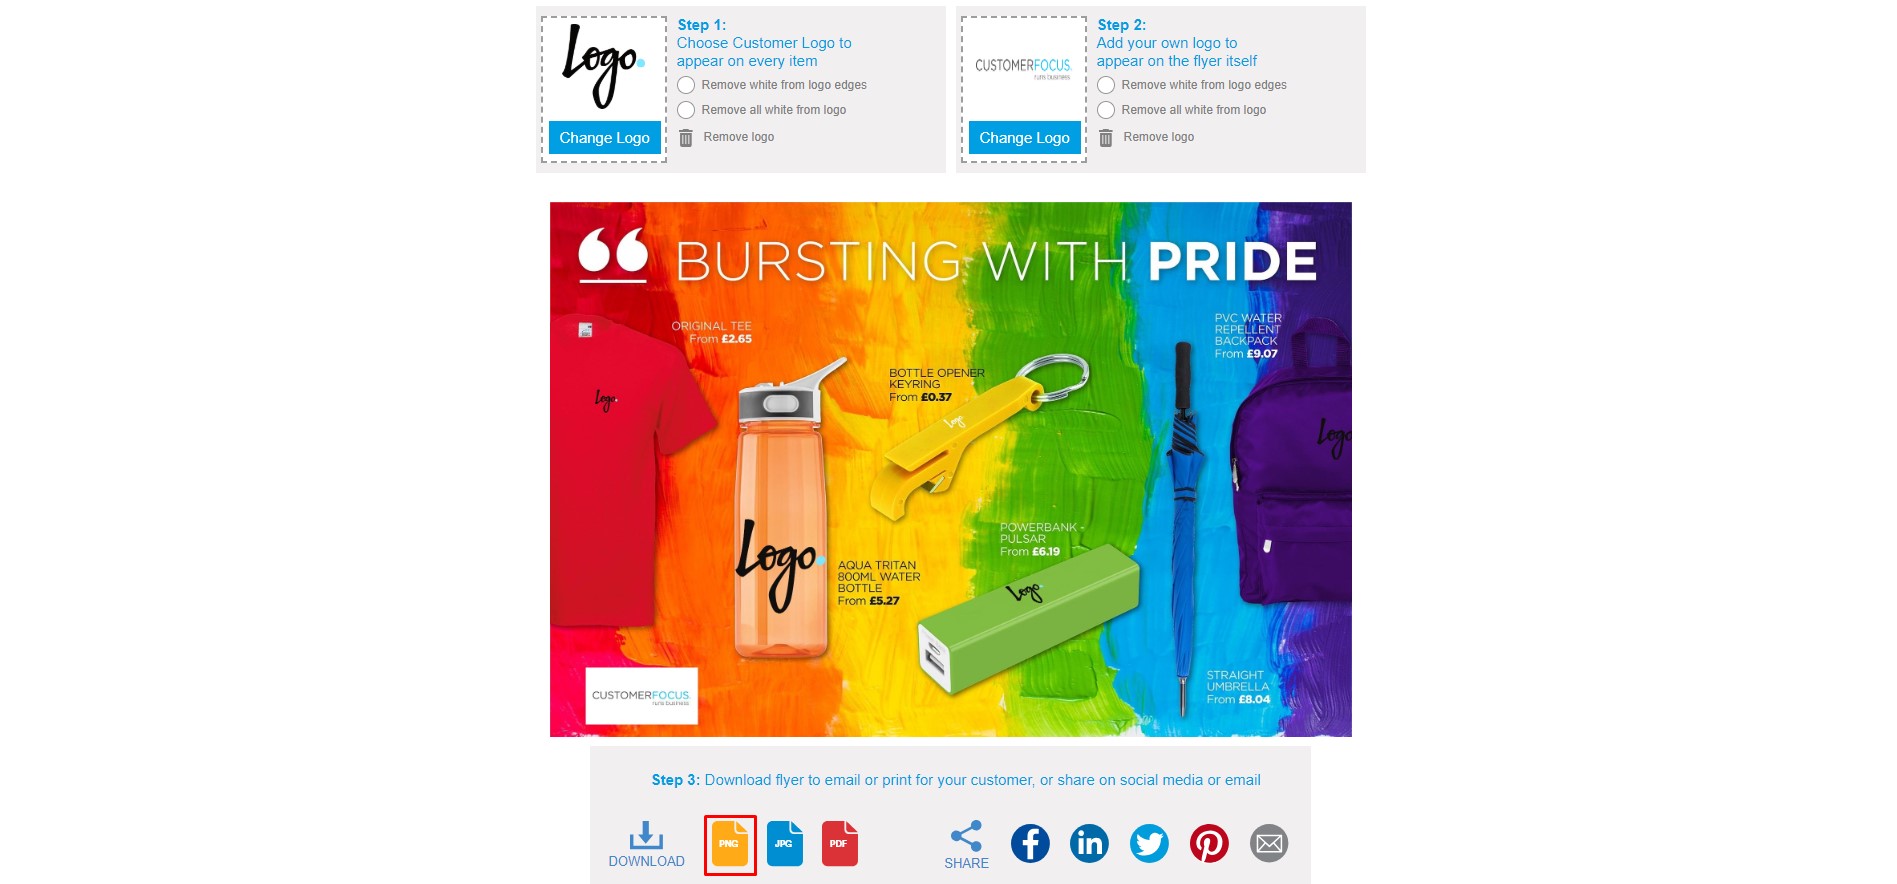
STEP 9 - You can also upload your own company logo by moving to step 2.

STEP 10 - Your logo will display at the bottom of the flyer as shown below. You can now use the options at the bottom of the screen to either save the artwork in the format you want, share it on Social Media or email it directly to your customer.