The following guide will show you how to make Dynamic Mailers using Technologo.
Users can use any existing accountID/password to log in into Upload service application.
Images upload tab
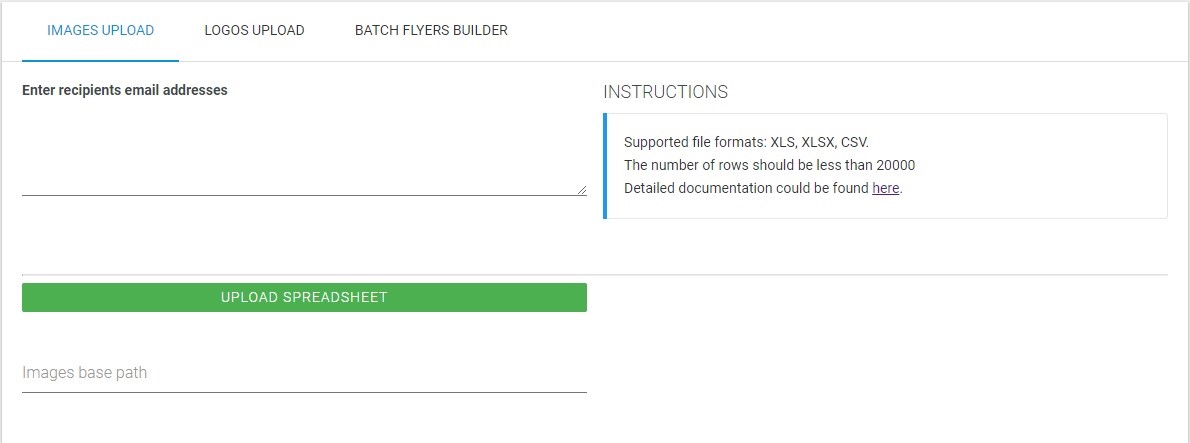
- Email recipients - the list of users which will get upload report. Default recipient is andrew.shalimov@customerfocus.com.
- Instructions - the requirements info about supported file formats, rows number and files examples.
- the ‘Upload spreadsheet’ button - to browse file to upload
- the ‘Image base path’ field - the exact path (directory) where images from the file are
FTP for “Images base path” is supported, but be aware that username and password should be provided, e.g.:
host: 205.185.50.151
user: username
password: password
ftp://username:password@205.185.50.151/ready for web creation/
File requirements:
- maximum 20 000 rows
- all headers are required (18 columns)
- SKU, product_name, image_file_name and location are mandatory
- supported file formats: xls, xlsx and csv.
If SKU from spreadsheet already exists in a TL DB then it will be overwritten including all images.
All existing ImprintAreas for such SKU will be deleted in that case.
Logos upload tab
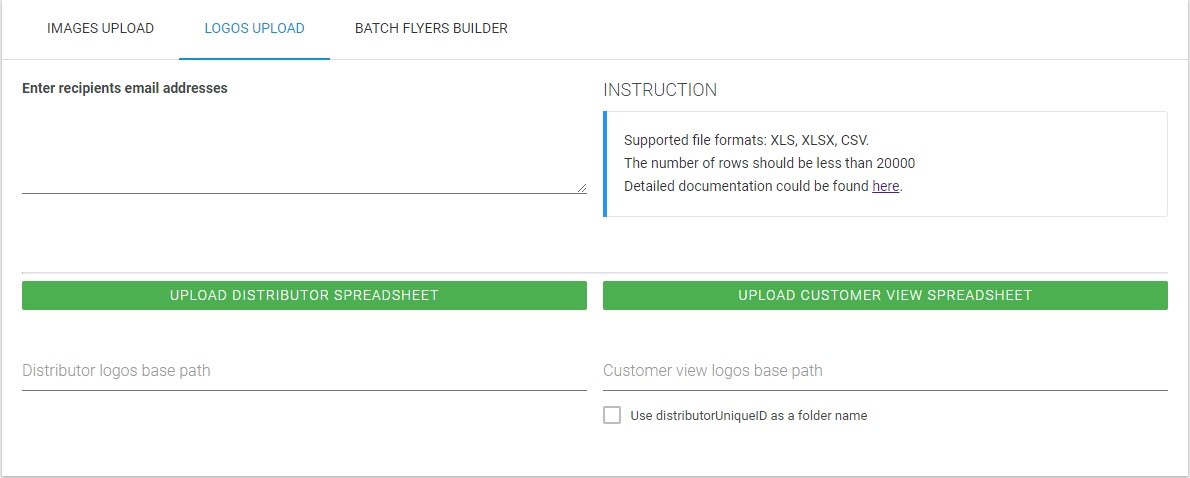
- Email recipients - the list of users which will get upload report. Default recipient is andrew.shalimov@customerfocus.com.
- Instructions - the requirements info about supported file formats, rows number and files examples.
- the ‘Upload distributor spreadsheet’ button - to browse file to upload logos for distributors
- the ‘Upload customer view spreadsheet’ button - to browse file to upload logos for distributors and their customers
- the ‘Distributor logos base path’ field - the exact path (directory) where images from the file are
- the Customer logos base path’ field - the exact path (directory) where images from the file are
- the ‘Use distributorUniqueID as a folder name’ check-box - to upload logos from the specified folder in the xls or in the root folder ‘ready for web creation’ or any other.
Distributor spreadsheet file requirements:
- maximum 20 000 rows
- aprinta_distributor_ref and logo_path headers are required
- aprinta_customer_ref, store_url_name and store_name are optional
- supported file formats: xls, xlsx and csv.
Customer view spreadsheet file requirements:
- maximum 20 000 rows
- distributorUniqueID, CustomerViewLogo and CustomerViewSlug are required
- CustomerViewTitle and Image Link are optional
- supported file formats: xls, xlsx and csv.
‘Image Link’ field from Upload customer view spreadsheet is used in order to check image link correctness after customers’ upload.
For instance,
http://technologo.com/services/image-service/get_logo?distributor_id=VALUE&customer_id=VALUE
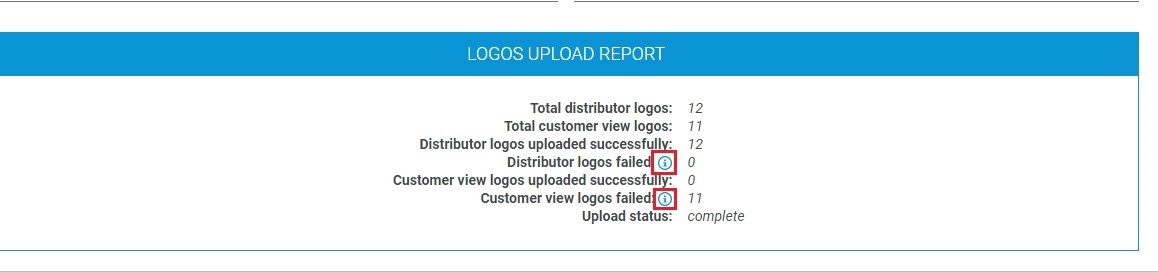
All failed images and logos can be viewed within upload report
Batch flyers builder
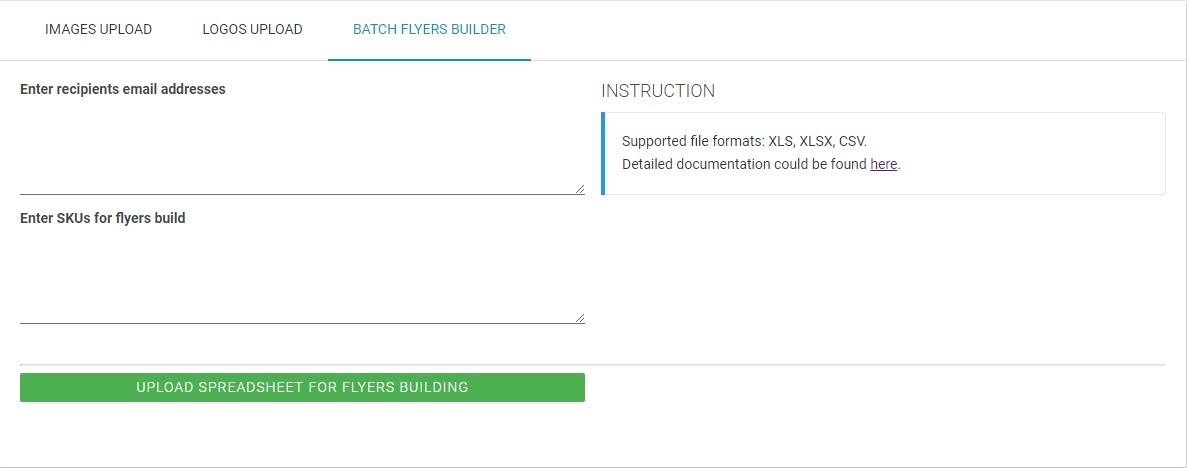
- Email recipients - the list of users which will get upload report. Default recipient is andrew.shalimov@customerfocus.com.
- Instructions - the requirements info about supported file formats, rows number and files examples.
- SKUs - input field for SKUs set or at least one.
- the ‘Upload spreadsheet for flyers building’ button - to browse file to upload flyers
Flyers spreadsheet file requirements:
- maximum 24 000 rows
- Image Link field is required
- supported file formats: xls, xlsx and csv.
Valid spreadsheets for both tabs can be found here
http://images.technologo.com/demo/valid_spreadsheets.zip
It’s intended for preparing video clip to be able for placing logo.
This process consists of 2 phases:
- uploading video and slicing it to the separate images
- definition of ImprintAreas - the places on each image where logo will be placed
Phase 1 - uploading video
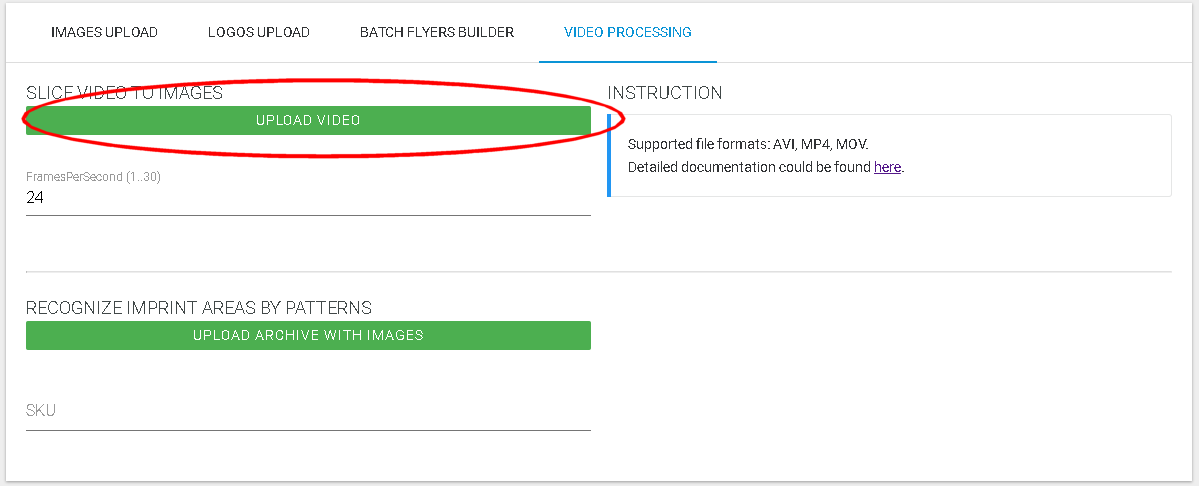
here you able to select the video clip and to upload it to TL backend.
Parameter FPS (FramesPerSecond) defines the quality of result video (after logo applying). Increasing this value will result in an increase in the number of images.
FPS = 20 is optimum.
Then you can start slicing video to images:
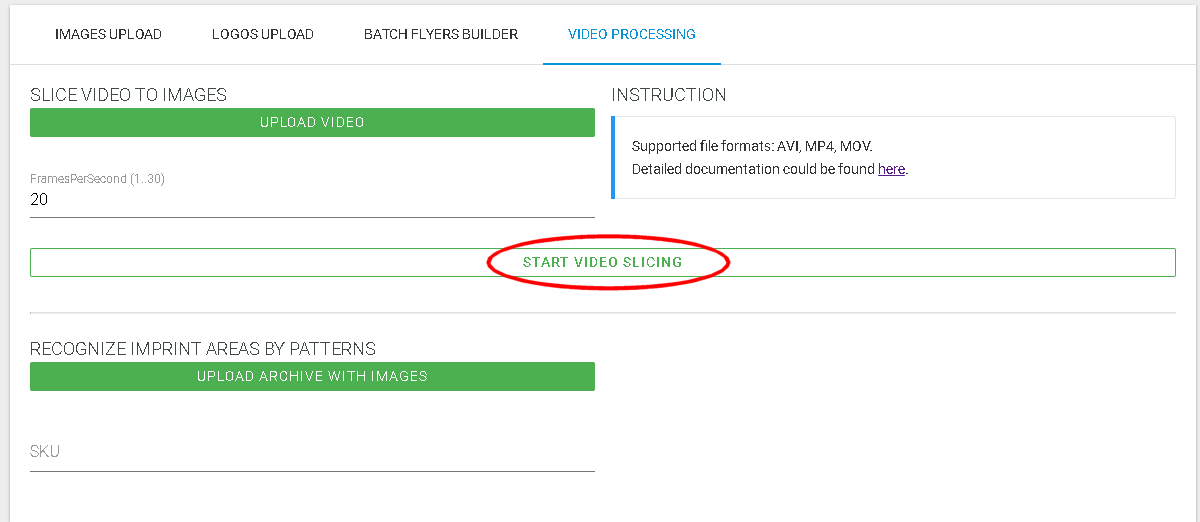
While slicing is in progress current progress will be shown:

You can interrupt this phase by clicking ‘STOP VIDEO SLICING’
When slicing will be completed final report will be shown:

There are an archive link with images and SKU of new product.
Using reported SKU you can find newly created product at TL admin console:

and to move ImprintAreas manually:
Because of huge number of images it’s not convenient, so here is Phase 2:
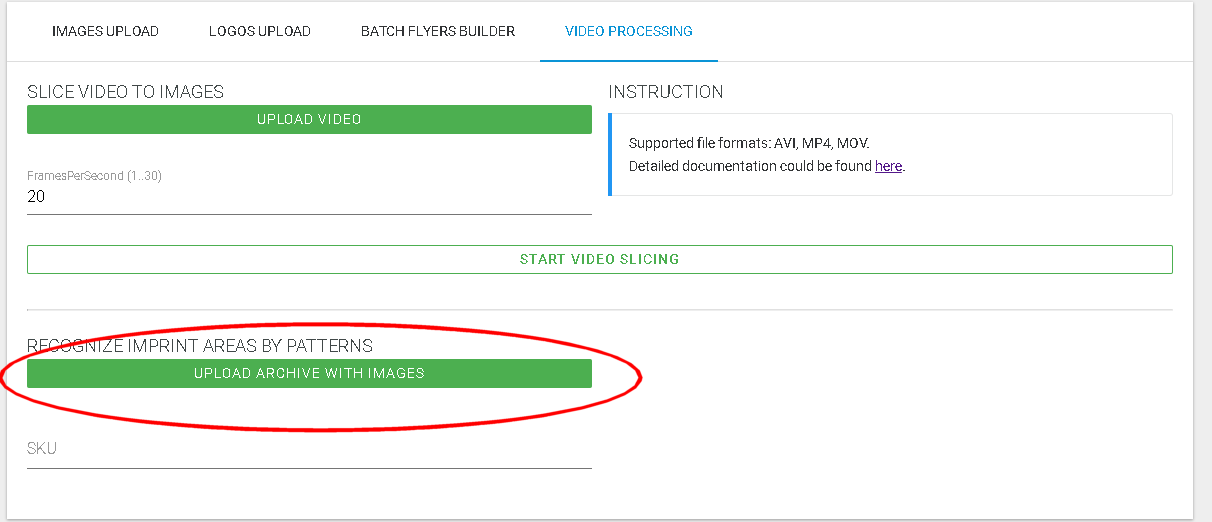
Phase 2 - ImprintAreas definition
You can download an archive with images using the ‘Sliced-images archive link’
There is a set of PNG files. In order to define an ImprintArea, mark desirable place as transparent rectangle using some graphics editor. Save the image with the same name and format - PNG. After all rectangles images will be setted up, they need to be packed into ZIP archive.
This archive will be uploaded with ‘UPLOAD ARCHIVE WITH IMAGES’ button:
Then set the SKU from Phase 1 and press ‘START IMPRINT AREAS RECOGNITION’
button:
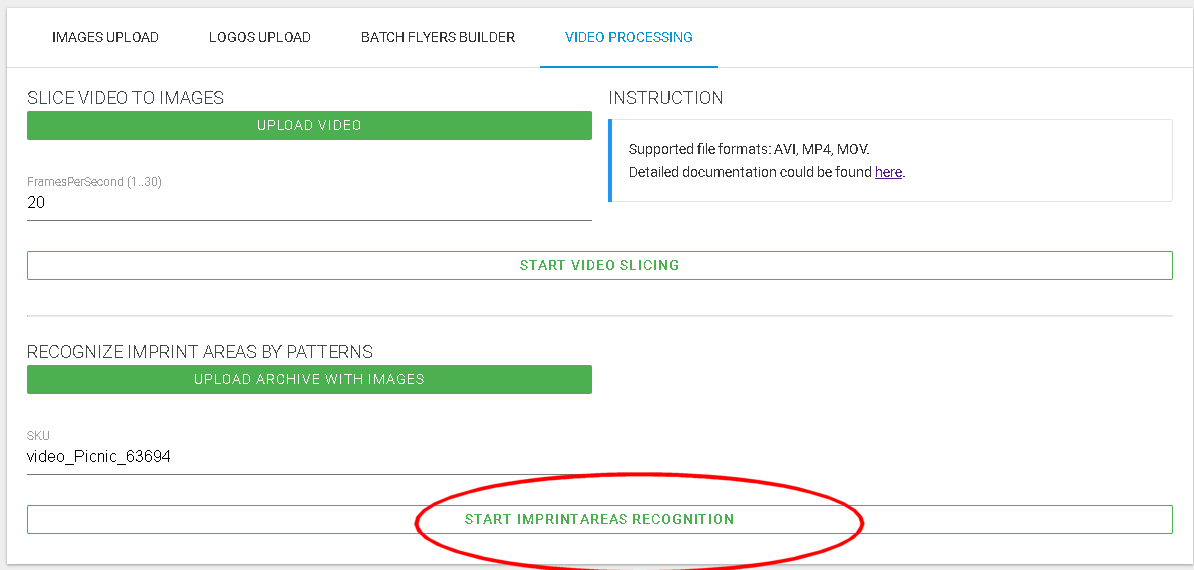
The service will detect your transparent rectangles at each image and to set up the coordinates of ImprintArea.
After finish those phases the Videoroduct (SKU) is ready, you can place the logo on it using image-service-rest
http://staging.tldev.biz/image-service-rest/
