How to Set Up an EC Sales Report
The following help sheet will talk you through how to set up an EC Sales report within Enterprise.
STEP 1
Be begin, you need to go into the Sales Invoicing area of the system. Navigate to ‘Invoices & Payables’ followed by ‘Sales Invoicing’

STEP 2
From within the Sales Invoicing screen, locate the report/export button at the bottom of the screen and click this

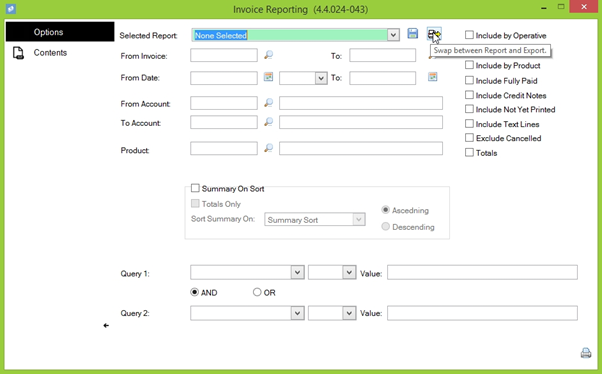
STEP 3
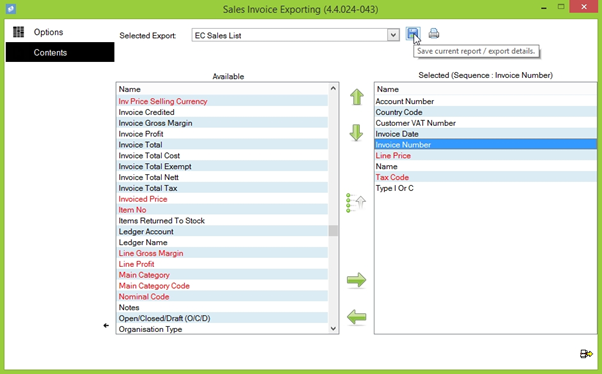
When first clicking the report/export button, it will produce the Invoice Reporting screen. We need to be in Sales Invoice Exporting, which can be accessed by clicking the icon next to the save icon at the top of the screen, as shown
STEP 4
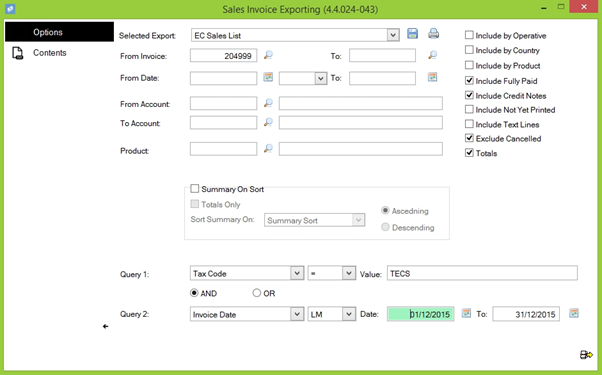
Once in Sales Invoice Exporting, it’s time to start setting up the report. First, give it a relevant and descriptive title such as ‘EC Sales List’. Next, turn your attention to the right-hand check boxes. We need to select ‘Include Fully Paid’, ‘Include Credit Note’, ‘Exclude Cancelled’ and ‘Totals’

STEP 5
Once these options are set we need to set up the queries themselves. The criteria you need are shown in the screenshot below. Additionally, ensure the AND radio button is selected, rather than OR.
STEP 6
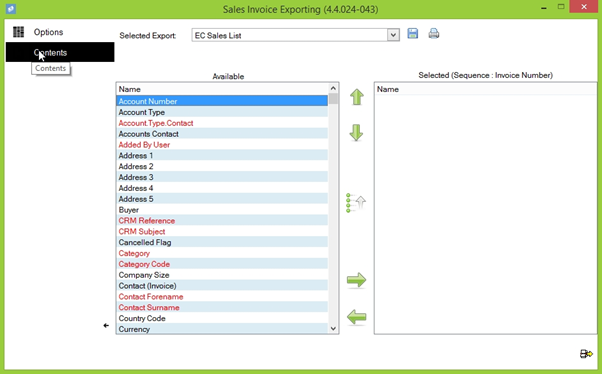
When you’re finished defining the options, move onto the ‘Contents’ tab listed on the left-hand side of the screen. This is where we will define specifically which fields show in our report.
STEP 7
The Contents screen is split into two sections. The left-hand list is all the available fields you can select for your report. The right hand list is the fields that have been selected. To add a field to the report, highlight it in the left-side list and click on the green ‘right’ arrow between the lists. You can use the left arrow below it to remove a field if needed.
For this particular report, we require:
- Account Number
- Country Code
- Customer VAT Number
- Invoice Date
- Invoice Number
- Line Price
- Name
- Tax Code
- Type I or C

STEP 8
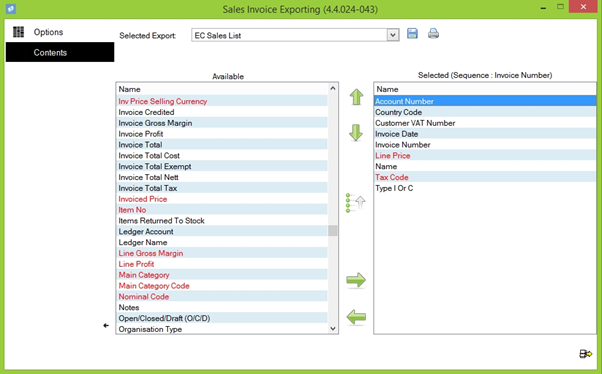
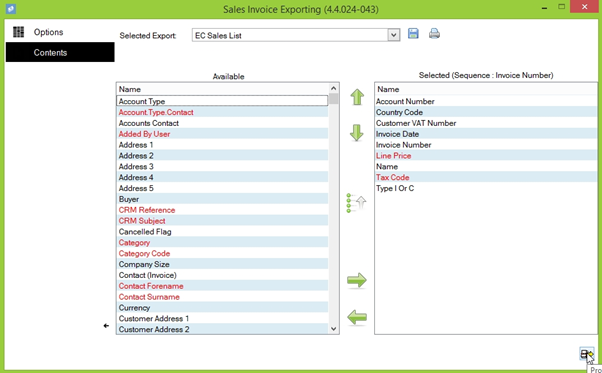
Once all the contents have been selected your list should look similar to the one in the screenshot below
NOTE: The sequence should run off Invoice Number for this report. You can check which field is being used as the sequencer by looking in the brackets above the right-hand list. If invoice number is not selected, you can do this by clicking the up arrow next to four dots in the very centre of the screen. Click this again while the current sequencer is highlighted to change whether this is ascending or descending.
STEP 9
Once you’re happy with the contents of your report, you can save it for later use by clicking the save icon next to the Export Name drop-down at the top of the screen. A popup window will appear to confirm the report has been saved.

STEP 10
To run the export, click on the export button in the bottom right of the screen.
This will generate the export options tab. From here, select options as you normally would, dependant on the media you prefer for your reports.
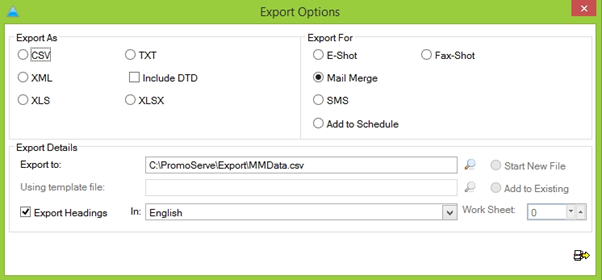
When you’re happy, click the export button in the bottom-right of the window to generate the report.
With this, the EC Sales report is now created.
