Editing Product Information Spreadsheet
STEP 1 - Download the Product Information Spreadsheet from here
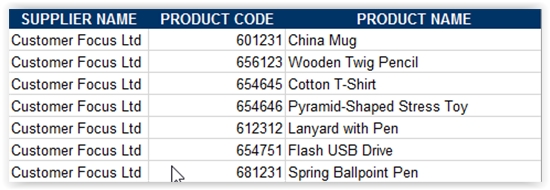
STEP 2 - Insert your company name into the Supplier Name column. In Product Code, enter the reference code you use for your products. The title of the item goes in the Product Name column.
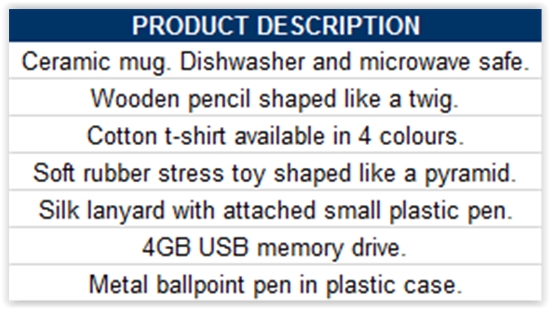
STEP 3 - Enter a description of your product in Product Description. This is how it will be displayed on Customer Focus Search.
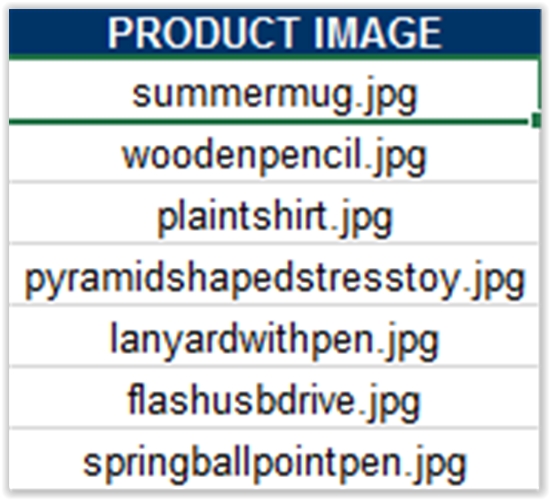
STEP 4 - All products require images to be displayed on Search. Enter the full name of the image, including extensions, in the Product Image column. The images can be sent to us via email or through an online file storage service. Preferably, the images should be in jpeg format.
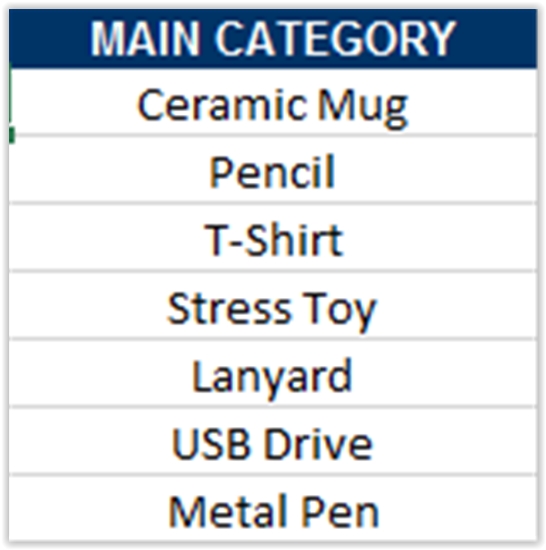
STEP 5 - In Main Category, enter the product category you believe most closely resembles the item.
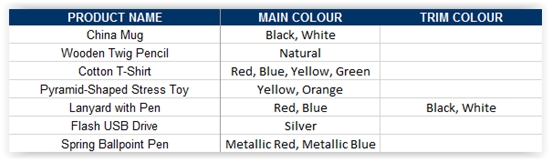
STEP 6 - Enter the Main Colour of the products here. If a product has more than one colour, please seperate these with a comma.
If a product has a Trim Colour, enter them in this column. These should pair with those in the Main Colour column. In the example shown, this shows that the Lanyard with Pen is available in red with black trim and also blue with white trim.
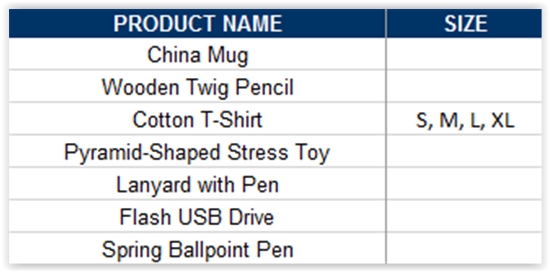
STEP 7 - The Size column is an optional entry. This is used for clothing sizes. This should not be confused with product dimensions.
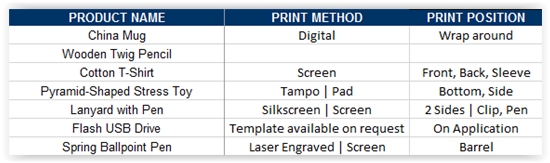
STEP 8 - In Print Method, enter the method of print you use on your product. If there is more than one, please seperate with a vertical bar (|).
Enter the Print Position in the next column. These should align with those in Print Method. Again, seperate with a vertical bar. If print psoitions are linked to one print method, these should be seperated by commas.
In the case of the examples given:
- Cotton T-Shirt is available to be screen printed on the front, back or sleeve.
- Pyramid Shaped Stress Toy can eb tampo or pad printed. And either of these can be printed on the bottom or side.
- Lanyard with Pen can be printed in silkscreen, but only on 2 sides. It is also available for screen print to either the clip or the pen.
- If a product can be printed on, but has no specific methods or positions like this Flash USB Drive, enter Template available on request and On Application as shown.
- Spring Ballpoint Pen can be either laser engraved or screen printed on the barrel.
- If a product is plain stock, you can leave these columns blank.
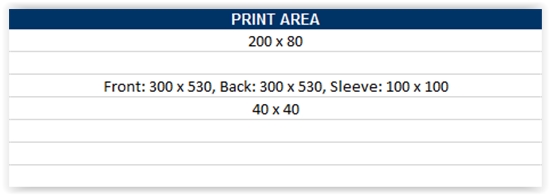
STEP 9 - In Print Area, specify the dimensions (in mm) of the area in width and height that is available to be printed on. If there are more than one print area depending on position, you can write these as plain text, as shown.
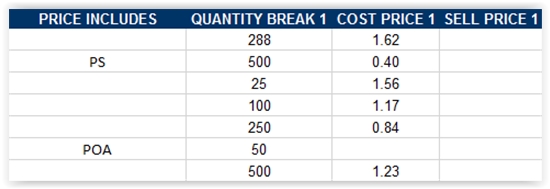
STEP 10 - In the Prices Included column, state what the subsequent prices correspond to.
- If they are for 1 Colour, leave the column blank. Otherwise enter 2Col, 3Col, 4Col or FCol.
- If the product is plain stock, enter PS.
- If you want the prices of a product to be set to price on application, enter POA.
Enter the first quantity break of your product into Quantity Break 1 and the cost price (the price to sell to distributors) in the adjacent Cost Price 1 column. The Sell Price column can be left blank. Do the same for any other quantity breaks in the following columns. there are five Quantity Break and Cost Price columns in total on the sheet that you can use if you wish. you do not have to use all of them. For any products you set as POA, they require at least one quantity break to be entered, but you do not have to list a price next to it, as shown.
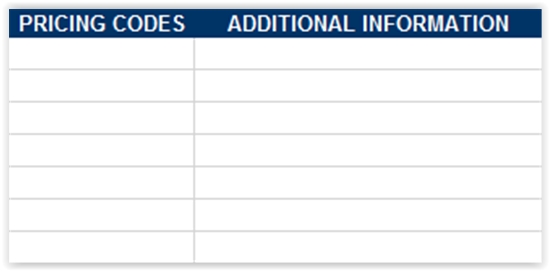
STEP 11 - The Pricing Codes column can be left blank. If you wish to display any additional information to the distributor only, enter it in the Additional Information column.
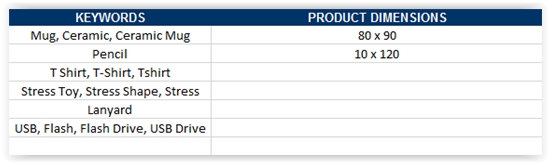
STEP 12 - enter any keywords for the product that may help during search queries inb the Keywords column. Seperate these with a comma. you may want to include variations of terms and common spelling mistakes for better results. Enter the dimensions of the product in mm in the Product Dimensions column. This can be written in plain text.
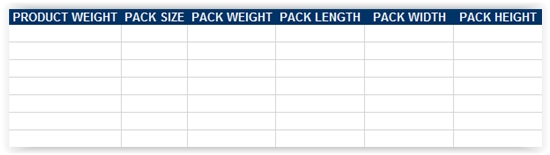
STEP 13 - These six columns are all optional. But, completion will assign a higher score rating to your products, and therefore will appear higher in any search results.
- Product Weight - Enter the product weight in kg.
- Pack Size - The size of a carton pack.
- Pack Weight - The weight of the pack in kg.
- Pack Length - The length of the pack in mm.
- Pack Width - the width of the pack in mm.
- Pack Height - the height of the pack in mm.
STEP 14 - Enter the lead time in maximum number of working days in the Lead Time column. Finally, enter the Country of Origin for the product in this column.

