How to Edit an Enquiry Form
On Customer Focus Web Stores, customers can show their interest in a product in the form of enquiries. These have their own section of the system, and can be modified to suit the kind of information you wish to gather from your customers.
This help sheet will walk you through how to alter the options on these enquiry forms, the options available to you, and how this appears in a finished form
STEP 1
To edit your enquiry form, you must first head to the management portal of your site. You can do this by going to your site URL, and adding /manage on the end of it.
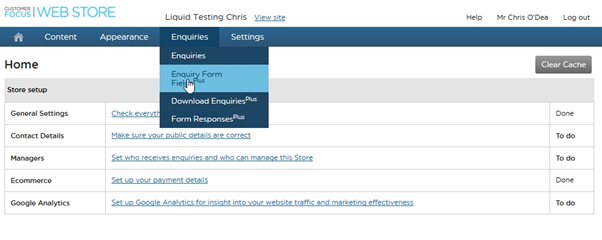
STEP 2
Once in the manage section of your site, hover over the Enquiries button at the top of the screen to generate a drop-down list. Select the ‘Enquiry Form Fields’ option.
STEP 3
This will bring up the Enquiry Form editor. On your first visit to this section of the site, the grid will be entirely blank. Click ‘Add new field’ to start building your enquiry form.

STEP 4
The ‘add field’ window is displayed. First you will see a number of radio buttons down the left-hand side of the screen.

These are all the different possible types of input/question. What follows is a rundown of each option type and its functions. After making each selection and defining its options, click the ‘Save Changes’ button to add the field to the form.
Text –

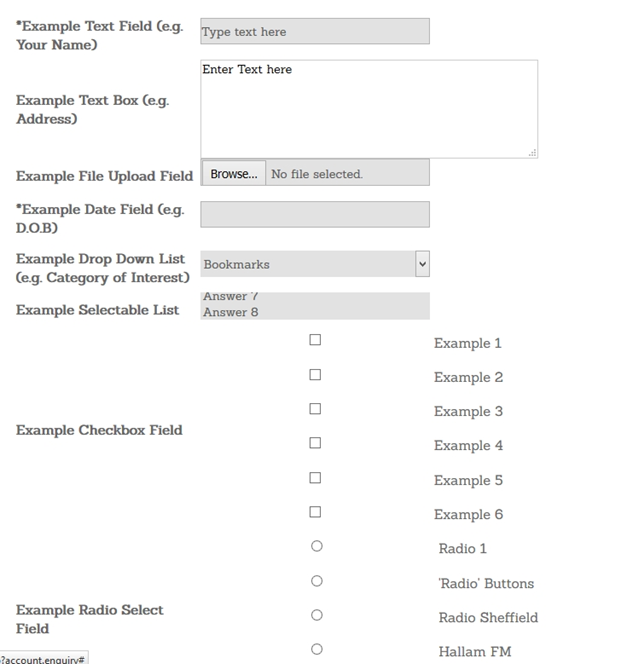
‘Text’ is the simply type of response, and provides a single text line for customers to type into freely. You may use this if you want customers to enter their name.
Text Box -
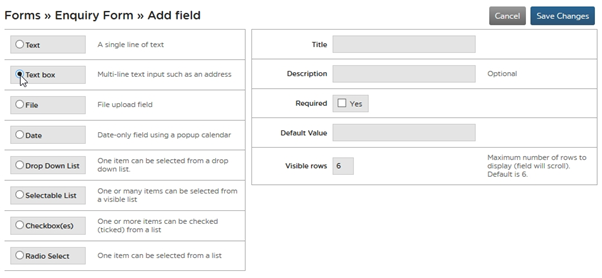
‘Text Box’ serves a similar function to ‘Text’, however provides multiple lines for the customer to type into. You may use this if you want a customer to input their address.
File –
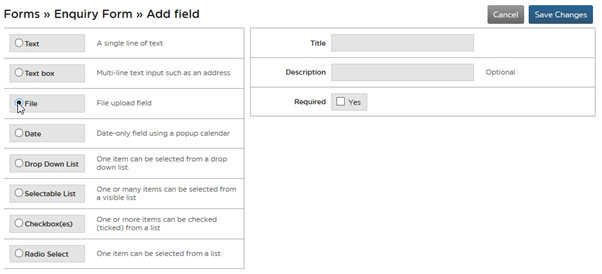
The ‘File’ response type provides a ‘browse’ button for customers to bring up windows explorer and locate a file path. You may use this if you want a customer to submit particular documented information.
Date –
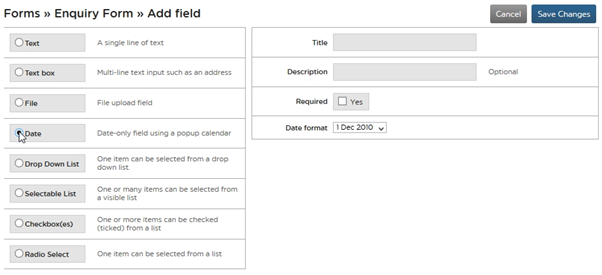
The date field, as you may expect, allows a customer to select a date from a small widget calendar. You can elect in which format this date should show once submitted

You may use this option if you want the customer to enter their date of birth
Drop-Down List

This option allows you to add a drop-down list to your enquiry. This can have as many options as you choose. Each option must be added to a new line. You may use this option if you want customers to select specific categories.
Selectable List
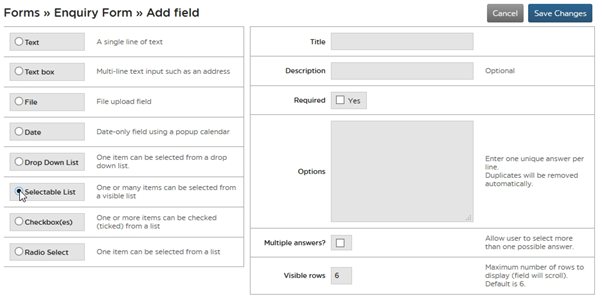
This option serves near enough the same function as a drop-down menu, however more than option can be selected
Checkbox(es)
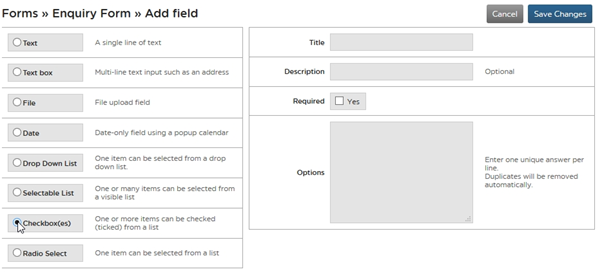
As the name suggests, this option allows you to create a list of options with checkboxes next to them. You can enter as many responses as you like, although bear in mind all of these are displayed at once and can push your form down on the page
Radio Select
Radio Select serves a similar function to checkboxes, but only one can be selected at a time and the buttons are circular. The options are displayed in a list format

This covers all the available options for an enquiry form. See below for a rundown of how each option would actually display on a form
STEP 5
Once you’re happy with the questions you’ve added, simply leave the page to save your changes. This form will now be produced whenever a customer makes an enquiry on your site. With this in mind, try to build an enquiry form that will grab all the customer information you will need to make contact to progress the enquiry (and perhaps a bit of market research too!)
