How to Set a Follow Up in Spectrum
In Spectrum, it is possible to set follow up tasks that are due to be completed on a certain date. Once set, these tasks appear on your dashboard as well as the calendar so you always have an idea of the work coming up in your week.
This help sheet will talk you through how to set one of these up and what do to with them after creation.
STEP 1
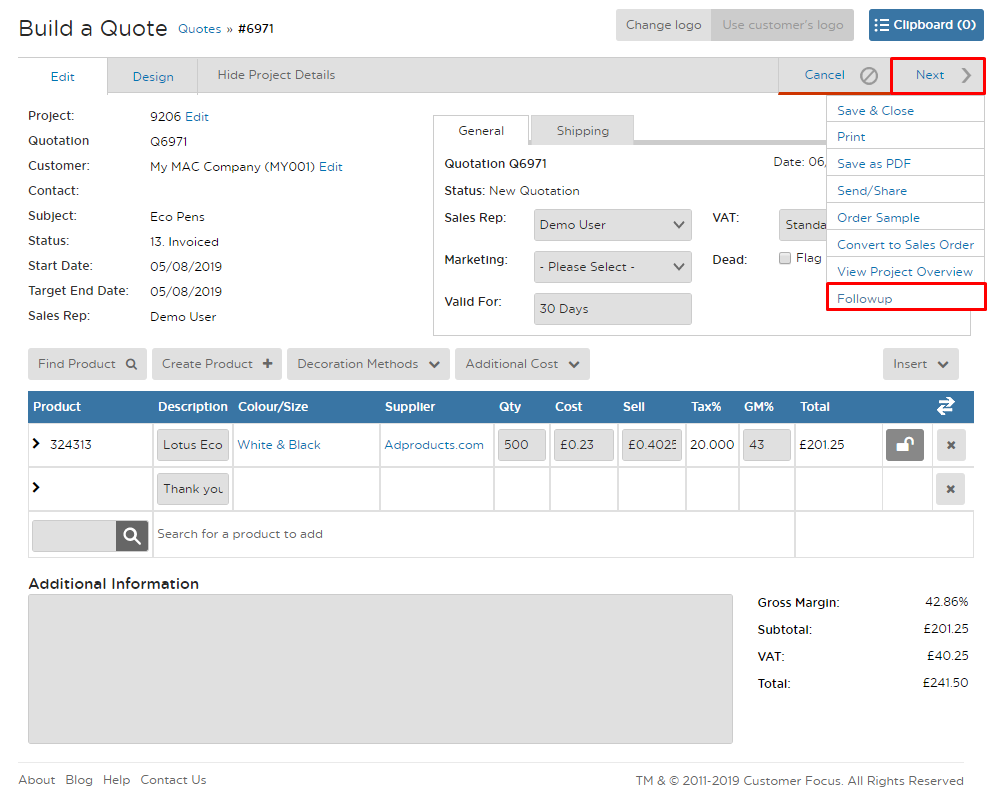
From the dashboard, locate a document you wish to create a follow up for, and open it (in this example we have used a quote, however the same can be done for presentations as well as orders and invoices)
Once the document builder has been opened, hover over ‘Next’ to produce a drop-down of options, and select ‘Followup’.
STEP 2
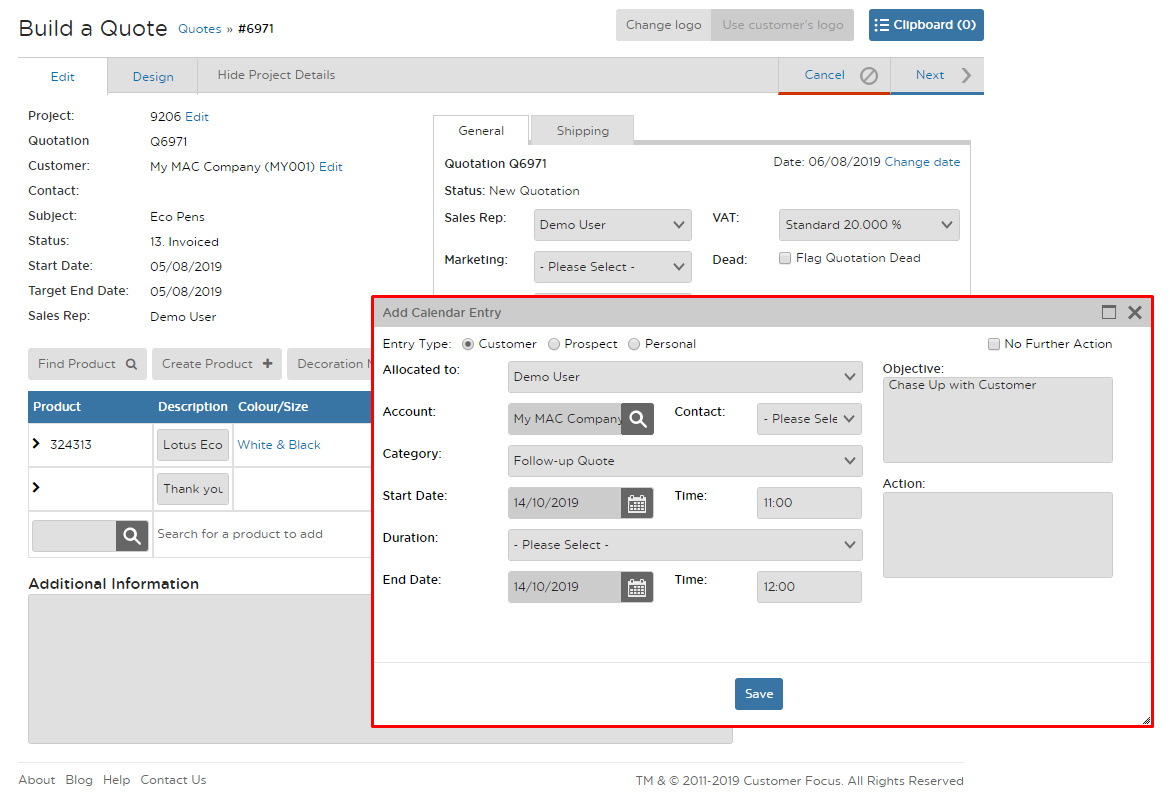
Clicking the ‘Followup’ button produces a ‘Add Calendar Entry’ window. From here you can specify the objective of the call and any actions to take. There Are 3 types of entries:
Customer/Prospect: These are near enough identical, apart from they check the relevant database for Accounts and Contacts.
Personal: This entry doesn’t need an account or contact entry, as these are for your own reference and not relevant to a business.
Once you’re happy with the entry, click save to store this in the system.
STEP 3
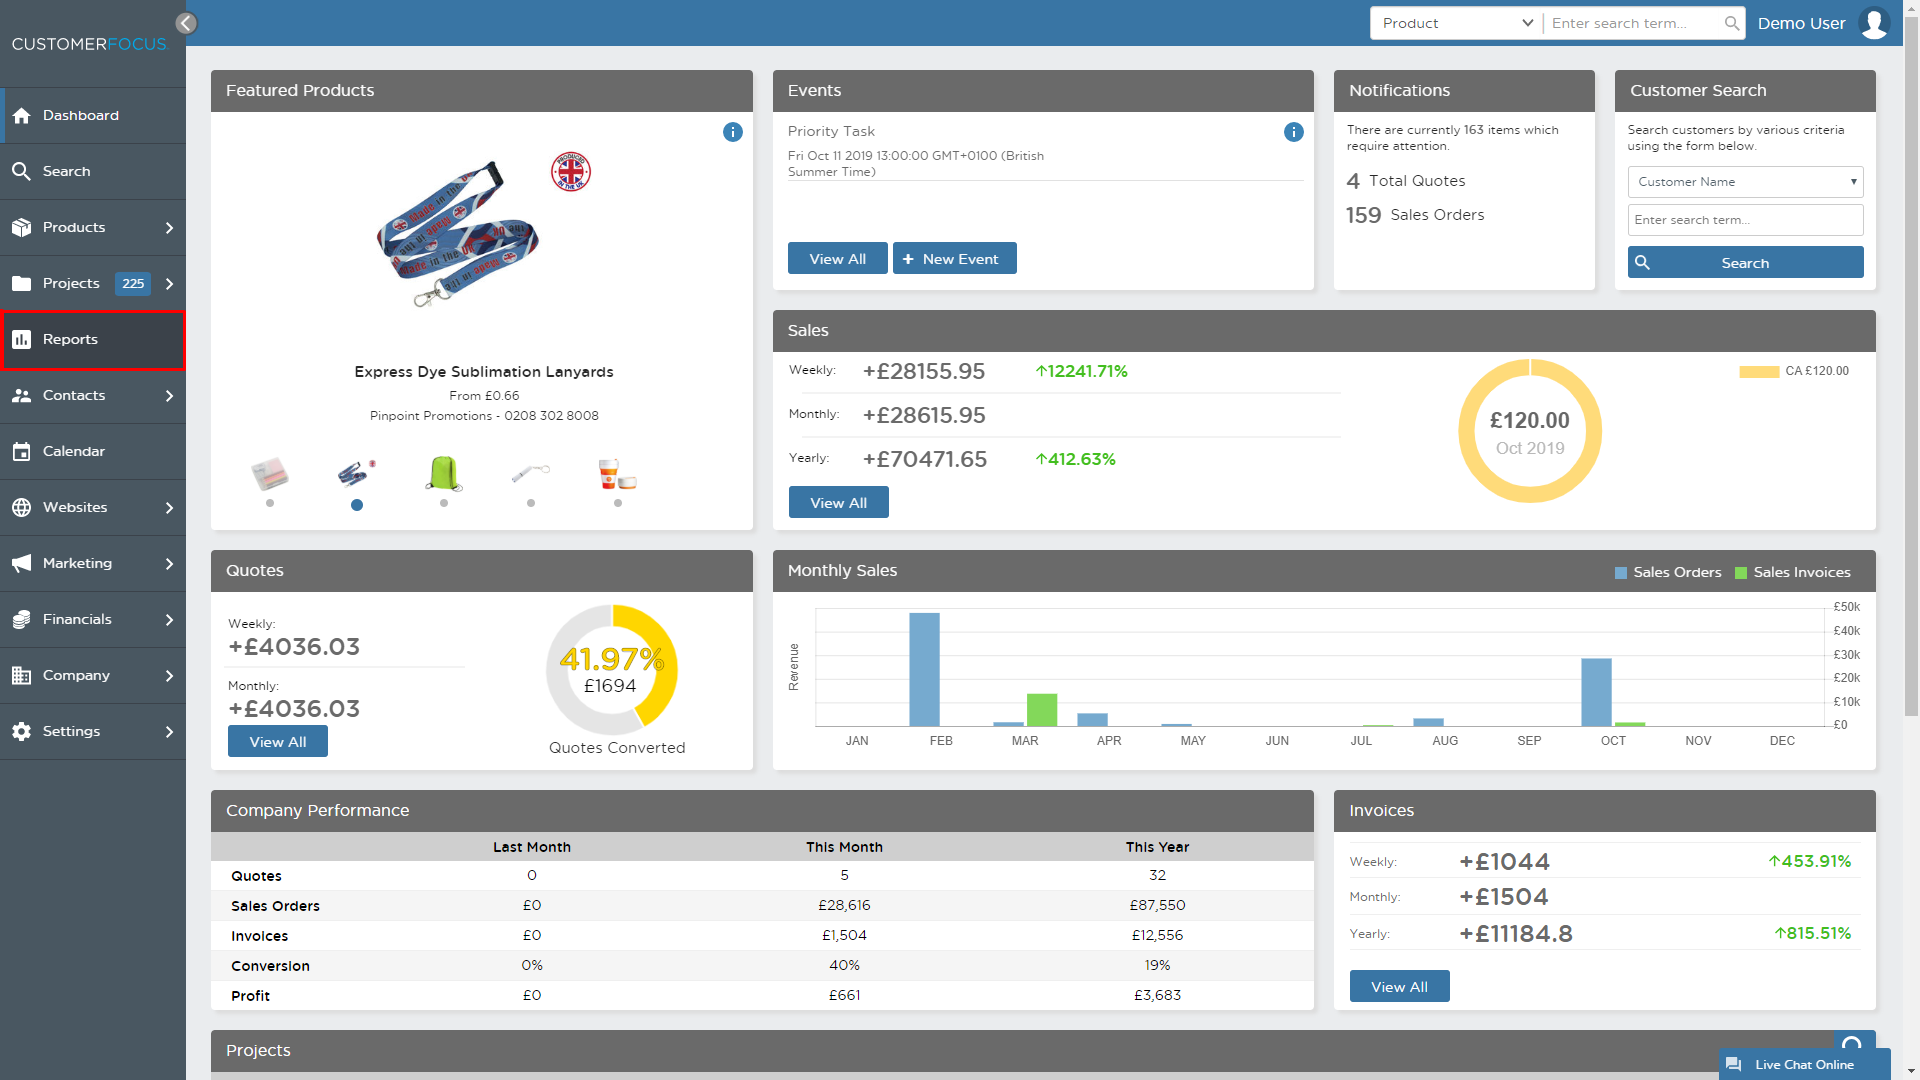
Once stored, the follow-up appears in two places:
My Calendar

Events Widget - Dashboard

You can mark tasks as completed directly from the tasks list by clicking the grey box just above the entry. You can also click ‘View All’ to be taken to your calendar.
STEP 4
If you wish, you can generate a report of all the upcoming follow up tasks relevant to a certain area of the system. You can do this by going to ‘Reports’ on the top navigation bar.
On the ‘Build a Report’ screen, first select the area of the system you want the follow up tasks for. Then on Report Details, select ‘(x) due for Followup’.
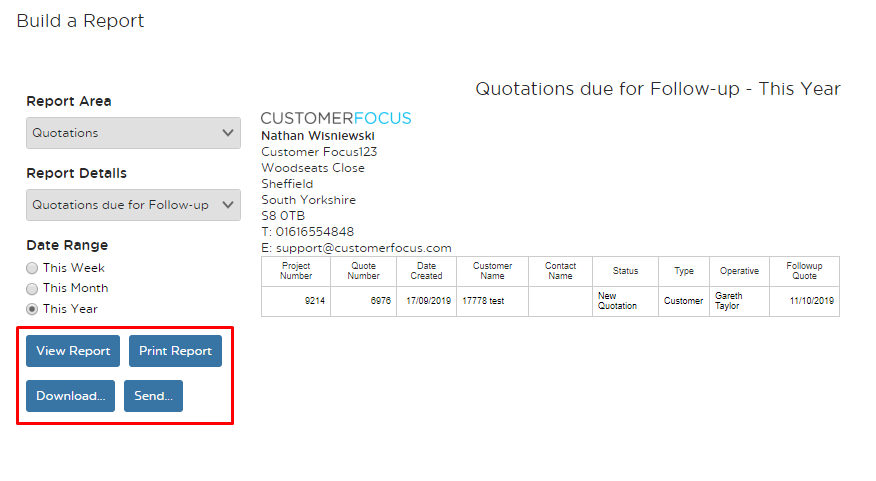
Once the report has been created, you can either view, print, download or send the report off.
