Installing TechnoLogo Instant
TechnoLogo Instant comes as a browser plugin which, once loaded, allows you to call any image from the internet to place your company branding onto. All you need is a suitable browser and your access key, to associate the plugin with your account. The setup process can be slightly different for each browser, so this help sheet aims to run through each in turn to ensure you get the software configured correctly.
 Chrome
STEP 1
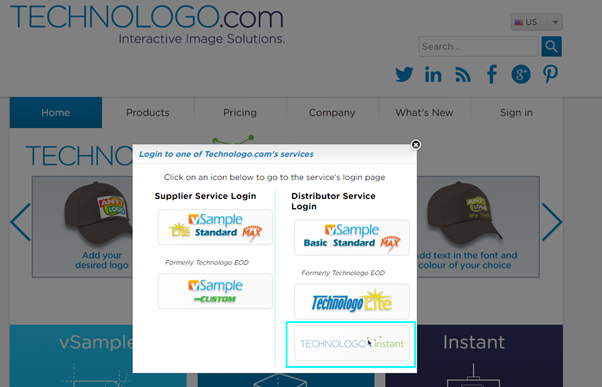
First head to marketing.technologo.com and clik the ‘sign in’ link in the navigation bar. A pop out window will appear in the middle of the screen. From here, select ‘TechnoLogo Instant’
STEP 2
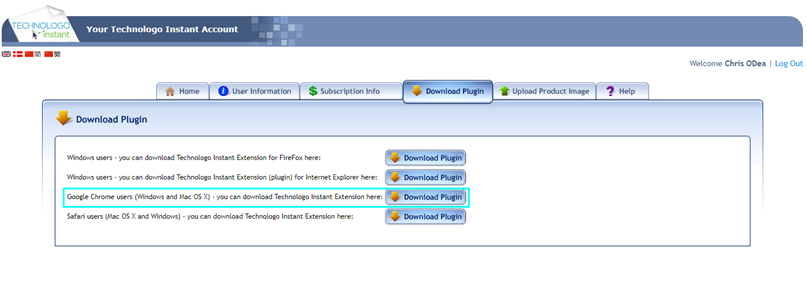
Once logged in, head to the ‘Download Plugin’ tab. Here you will be presented with different options for different browsers. For Chrome, use the 3rd option down, as shown below:
STEP 3
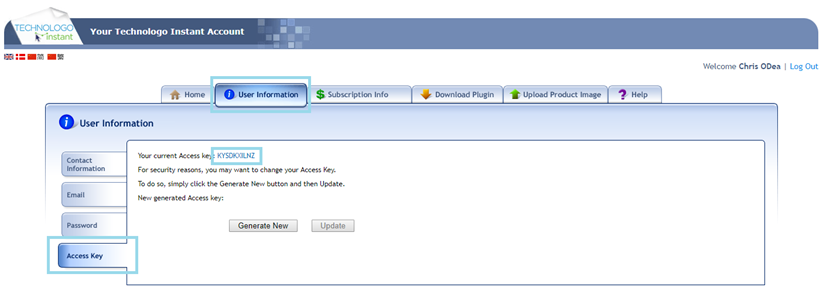
While the plugin is downloading, head to the ‘User Information’ tab on the top bar, then select ‘Access Key’ from the options on the left. On this screen you will see a 10 digit code in blue. This will need entering into the plugin later, so make a note or copy this in your browser.
STEP 4
Once the plugin is downloaded and installed, restart your browser. When it reopens, click the options button in the top right, then navigate to More Tools > Extensions
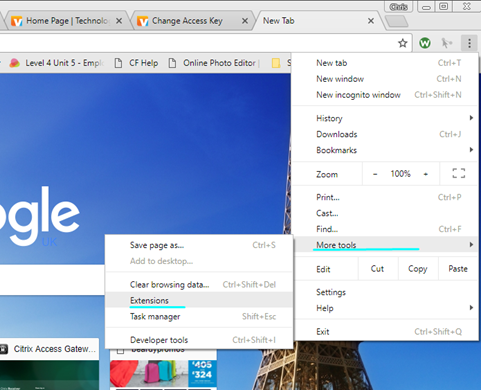
STEP 5
On the extensions list, scroll down to Technologo Instant. This will most likely be at the bottom of the list. When you find it, click ‘options’

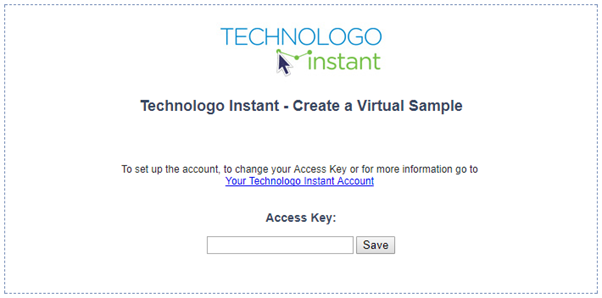
STEP 6
You will be greeted by a separate window, prompting you to enter the access key we copied from the account earlier. Paste this in and click save.
STEP 7
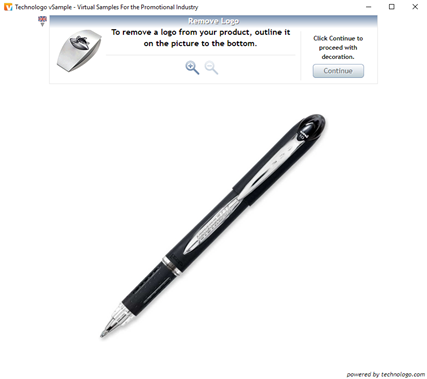
To ensure the system is working correctly, reload your browser and right click on a non copyright-protected image. You should see an option at the bottom of the list saying ‘Technologo Instant’. Click this, and a popup box should appear with the image inside, similar to the below: