Marking an Invoice as Fully Paid in Spectrum
To ensure that all processes are completed as part of an order, certain options are omitted within Spectrum until a specific stage of the project is reached. One example of this is the option to mark an invoice as paid. This option is not available within Spectrum until the invoice is marked as being sent to the customer. The following guide will show you how to meet the relevant criteria to make the ‘mark as paid’ option available for an order.
STEP 1
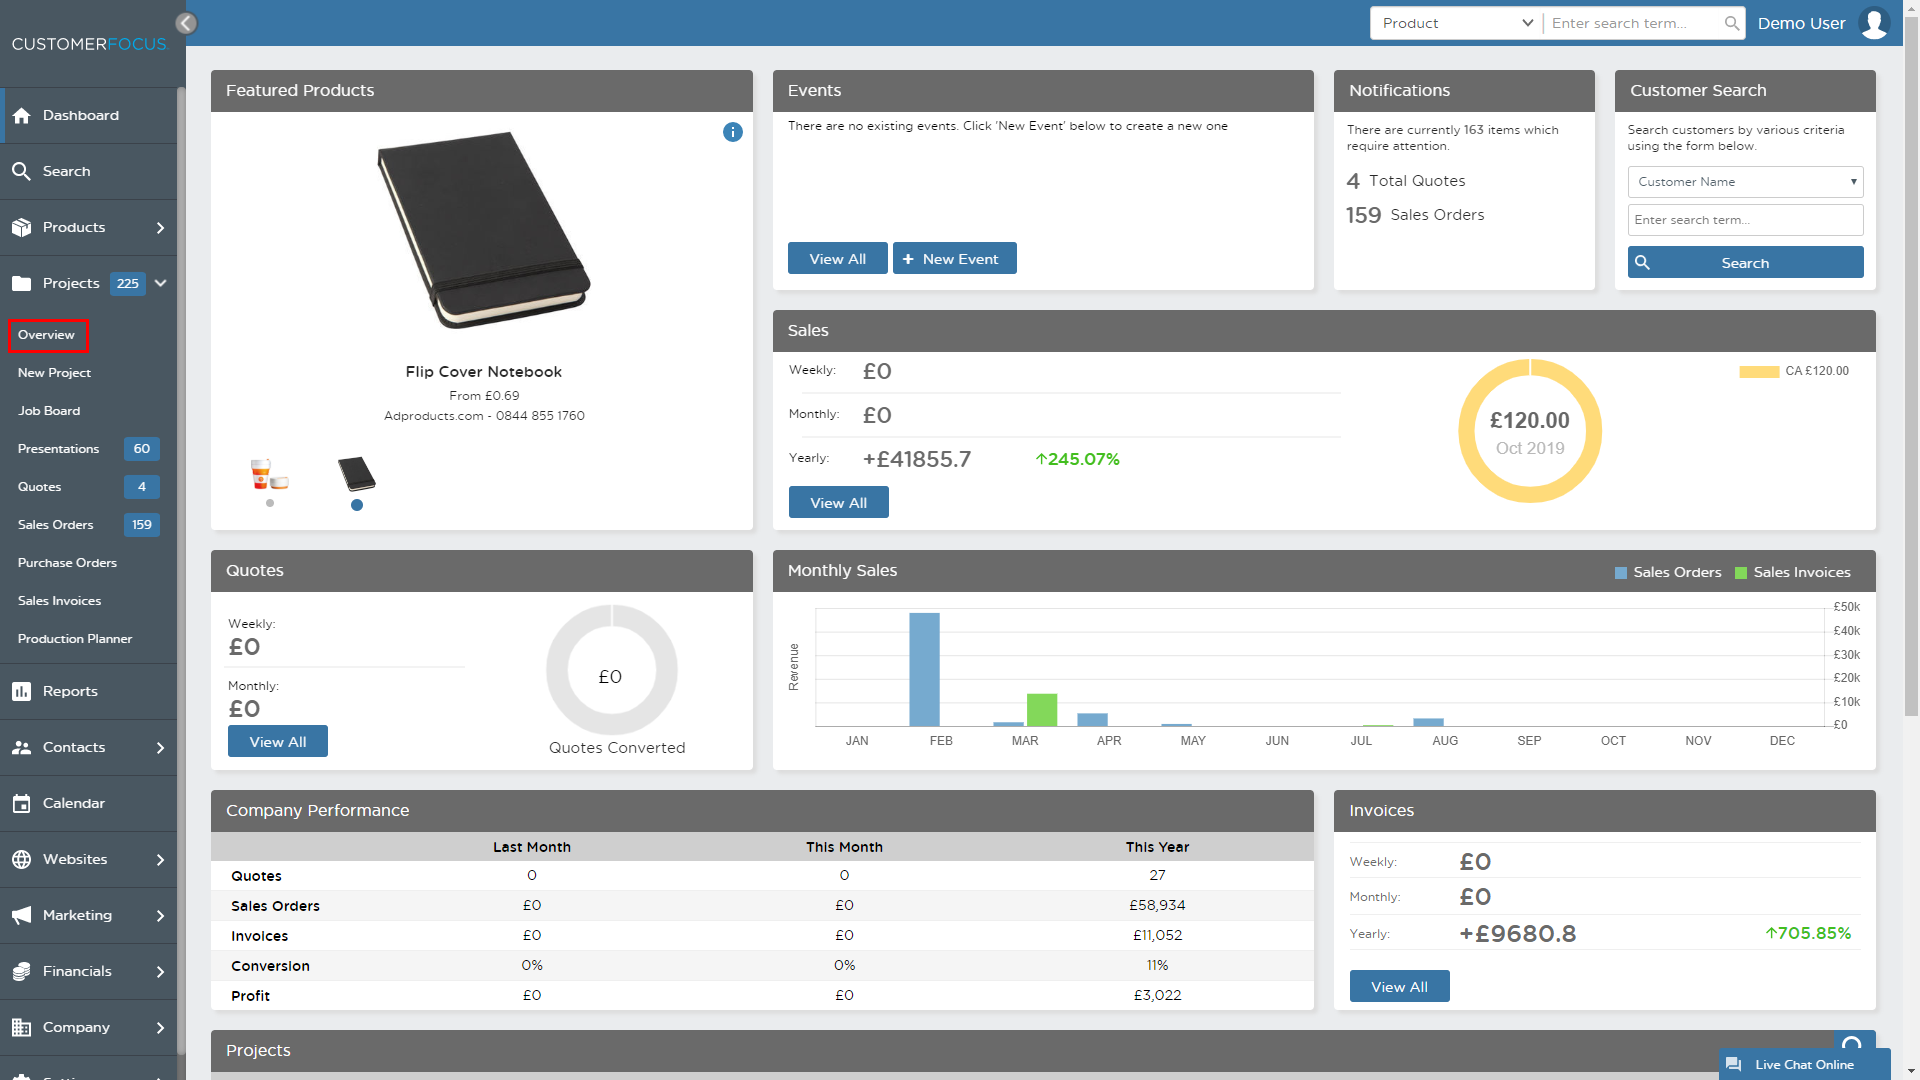
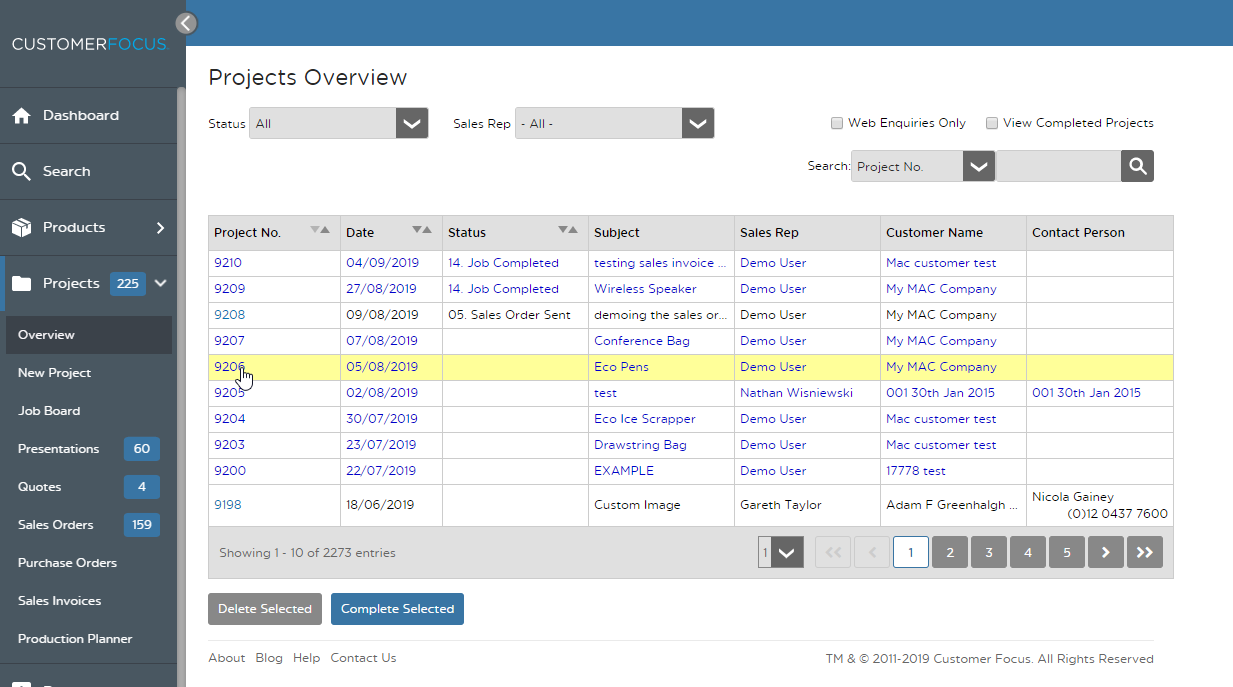
First, navigate to the project you wish to edit. To do this go to Projects -> Overview on the left side menu.
Once there, click the project number of the project in question to be taken to the overview screen for that project.
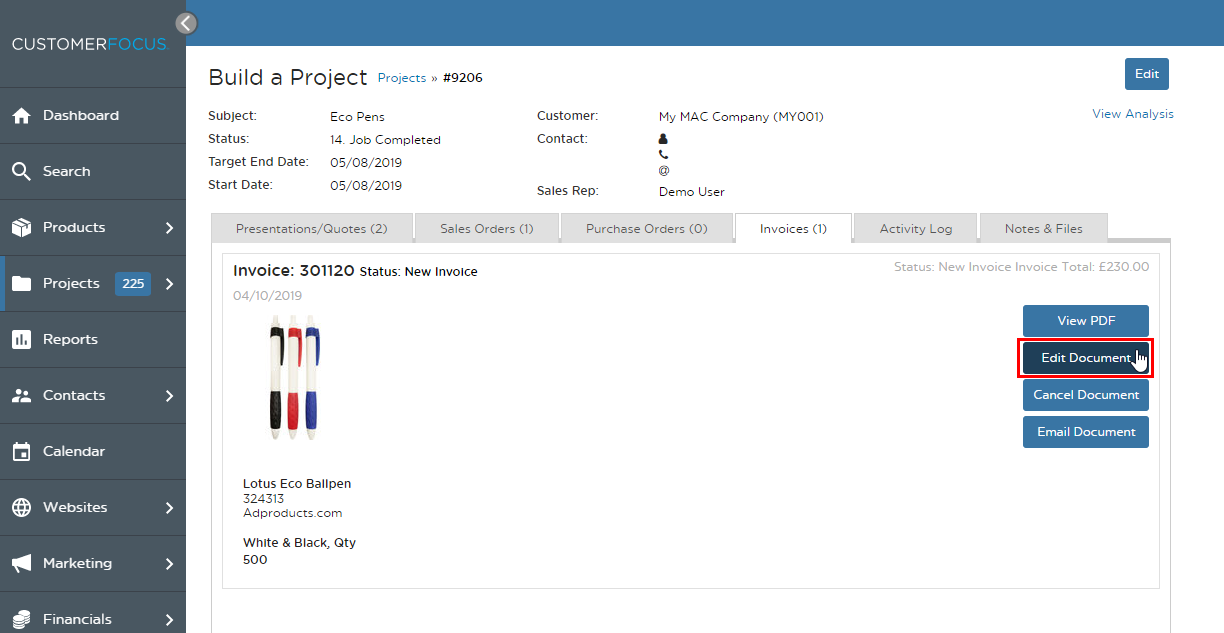
From within the project overview screen, click the invoice tab
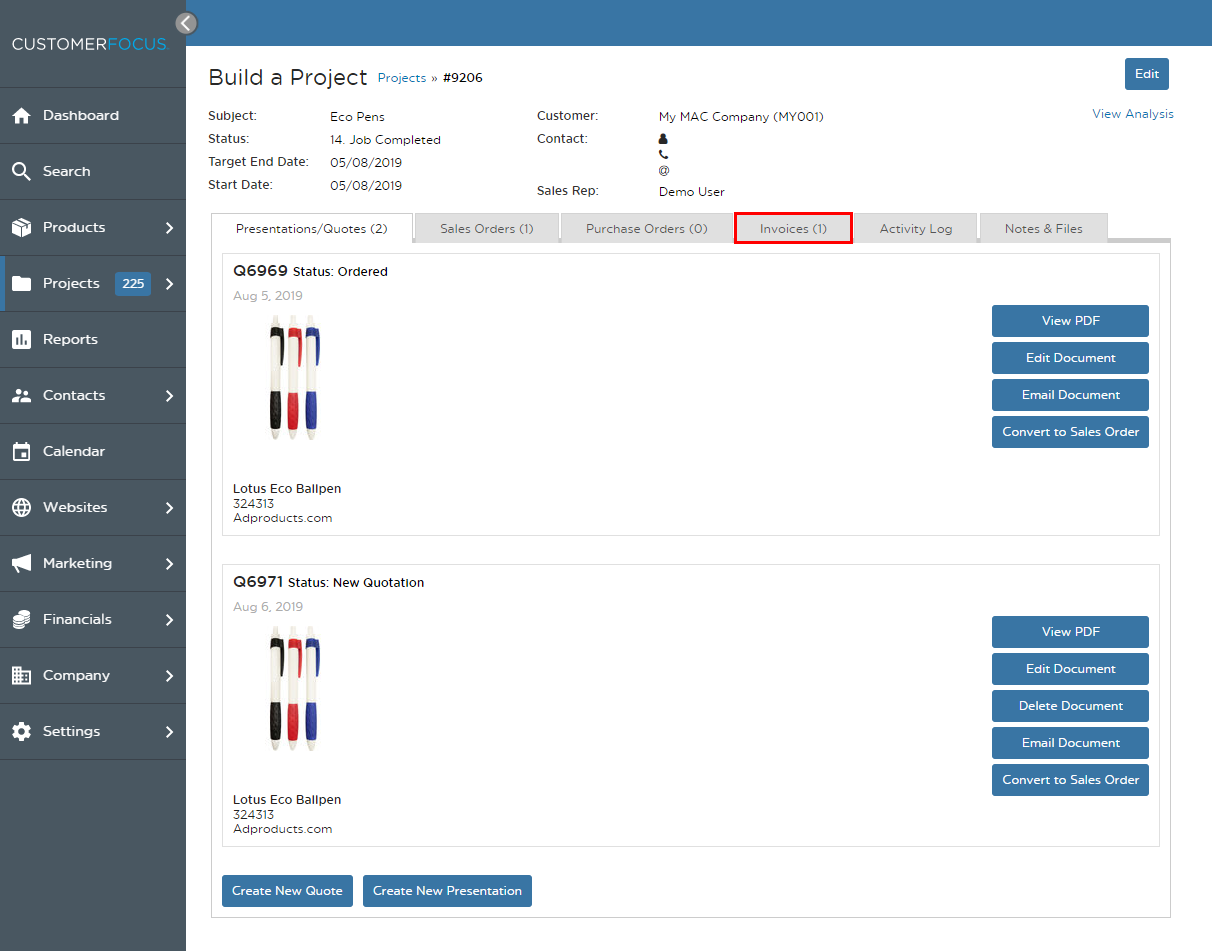
STEP 2
This screen is generally where the ‘Mark as Paid’ option will appear. However, this button only appears once an invoice has a status of ‘Printed’. This is to ensure that you don’t accidentally mark an invoice as paid that has yet to be issued to the customer.
To rectify this, first click on ‘edit document’ to be taken to the invoice builder page.
STEP 3
IMPORTANT NOTE: Before proceeding, ensure that the details of the invoice are correct. Once an invoice has the status ‘printed’ it cannot be edited as the system assumes that the state of the document when that status was applied is the state as the customer will receive it.
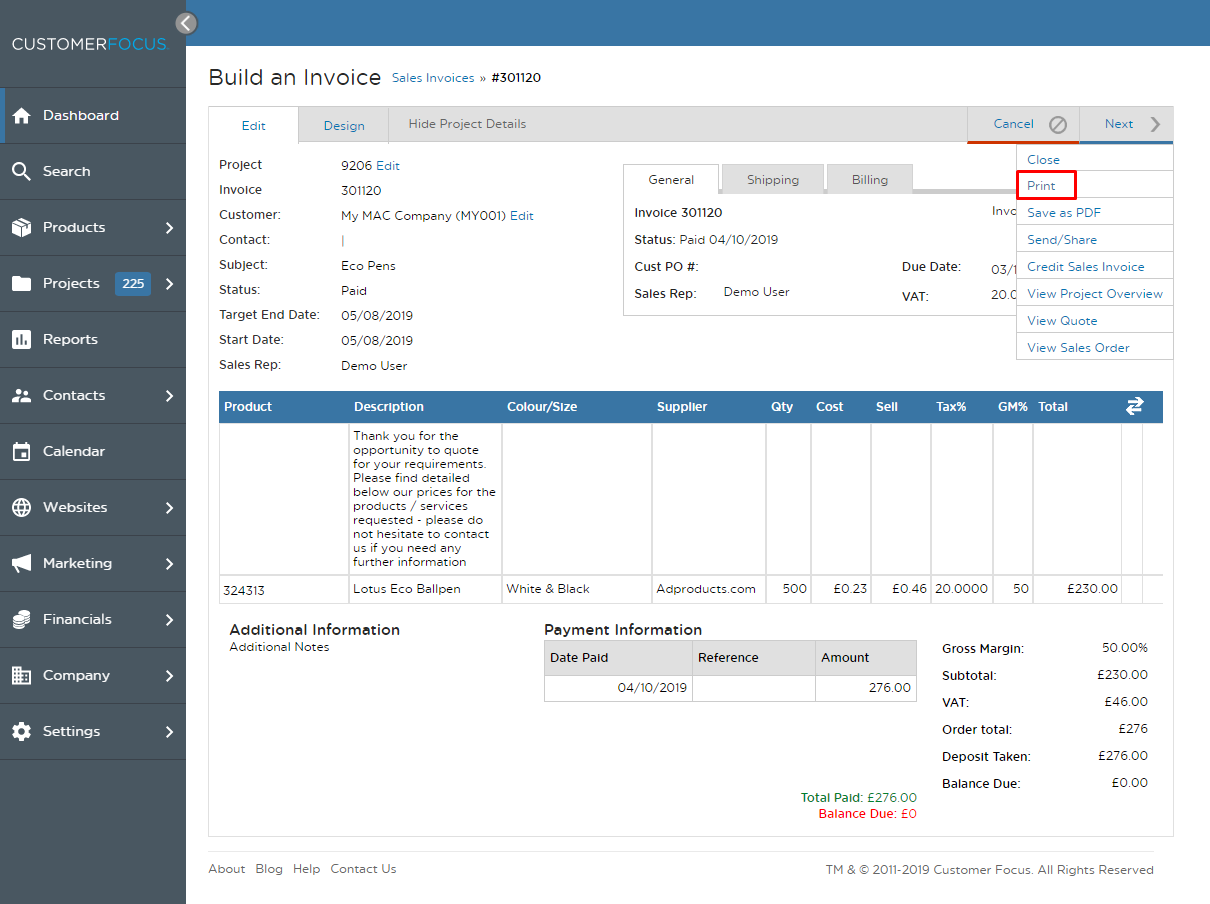
When you are ready to proceed, hover over the ‘Next’ button to be presented with a list of options. Click on the ‘Print’ option, and you will receive a popup warning you about changes. Confirm this, and a print preview will appear along with the print console. Proceed as you would a normal print job.
STEP 4
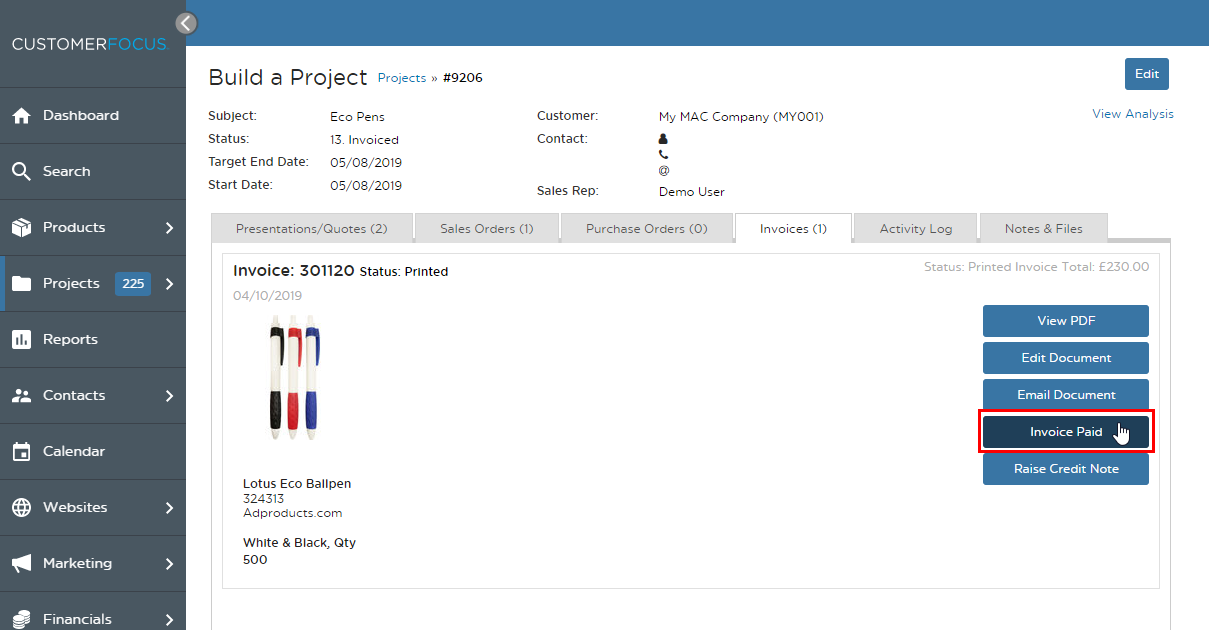
Once the document has been printed, navigate back to the Invoices tab of the Project Overview screen. You should see that the ‘Invoice Paid’ button has become available on the right-hand panel, and that the invoice is showing a status of ‘Printed’ on the left-hand side. Click the Invoice Paid button. Another confirmation box will appear. Read and confirm this.
STEP 5
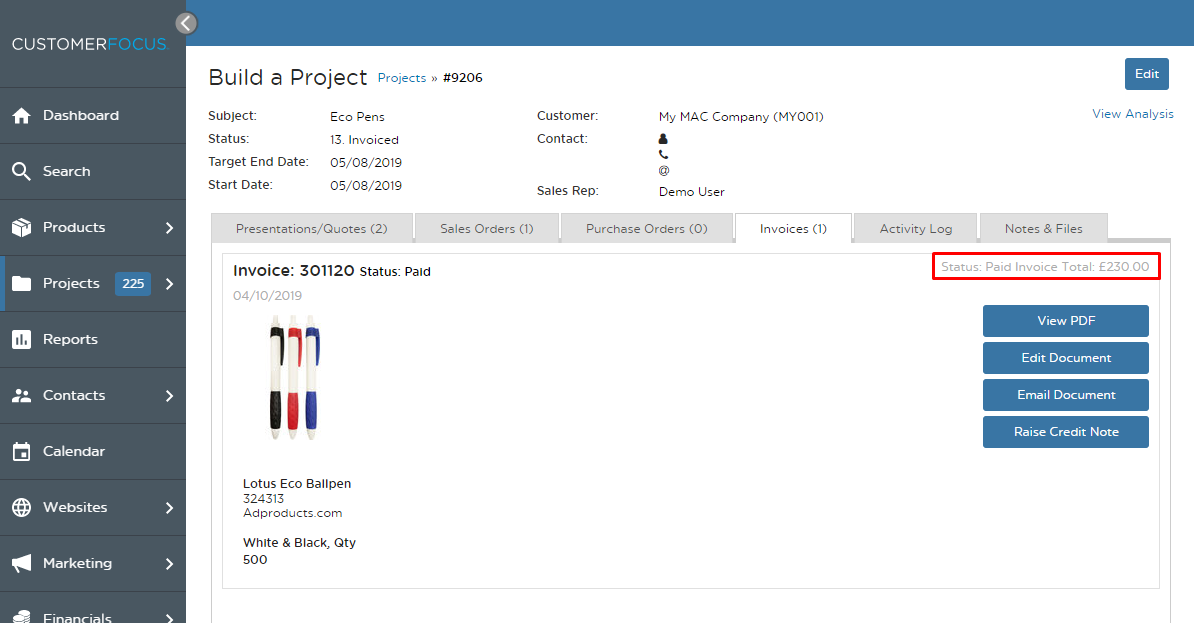
The invoice should now be flagged as paid in the system. As a way of confirmation, check the grey text above the right-hand option panel. This should state ‘Paid Invoice Total £####’ with ‘####’ being the total value of the invoice.