Auto Create Job Folders from Job Management Center
You can set PromoServe to save all files and documents for a Job Bag within your customer's own specific folder. This creates a sub-folder that is named with the Job Bag Reference number and Subjext/Title of the Job.
STEP 1
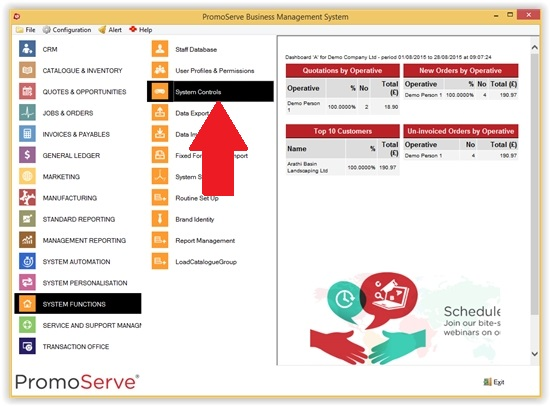
First, you need to assign a default document path for the intended customer. You can do this by navigating to the System Functions > System Controls area of the main menu.
STEP 2
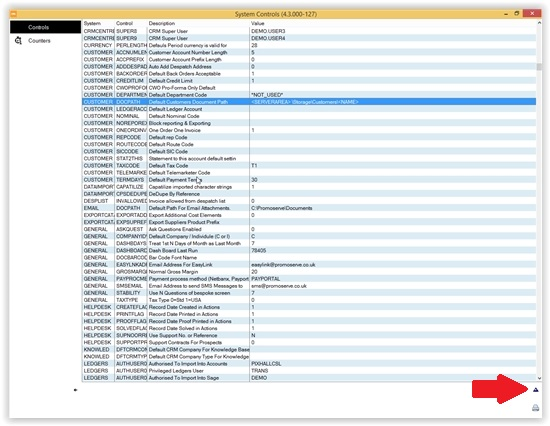
On the System Controls screen, scroll until you find the system (far-left column) named ‘CUSTOMER’ then find the control (second-from-left column) named DOCPATH. Once located, select this entry and click the blue triangle in the bottom-right of the screen.
STEP 3
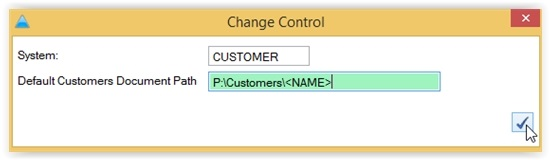
Where P: is the mapped drive to your server, create the file path as per the image below. Click the checkmark when finished.
STEP 4
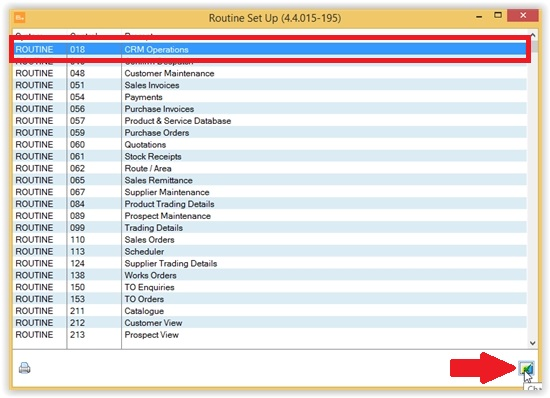
Before this file path can be used, you need to activate this function. To do this, navigate to System functions > Routine Setup. Once there, locate the ‘CRM Operations’ option and click the green checkmark in the bottom-right.
STEP 5
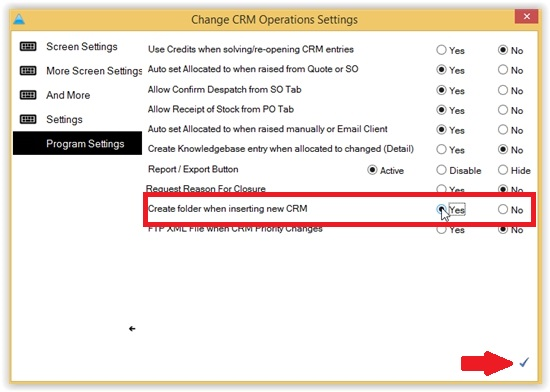
In the ‘CRM Operations’ you need to navigate to ‘Program Settings’ and locate the option for ‘Create folder when inserting new CRM’. Set this option to ‘Yes’ then click the checkmark in the bottom-right of the window.
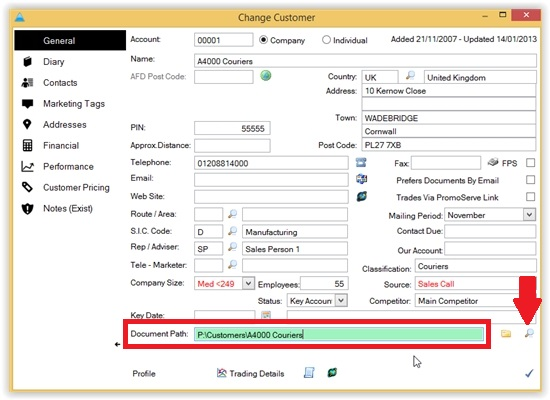
NOTE: For the function to work, the Default Document Path on the customer record must be set correctly, as shown below.