Managing a Custom Inquiry
The following will describe the best process for managing your custom inquiries
|
STEP 1 Click the 'Insert' Button to add a new quotation Choose Quotation or Inquiry
|
|
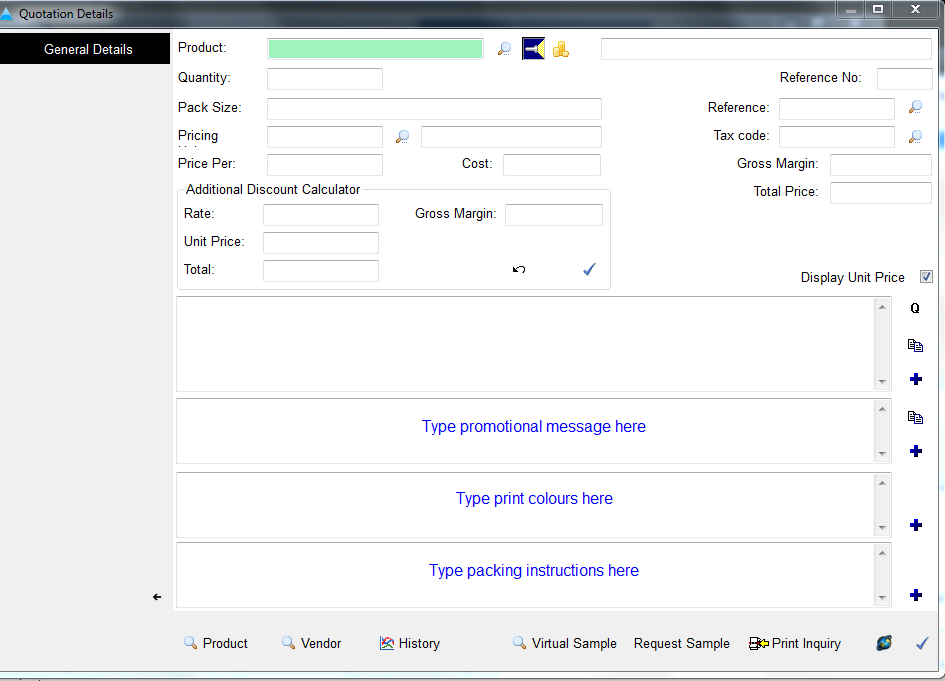
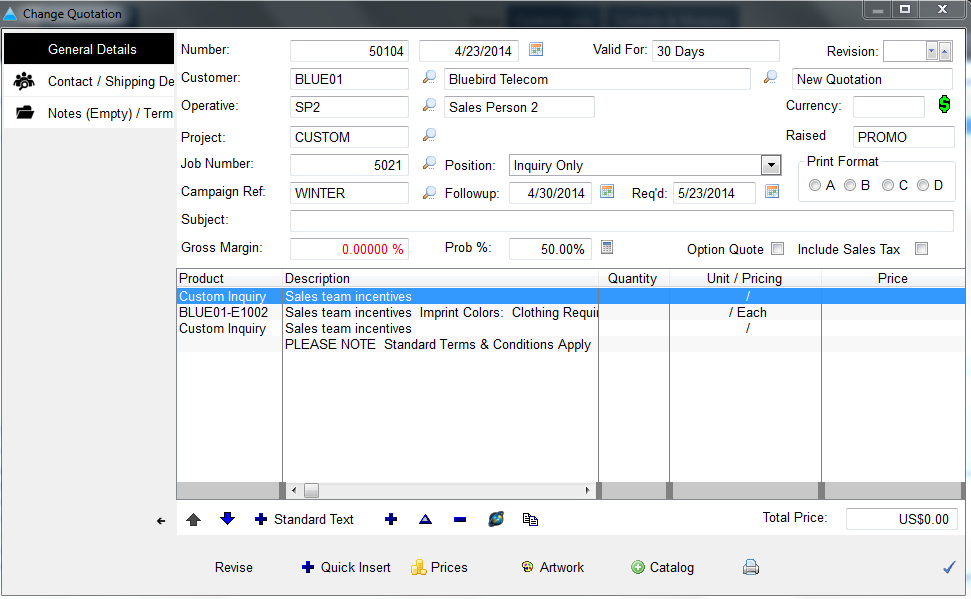
STEP 2 Add a Product Line Click, 'Print Inquiry' in the bottom right hand corner.
|
|
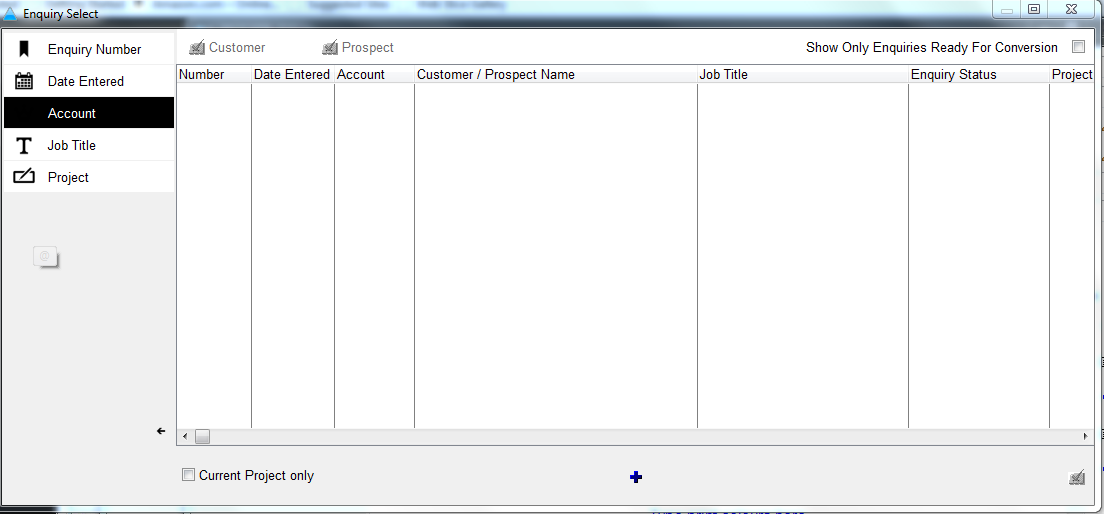
STEP 3 Select Previous Inquiry or Add New Inquiries can be filtered by previous or current. Search by date entered, job description, or project. Search by date entered, job description, project. To add a new custom inquiry, click '+' at the bottom of the screen.
|
|
STEP 4 Add Outline Product Category Add a category for the inquiry which provides a list of prompts/questions to help vendors quote for requirements Click the checkmark to proceed.
|
|
STEP 5 Add Job Description/Title Enter the necessary data, including Project ID, Quantities Required, and required by dates/times for prices.
|
|
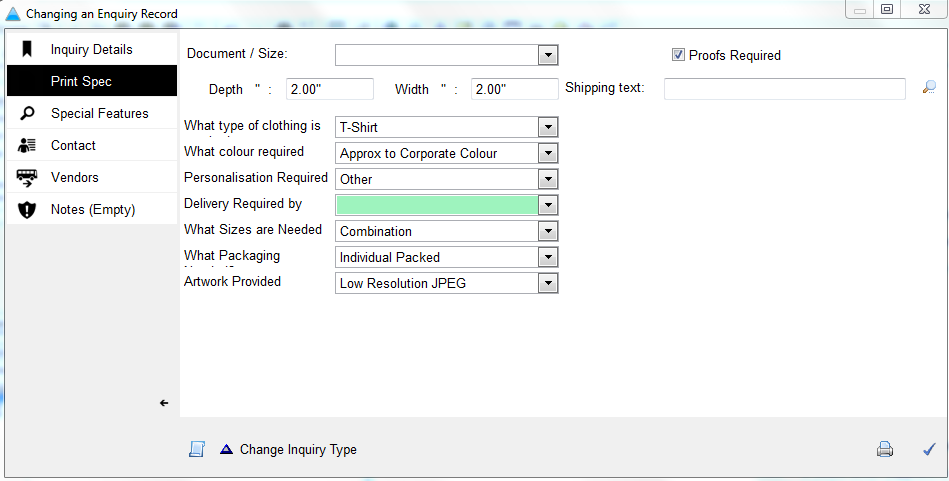
STEP 6 Add Detailed Specification The 'Print Areas' tab includes dropdowns with selections to be made. The 'Special Features' tab allows entry for further information needed about the product Requirements can go under one or both tabs
|
|
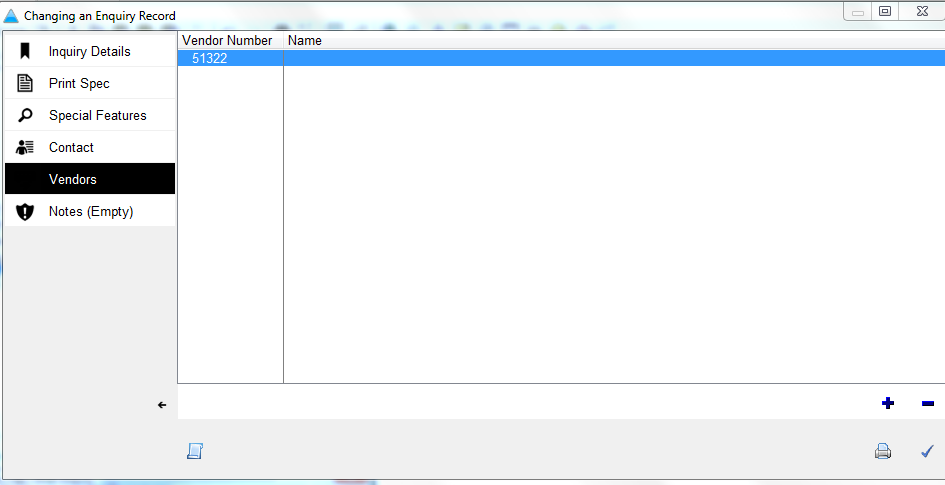
STEP 7 Choose Vendors to Send Inquiries to Click '+' to select which suppliers to send the inquiry to. The system suggests default suppliers for the product category or a manual entry can be made. Click 'Print' to send inquiries to suppliers
|
|
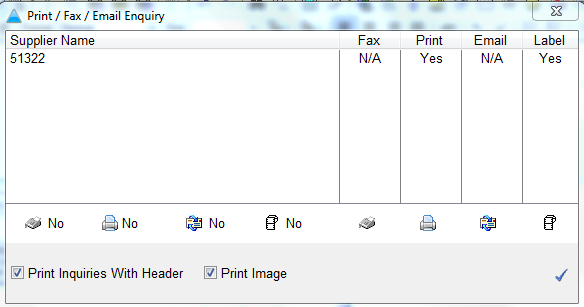
STEP 8 Send Inquiries to Suppliers Send inquiries to suppliers by E-mail, Fax, or Print.
|
|
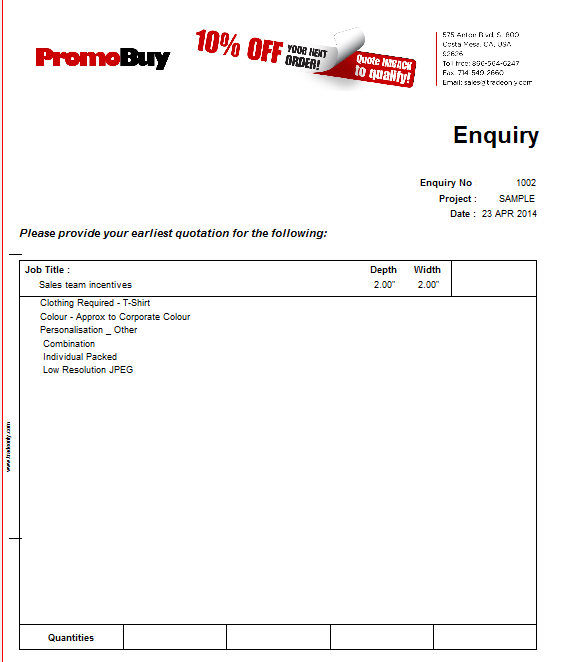
STEP 9 Inquiry Produced The inquiry sent to the vendor includes: Full specification of product required, Quantity required and box to insert price (spreadsheet if enquiry sent via email), Timescale for prices required, Inquiry number (linked to original quote), Inquiry individually addressed.
|
|
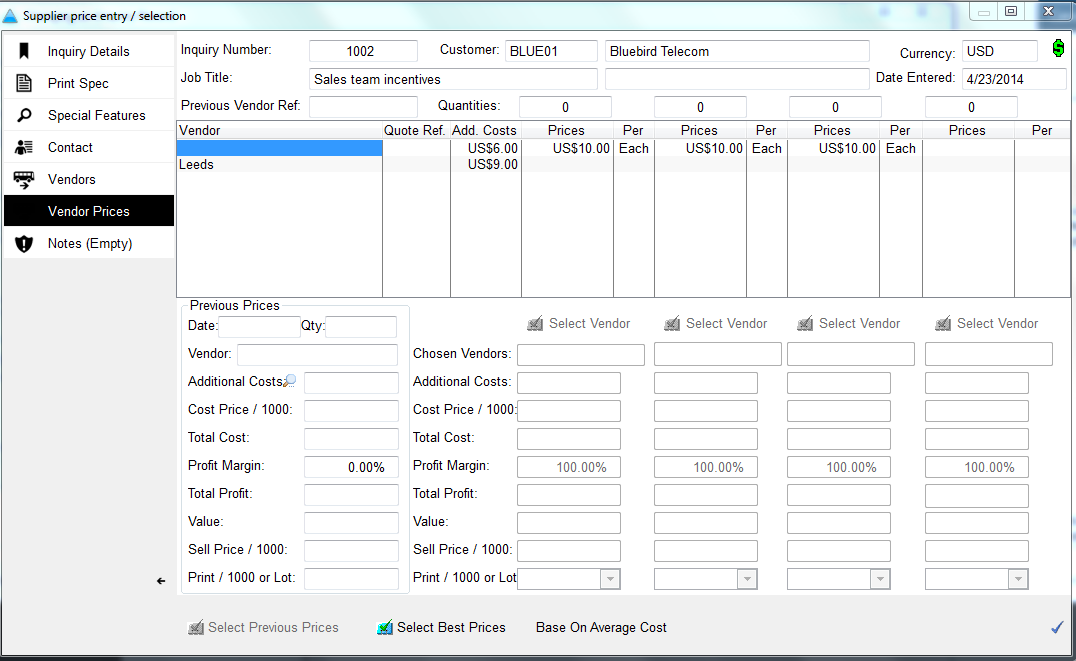
STEP 10 Vendor Prices Input Supplier prices can be entered manually or imported from a spreadsheet. Once prices are entered, select chosen margin and supplier, or the software will select the supplier offering the best prices. Review and change prices by margin, sell price, or profit made.
|
|
STEP 11 Import prices into the Quotation Details are imported into the quotation. Add additional costs, enhance the product description, add extra text, and upload a picture/virtual sample.Click the checkmark for the system to auto create a unique product code based on a combination of customer code and inquiry number.
|
|
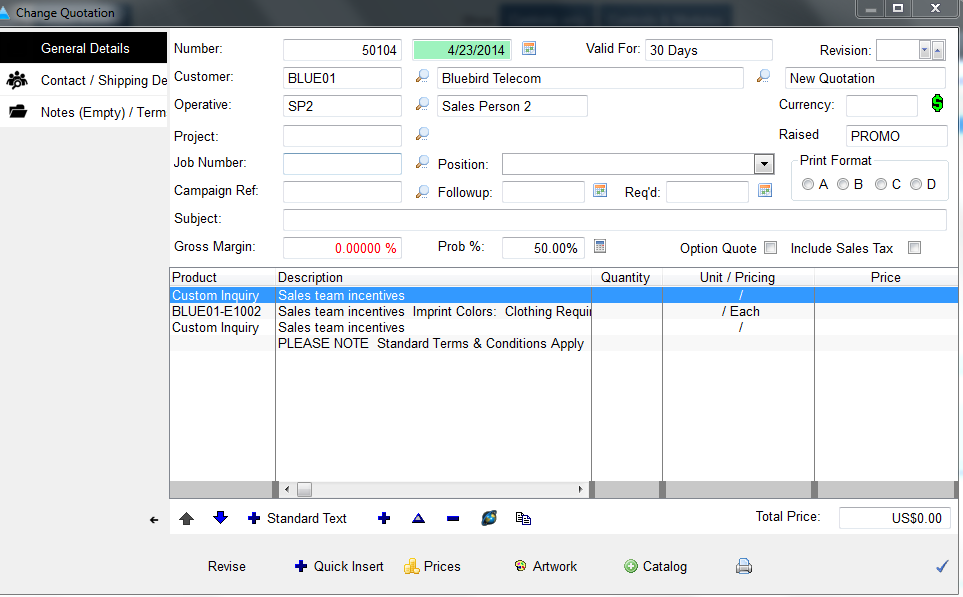
STEP 12 Quotation Created The newly created product is auto added to the quotation. Add customer contact name, delivery address, sales data (status, probability, and campaign reference), journal followup, and different currency.
|
|
STEP 13 Print Quotation The quotation can be Printed, Faxed, or E-Mailed. There are various print formats: with or without company header, picture quotations, total prce/itemized, roll additional costs into the price (i.e. print costs), samples quotations, order forms, or labels/envelopes.
|
|
STEP 14 Produce your Quotation There are more than 20 standard options, or a custom quote format can be created. Quote formats can be customized in system functions and can include: product description (long and short), product image, available colors, print area details, price inclusion details, lead time, signatures, and trading terms and conditions.
|