Creating Company Stores
As well as creating websites for yourself, Customer Focus gives you the option to spin additional sites specifically for your customers, with their own branding and product configurations to suit their business. The following help sheet runs through how to create one of these’ company stores’
Please Note – To create a company store, you must have a minimum of one credit available. If you do not have a credit available, you can either remove an old website to free up a credit instantly or put a request in for an additional credit by following the steps here.
STEP 1 - To begin, you’ll need to log into your account at https://uk.customerfocus.com/vision

STEP 2 - Once logged in, click on the ‘Websites’ option on the left side menu, then select "New Website"

Note – If you don’t see the New Website option, you lack the required credits. Refer to the link at the top of this document to raise a request
STEP 3 - When the website creation wizard appear, you’ll see two radio buttons in the top-left denoting who the store is for. Select ‘ A Customer or Prospect’ to generate a customer list. Select the customer from this and their contact details will pull into the website creator.
.png)
STEP 4 - If you have already assigned a logo against the customer record, this will pull into ‘company logo’ automatically. If you haven’t, you’ll need to add this as part of step 1 of the wizard if you wish to have your customer’s logo in the header of the website. If you’re unsure how to assign a logo, you can find a video tutorial on the process here..png)
You can assign a logo as the branding logo (appears on product images) using the same method in the ‘Branding Logo’ area.
Once you’re happy with the upload, click ‘next’ on the website creator to move to step 5.
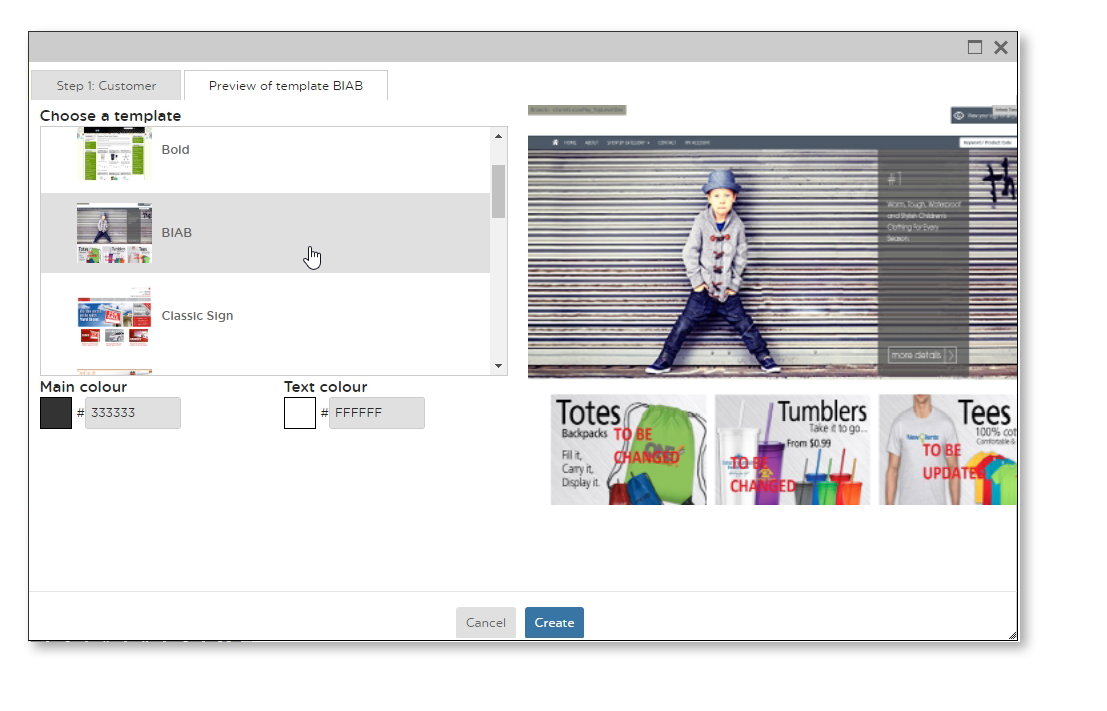
STEP 5 - The next thing you’ll need to do is pick out a theme for the customer. To note, the Liquid and Business in a Box themes are mobile responsive. Therefore it is our recommendation that you select one of these two themes, to assist with SEO. However, you are free to choose any of the available themes that you wish.
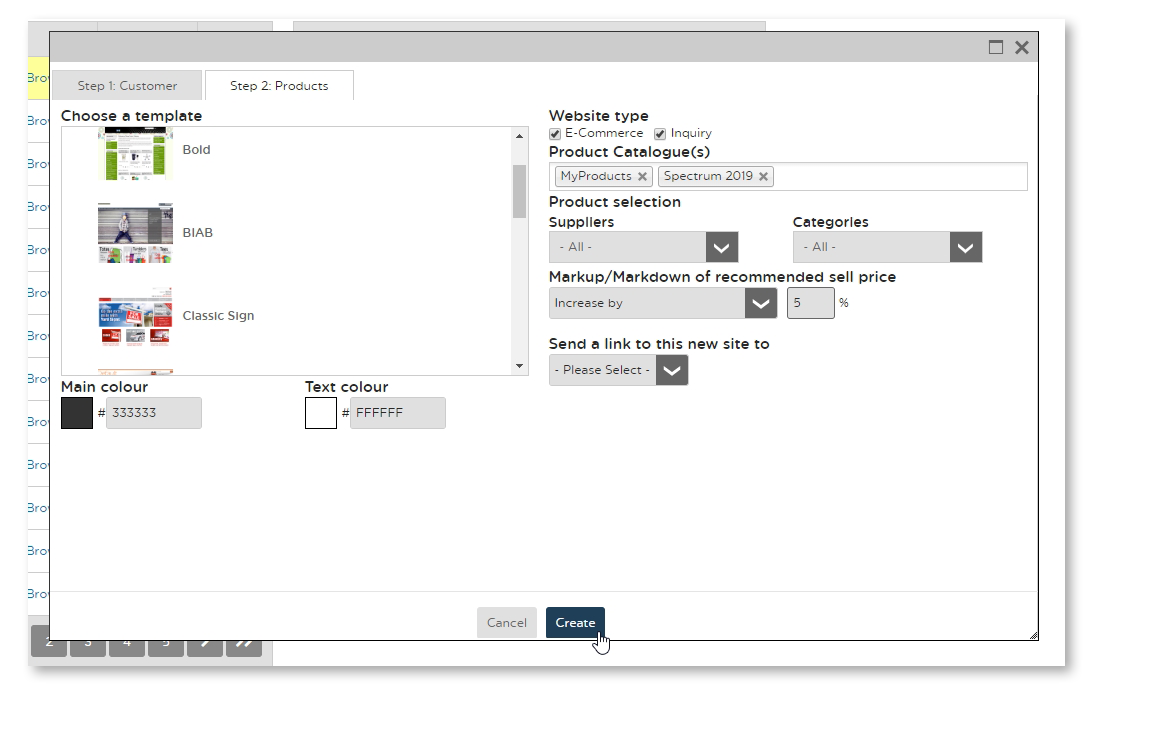
STEP 6 - Next you’ll need to select which catalogues you want to feed into the site. Don’t worry about selecting too many, you’ll only see the catalogues assigned to your company so you’ll never receive additional charges for the feeds you select.

STEP 7 - Next, pick out which suppliers you wish to use. If you want to add all the available suppliers, simply tick the ‘all’ box at the top of the drop-down list. Suppliers can then be ticked/unticked freely depending on your preferences.
.png)
Repeat the same process for categories on the next drop-down menu. Be aware however, that if a category is not selected the products under this category will not appear at all on the site, even in a keyword search. If you want to turn off categories but retain the products, it’s better to select all categories then amend this within the product itself once the site is created. This is the default selection, so it’s rare you’ll actually need to specify ‘all’.
STEP 8 - Finally, you need to decide if a markup will be applied site-wide. Please note that most suppliers add a markup of 35-40% on their product, and a markup set here will apply ON TOP OF whatever the supplier has set.
Once you’re happy and have reviewed your settings, click the ‘Create’ button and the system will build your website per your selections. Following this, the website can be accessed the usual way in your Websites section.
