Setting up the new quotation document design
Overview:
This guide will take you through how to apply the new document design for your quotes, this uses an optional header page for your general details and company branding and a detail page to show off your product options.
This document will cover:
- What you need to set your own document design
- How to upload and associate your design
- How to use the new format
- Editing the document layout
What you will need to set up your own document design
- The document needs to be in PNG or JPEG format
- Image size of the image needs to be 1169 x 826 pixels
- Bit-Depth to be 32
- The file needs to be in landscape format
How to upload and associate your design
Go into your Pixhall.ini file on the client and add the below options, these will point to the images for the new design:
QuoteFullLandscapeH=
QuoteFullLandscapeD=
Explanation:
QuoteFullLandscapeH= (this is for the cover file on your quotes)
QuoteFullLandscapeD= (this is for the detail file on your quotes)
Example:
This includes the location of where the images are, I would advise for these to go either in your main images folder or icons folder.
QuoteFullLandscapeH=C:PSSQLImagesPromoServequotationcoverpage.png
QuoteFullLandscapeD=C:PSSQLImagesPromoServequotationdetailpage.png
You also need to make sure you have added the QuotationM.csv file into the Templates folder on the server so that any amendments made can be saved.
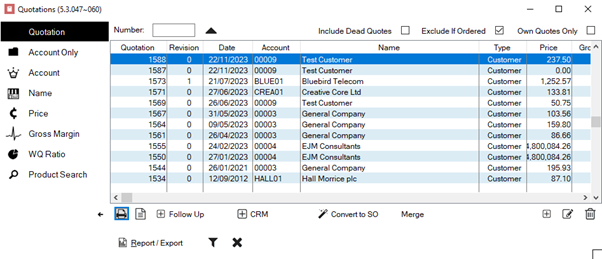
How to use the new format
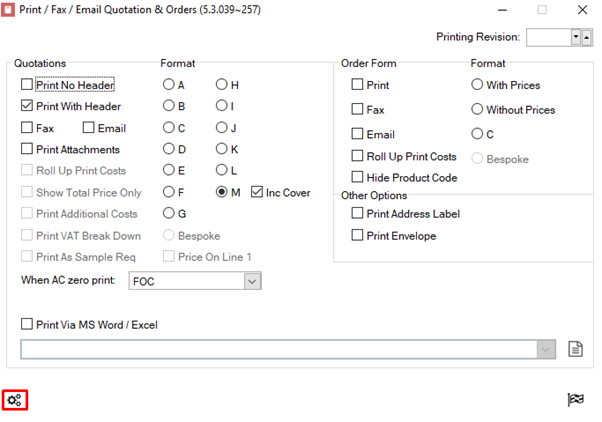
- Select the quote you’d like to send
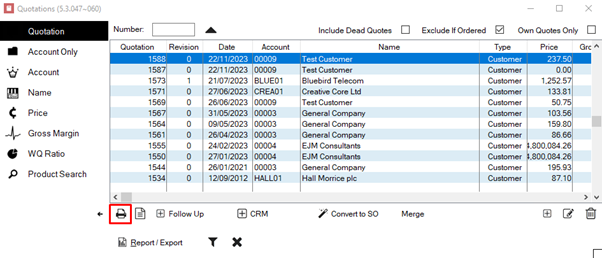
- Click on the printer icon on the bottom left
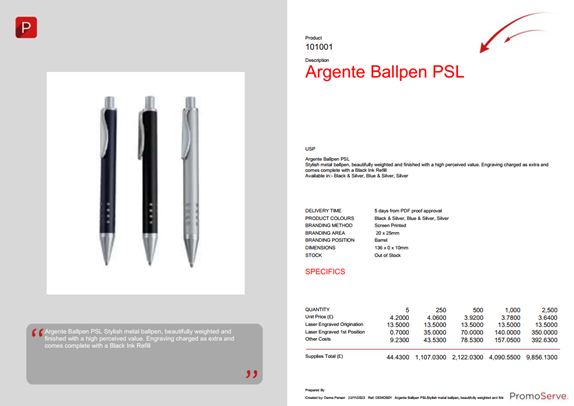
- Select format M (At this stage you can choose to select the cover option if you want to)
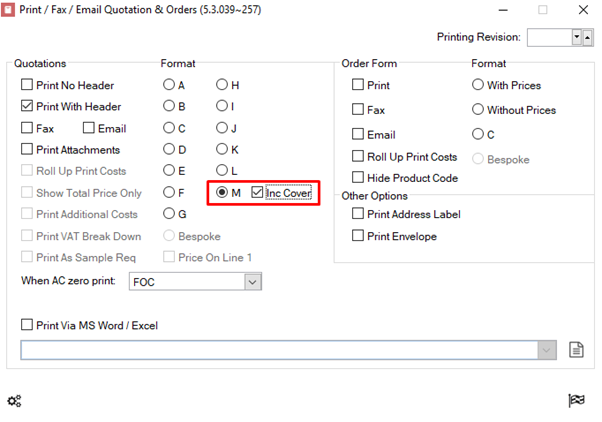
- This is how the quotation will display.
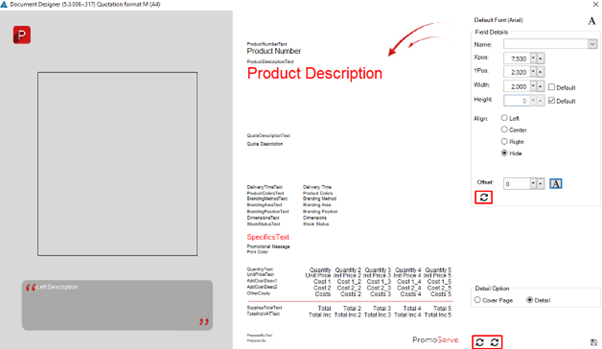
Editing the document format
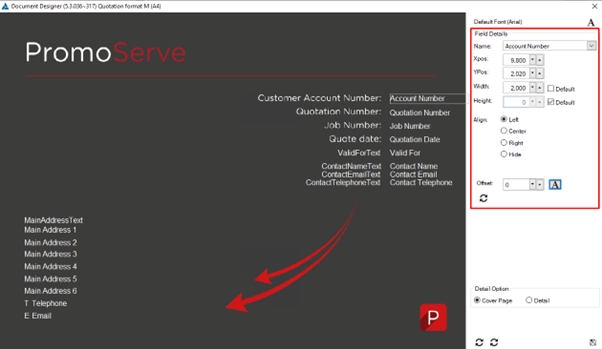
In the document print section, click on the cog icon on the bottom left
Now the document designer is open, from here you can do the following:
- Change the position of the fields
- Align the information
- Hide the information you don’t need
- Edit the colours and fonts of the text
You can edit the detail page by clicking the detail option on the bottom right
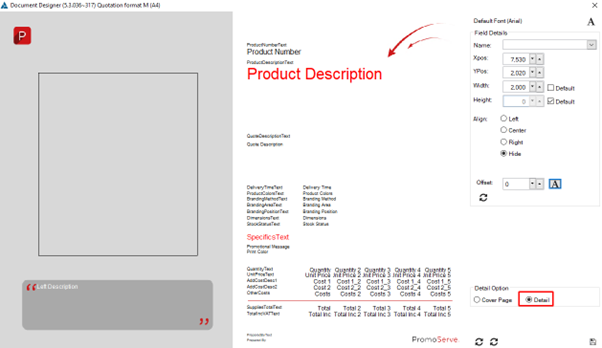
Once you’ve made the changes you need you can save them by clicking the floppy disk icon

You can revert your changes by clicking the revert buttons