Creating a New User in Enterprise
The following help sheet explains how to add a new user account within Enterprise.
A Note on Permissions: It is the responsiblity of the customer to ensure that all user accounts attached to their system only have access to their intended areas. Failure to ensure this can lead to unintended changes in the system which can cause significant problems if done in the wrong area.
STEP 1
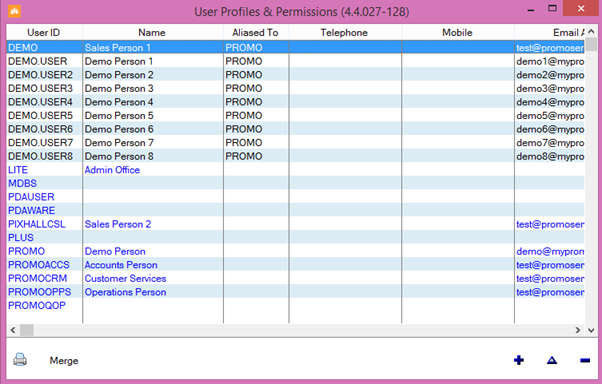
From the main menu of Enterprise, click on ‘System Functions’ followed by ‘User Profiles & Permissions’

STEP 2
Once in the User Profiles screen, click on the blue ‘+’ sign towards the bottom-right of the screen
STEP 3
In the User ID field, specify a unique user ID. This must be a minimum of 4 characters and can be alphanumeric (can contain both letters and numbers (but no symbols))
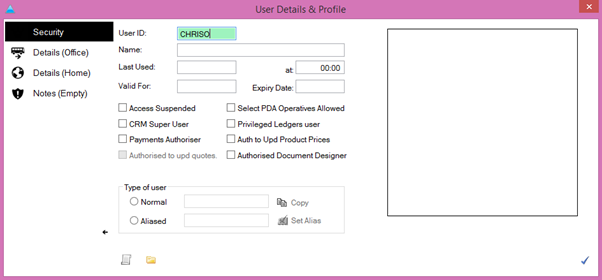
The block of tick boxes under the information fields maps out the permissions for the new user:
Access Suspended – When ticked, the user will not be able to log into the account, and a warning message will be displayed if a login is attempted.
Select PDA Operatives Allowed
CRM Super User – This effectively gives the user all permissions in relation to job management, such as being able to finalise jobs within the CRM that need a superior’s authorisation.
Privileged Ledger User – Similar concept to CRM Super User in relation to General Ledger instead of Job Management.
Payments Authoriser – Self-explanatory
Auth to Update Product Prices – When ticked the user will be able to alter product pricing information within Enterprise. It is advisable to keep this box unticked in the majority of cases unless there is a specific requirement.
STEP 4
As an alternative to the permissions checkboxes, an alias can also be defined to allow the user to simply mirror these aliased permissions. To do this click the ‘Aliased’ radio button and then click the ‘Set Alias’ button to the right
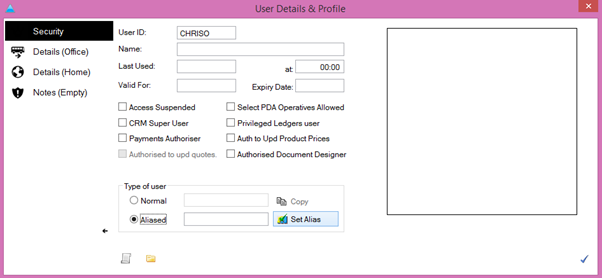
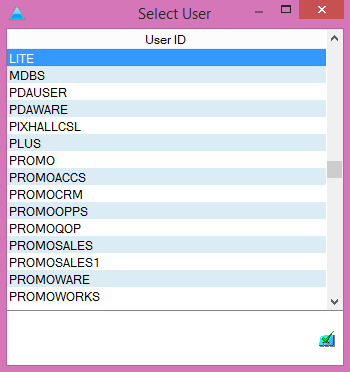
This will cause the ‘Select User’ box to appear, where you can select the desired alias. Remember, whichever user you select, the fresh user will adopt all of this user’s permissions, so select with care.
Once you’ve selected the desired alias, click the blue/green tick towards the bottom-right of the window to return to the User Details window.
STEP 5
Next, click the Details (Office) tab to the left of the screen, then the operatives button towards the botton-left. This will bring up the Maintain Operatives window. Once there, click the blue ‘+’ in the bottom-right to create a new operative.
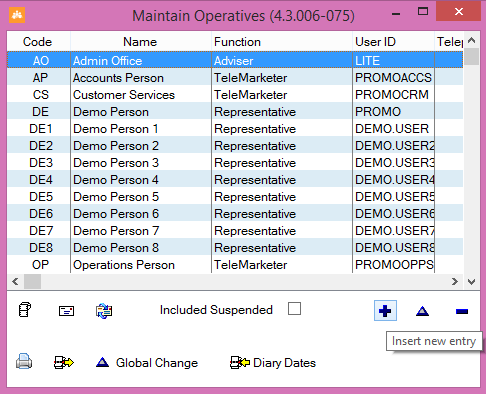
STEP 6
First, choose a code for the new operative. This must be 4 digits and can be alphanumeric. Once you’ve chosen a code (ensure it’s unique) populate the other user details such as name, email, function etc.
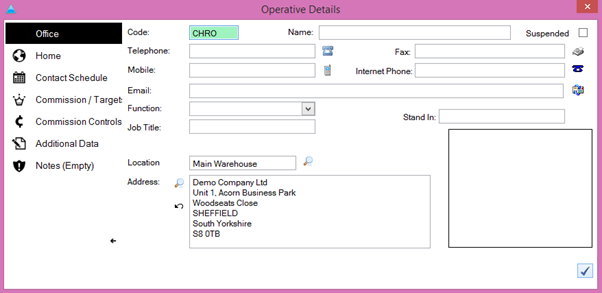
When all relevant details have been entered, click the blue tick in the bottom-right of the screen to save your changes. This will return you to the Maintain Operatives screen. Close this to return to the user details window.
STEP 7
In the user details window, click the spyglass next to ‘code’ and highlight the operative that we just created. Use the blue/green tick box in the bottom left of the ‘Select Operative’ window to select it.
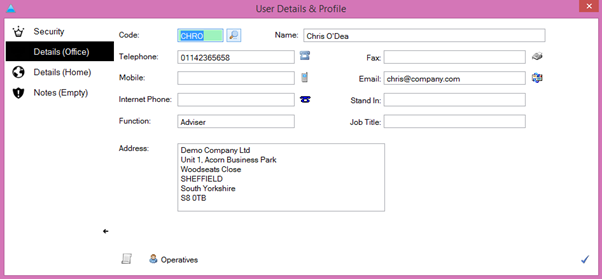
This will populate the User Details window with all the details we entered when creating the operative. When you’re happy, click the blue tick in the bottom right to save your changes.
STEP 8
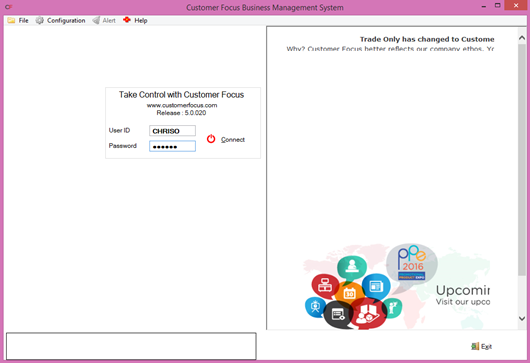
Now the user has been created they need to be given a new password. First, close out of any remaining windows and log out of Enterprise as the current user.
Once returned to the login screen, enter the user ID we set (the one that is a minimum of 4 characters). For the password, enter the user ID again in ALL CAPS. Hit the connect button.
STEP 9
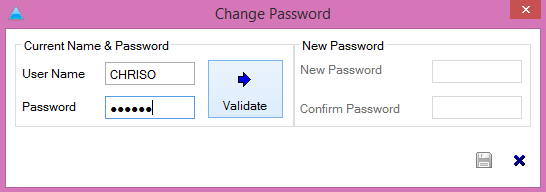
This will generate a dialogue box stating that the password must be changed. Hit okay and the ‘Change Password’ box will appear, as below. To begin, enter the same user Id and password combination we just used and click the validate button to the right of them.
 v
v
STEP 10
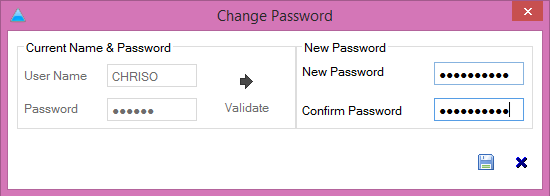
If these details were correct, it will unlock the right-hand side of the window, where you can enter a new password. You will also need to re-type this in the next box down to confirm it. When you are happy, click the ‘save’ icon (floppy disk) in the bottom-right of the window.
Your new user profile has now been created, and you should be able to log into Enterprise as normal with these new details.
