Creating a New Web Store
Before we can get into the meat of how to manage and configure your web store, the store needs creating! Fortunately, this is a simple process, and the built-in website creation wizard will take care of most of the techy nonsense for you. You just need to point it in the right direction!
The following help sheet aims to smooth out the process of using the website creation tool by explaining the purpose of each section so you can ensure the correct information is loaded in. To begin:
STEP 1
First, log into your Customer Focus account by heading to uk.customerfocus.com (if you are a US customer, simply replace the ‘uk.’ with ‘usa.’

STEP 2
Once logged in, you’ll notice a button on your navigation that says ‘Websites’. Hover over this, and click on the ‘New Website’ link that appears. This will open the website creation wizard.

STEP 3
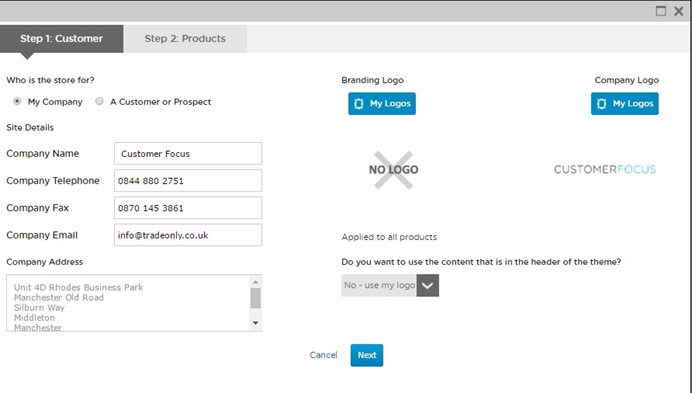
Once the website creating wizard opens, you’ll notice that a lot of the information on the left is already populated. This is information pulled directly from your customer account, so it’s a good opportunity to verify this information is accurate before moving forward.
STEP 4
Turning your attention to the right-hand side of the wizard, you’ll notice two ‘My Logo’ buttons, one labelled ‘Branding’ and the other labelled ‘Company’. To offer a bit of clarity on these logos and where they appear:
Branding: This is the logo that will appear on any Brand-on-Demand-enabled product
Company: This is the logo that will appear at the top of your web page, in the header section
For the drop down below these options, select ‘No, I want to use my logo’. Once you’re happy, click ‘next’ at the bottom of the page

STEP 5
Next, we need to pick out some details on the site. Step 2 allows us to nail these down. This is where you select the theme, categories and product feeds for your site, as well as apply a global markup if you wish.

STEP 6
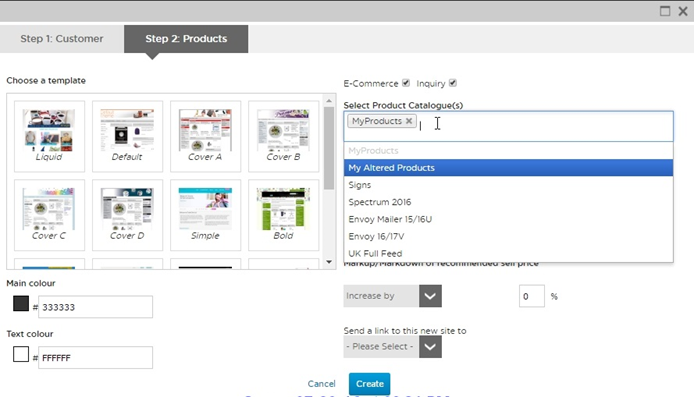
First you need to choose a template for the site. You’ll notice that when you hover over one of these options, the right hand side of the wizard changes to show a preview of the selected theme. This gives you an idea of how the page will look once created.
NOTE: Currently, there is only one mobile responsive theme available on Customer Focus Web Stores. This is the ‘Liquid’ theme, which is fully scalable regardless of resolution so it can be viewed correctly on a desktop pc, tablet or smartphone.

STEP 7
Once you’ve selected a template, you need to pick out which feeds will appear on your site. You don’t have to worry about adding the ‘wrong’ feeds, as only those assigned to your company will appear in the list. To access this, simply hover over the white space in the ‘Select Product Catalogue(s)’ box. This will generate a dropdown list of all the available catalogues. Select the desired from this list to add them to the box.
STEP 8
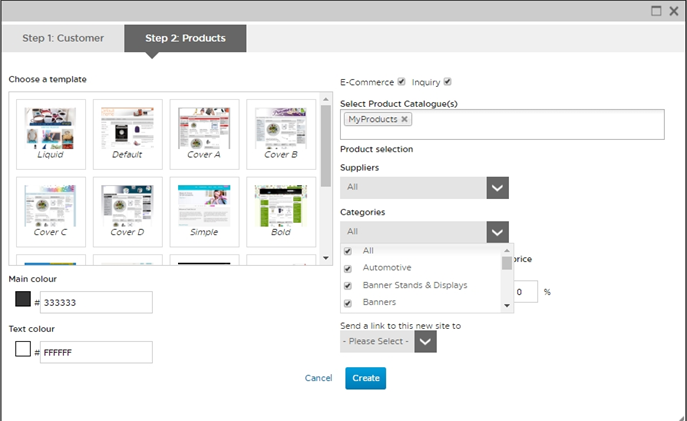
Once the system knows what catalogues you wish to use, the ‘Suppliers’ and ‘Categories’ lists will be populated with all the available options for those catalogues. You can either check all the options you wish to use, or simply check the ‘all’ box to get all the suppliers and categories available for the selected catalogues.
STEP 9
Once this is done, the last step is to define a global mark-up price (if necessary). Please be aware that if suppliers have added their own mark-up to a product, the figure designated here will apply on top of the supplier’s.
Once you’re happy, click the create button and the system will start spinning up the store. You’ll know it’s been completed when you see the below message. Click the ‘view website’ button to head straight to your new store

With this, your new Web Store is good to go!
