Financials Payment Processing
Overview
You may process payments, deposits and use credit notes under the Financials section of your Tech Suite. You may also add a credit to an account and use that towards a Sales Order or Sales Invoice.
If you have the Clover Connect Integration connect in your Settings, this will process through Clover Connect. Otherwise, these tools can be used to track these financial transactions.
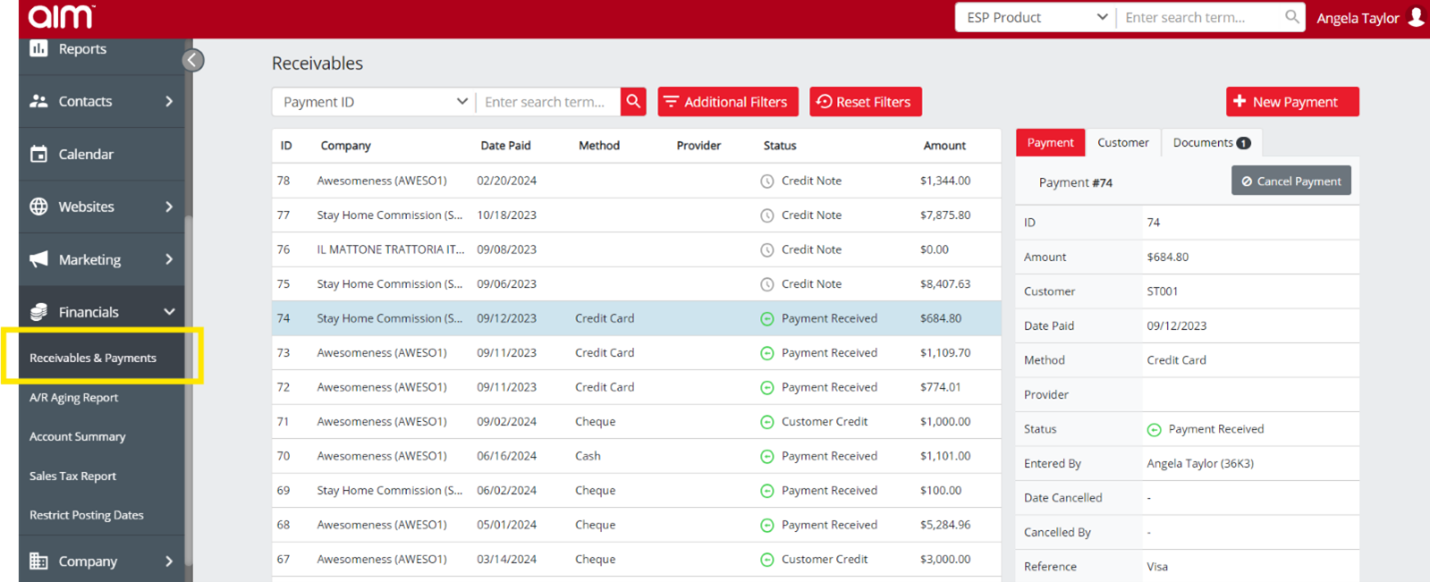
This can be done under Financials > Receivables & Payments. Here you will see any transactions, including payments received, payments cancelled, credit notes, etc.
At the top you may filter by Payment ID, Customer Account Number, Supplier ID, or Reference.
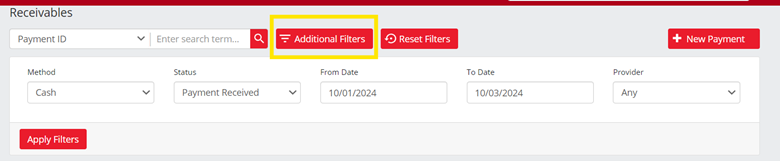
You may also use the Additional Filters where you can click to apply other search filters.
- Method: Filter by payment method. Ex: Cash, Credit Card, Online Payment
- Status: Filter by payment status. Ex: Payment Received, Credit Note, etc.
- From Date: Start date
- To Date: End date
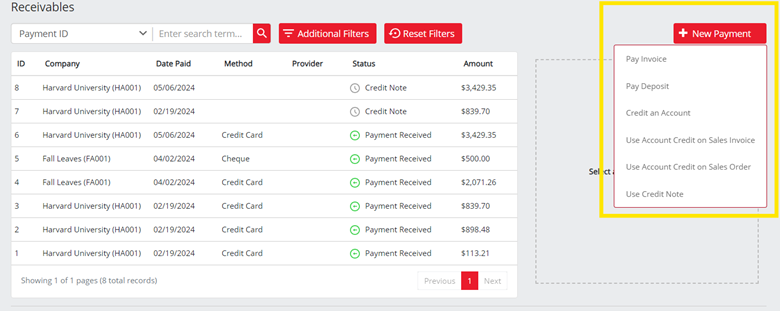
When you click the "New Payment" button, a modal will open containing the following fields:
- Pay Invoice: Facilitate payment for outstanding invoices by selecting relevant documents and entering payment amounts.
- Pay Deposit: Enable users to make advance payments or deposits for future services or orders linked to a customer.
- Credit an Account: Allow users to issue a credit to a customer’s account for adjustments or overpayments.
- Use Account Credit on Sales Invoice: Apply existing account credit toward the balance of a sales invoice to reduce the amount owed.
- Use Account Credit on Sales Order: Utilize available account credit to offset costs on a new sales order at the point of creation.
- Use Credit Note: Redeem a credit note against an invoice or order, adjusting the payment owed accordingly.
Applying a Payment or Deposit
Select which type of payment you would like to apply, and a new window will open. A Payment can only be applied to an Invoice, and a Deposit can only be applied to a Sales Order. In this example, we’ll apply a payment to an Invoice clicking ‘Pay Invoice.’
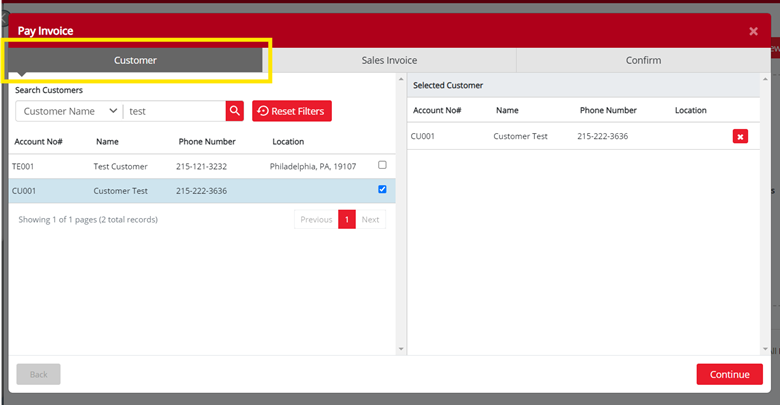
Search and select your customer. Once a customer is selected, select ‘Continue’ or the ‘Sales Invoice’ tab to see a list of all related invoices.
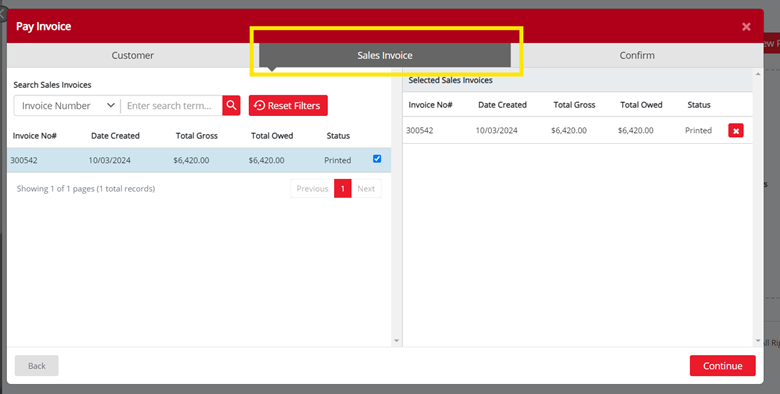
Click ‘Continue’ or the ‘Confirm’ tab to enter the Total Amount, Date Paid, Method and Reference. Click ’Submit Payment' to apply the payment.

After clicking ‘Submit Payment,’ the new payment will appear in the list of payments.

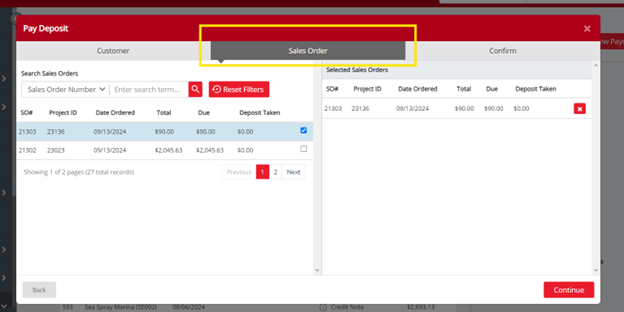
The same steps apply if you wish to apply a deposit. Click ‘New Payment’ then ‘Pay Deposit.’ Search and select your customer. Once a customer is selected, select ‘Continue’ or the ‘Sales Order’ tab to see a list of all related sales orders.
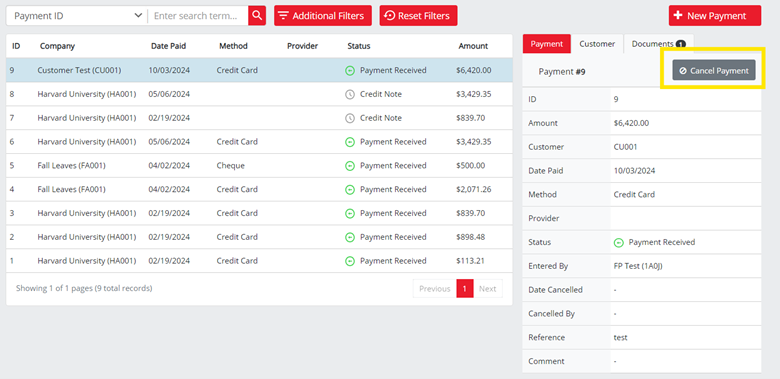
Cancelling a Payment
A payment can only be cancelled if its status is New Remittance or On Account.
Highlight the line item you wish to cancel the payment for and click ‘Cancel Payment.’
A window will appear asking you to Confirm if you wish to cancel the payment. Clicking ‘Confirm’ will cancel the payment.
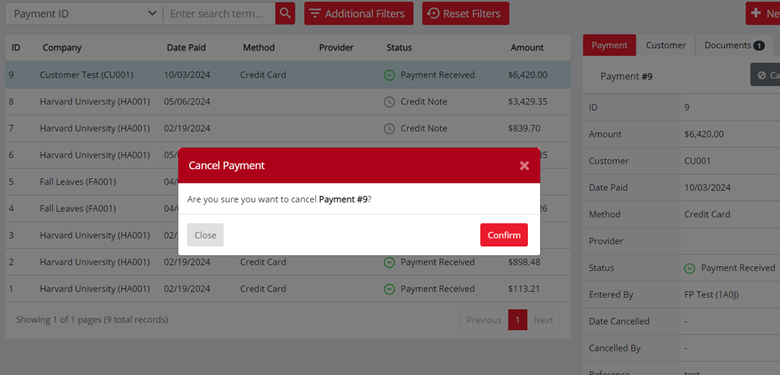
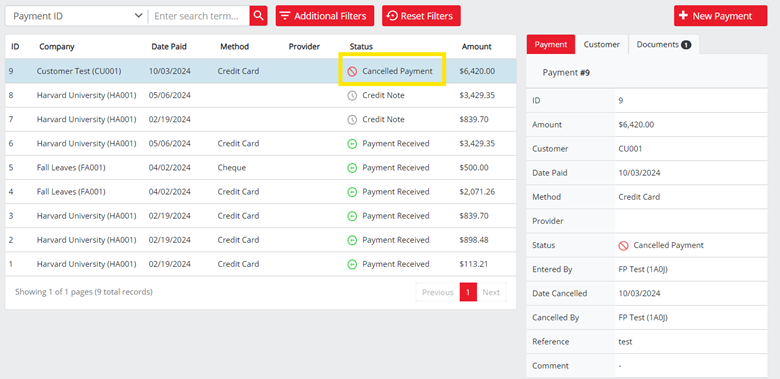
This will then show as a Cancelled payment.
Using Credit Notes
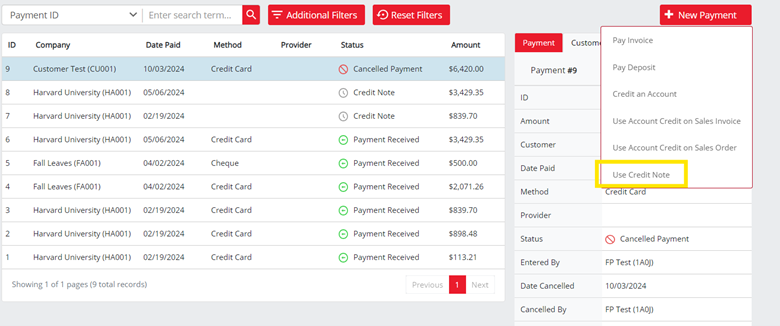
Click on ‘New Payment,’ and select ‘Use Credit Note.’ This will allow you to select the Credit Note and then apply it to one or multiple Sales Invoices.
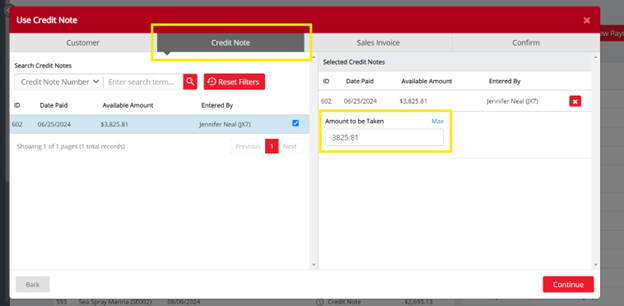
Search and select your customer. Once a customer is selected, select ‘Continue’ or the ‘Credit Note’ tab to see a list of all related credit notes.
Once you have selected and highlight your credit note, you can adjust the ‘Amount to be Taken’ if you wish to apply a credit for a different amount. You may click the blue ‘Max’ text to revert it back to the max amount. Note you will not be able to submit the payment with an amount that exceeds the available amount of the credit.
Then select ‘Continue’ or the ‘Sales Invoice’ tab to see a list of all related invoices. You may select one or multiple invoices to apply the credit to.
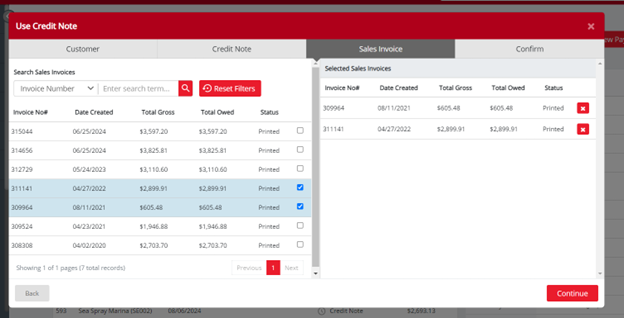
Click ‘Continue’ or the ‘Confirm’ tab to enter the Pay Amount and Date Paid. You can adjust the Pay Amount for the Sales Invoice(s) to your preference so you may change it to a partial Pay Amount, so you are not using the full Available Amount. Note that the Allocated Amount and the Available Amount (From Credit Notes) will also be displayed. If you do not use the full Available Amount, this will remain available for this customer for future use.
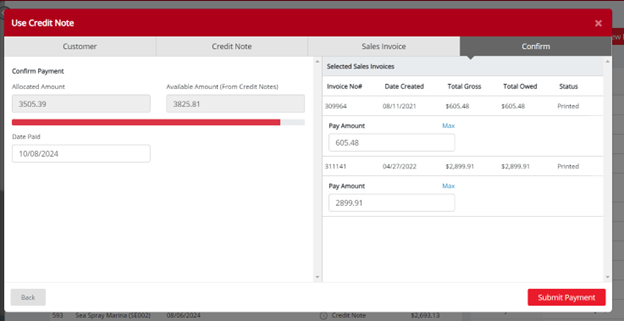
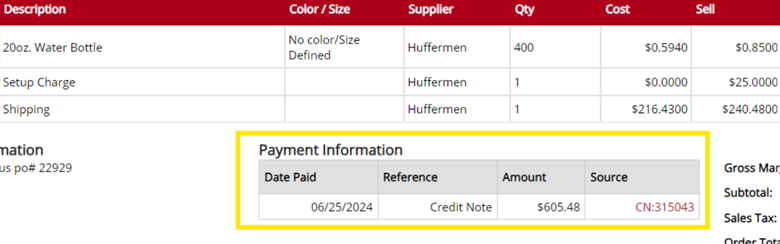
Click ‘Submit Payment’ to apply the payments. Note that credit notes applied to invoices do not show on the receivables page but will show on the document that it’s applied to.
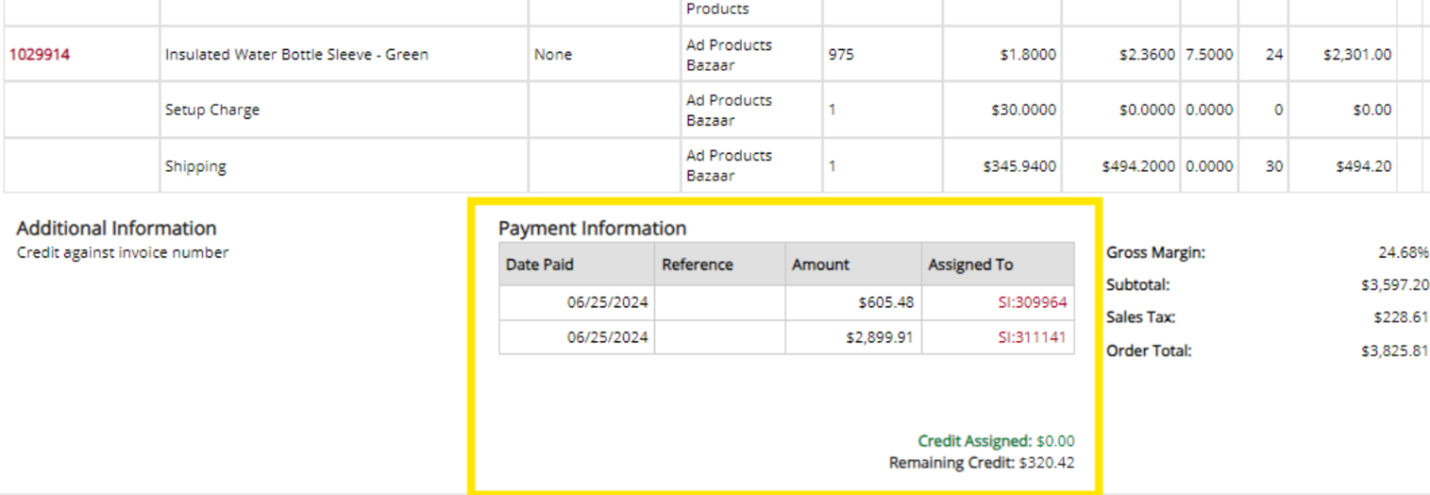
You may click the credit note under ‘Source’ and it will open a new tab for that credit note which will also display the Sales Invoices it was applied to, along with any remaining credit.
This will also be displayed on the Receivables page in the documents tab, showing the Sales Invoices the Credit Note was applied to.

Adding a Credit to an Account
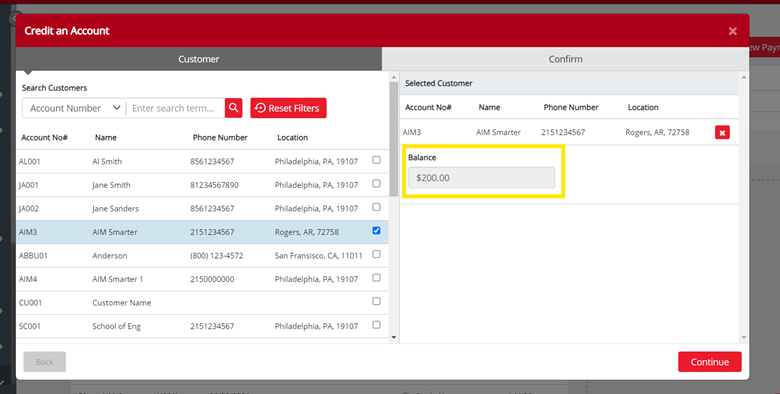
You may use this tool to add a credit to a customer account. This could be in the case that you received an overpayment if you wish to issue a credit instead of cancelling or refunding the payment. Click on ‘New Payment,’ and select ‘Credit an Account.’
This window will appear where you may then select your customer. Once selected, the customers information will show to the right. If there is already an existing balance, or credit on the customer's account, this will display here. You cannot edit this here as you will be adding any additional credit on the next tab.
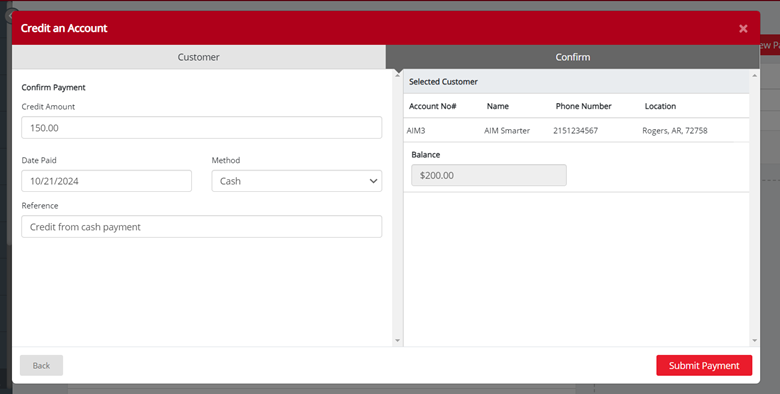
Click ‘Continue’ or ‘Confirm.’ In the ‘Credit Amount’ section, add the credit you would like to issue. Choose the Date Paid, Method and enter a Reference if you wish. Then click ‘Submit Payment.’ The window will close, and you will receive a success message.
Applying a Credit to a Sales Invoice or Sales Order
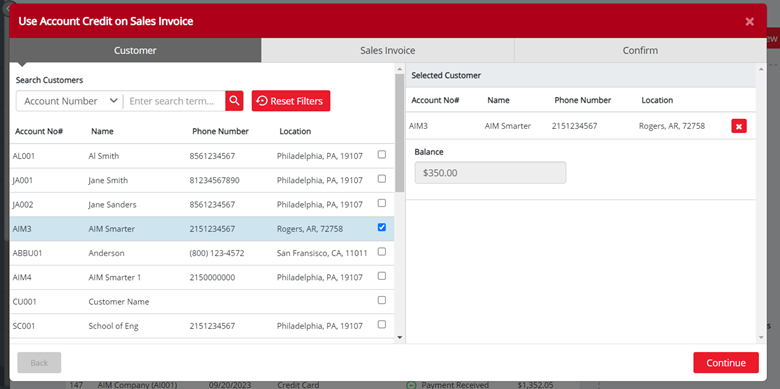
You may apply a credit you added to a Sales Invoice or Sales Order. In this example, we’ll apply it to a Sales Invoice by clicking ‘New Payment’ and ‘Use Account Credit on Sales Invoice.’
This window will appear where you may select your customer and see the available credit balance.
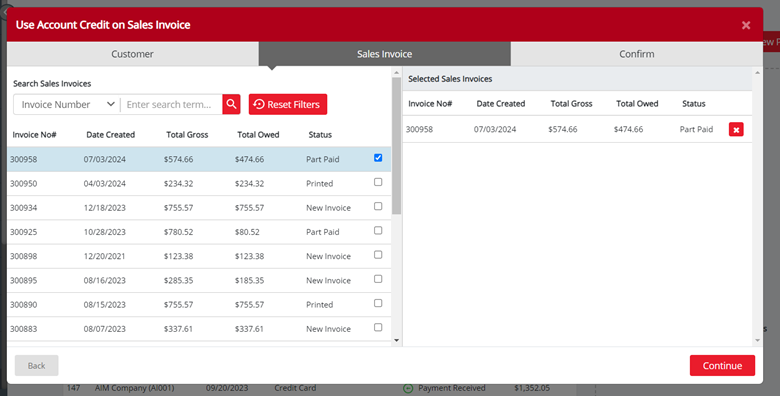
Click ’Continue’ or the ’Sales Invoice’ tab. Here you may select the Sales Invoice, or multiple Sales Invoices you wish to apply the credit to. Click ’Continue’ or the ’Confirm’ tab.
You can adjust the Pay Amount to your preference so you may change it to a partial Pay Amount, so you are not using the full Available Amount. Note that the Allocated Amount and the Available Amount (From Customer) will also be displayed. If you do not use the full Available Amount, this will remain available for this customer for future use. You will not be able to enter an Amount above the Available Amount.
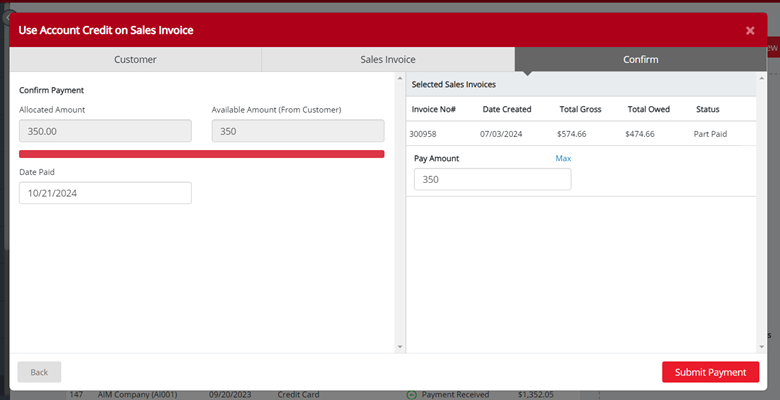
Click ‘Submit Payment’ to apply the Pay Amount to the selected document. The window will close with a success message that payment has been applied.
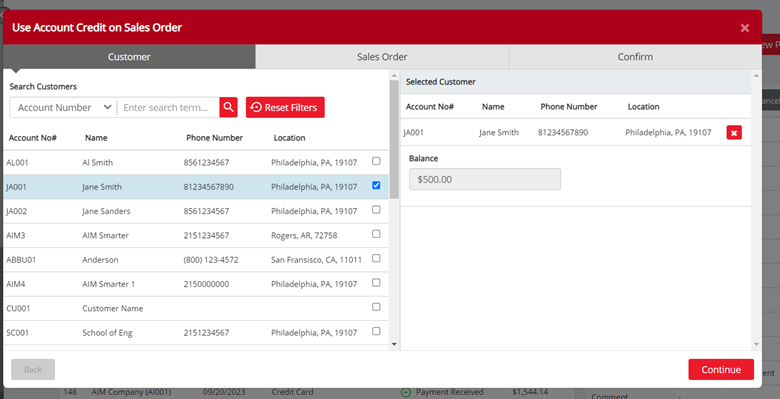
To add a credit to a sales order, you may follow the same steps as above but instead click on ‘New Payment’ and ‘Use Account Credit on Sales Order.’ You may then select your customer and proceed with choosing the Sales Order to apply the credit to.