Importing Products into Enterprise
This help sheet will talk you through how to do a bulk import of products from within Enterprise.
NOTE: Bulk imports are done with the use of comma-delimited .csv files. You can find an example import file here. Import files used in this manner must follow a specific format, and all headers need to correspond to a header on the right-hand side of the import screen (step 3) or the information under the headers will not be recognised correctly. Therefore, if you intend to create your own import file ensure to use the header list as a point of reference, particularly to find the correct naming convention.
STEP 1
All bulk uploads are done by the same method in Enterprise. Therefore to begin, go to ‘System Functions’ followed by ‘Data Import’.

STEP 2
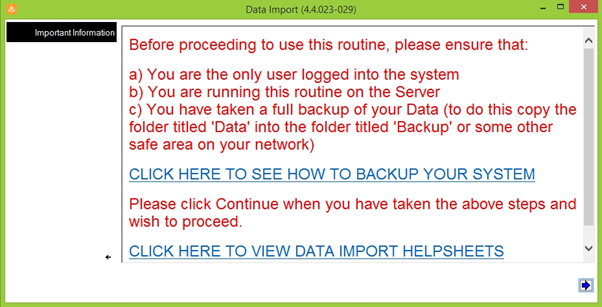
You will be presented with the ‘Important Information’ screen. Read this carefully and ensure you have taken all the steps described before continuing.
If you are unsure how to run an Enterprise backup, click here to view the help sheet.
STEP 3
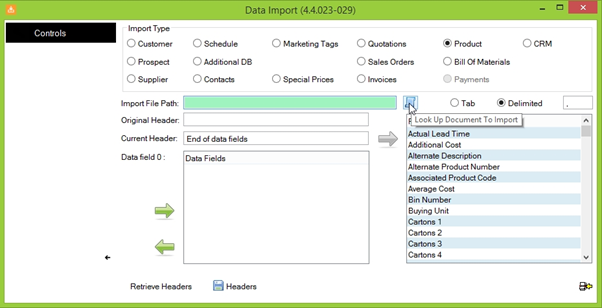
The Data Import screen will now be displayed. Firstly, select ‘Product’ from the radio buttons towards the top of the screen. Next, click the scroll icon next to the ‘Import File Path box’
STEP 4
When the file browser window opens, navigate to the .csv file containing the product data and click ‘open’. You will be greeted by a dialogue box asking you to confirm if the headers the system has located are correct.

STEP 5
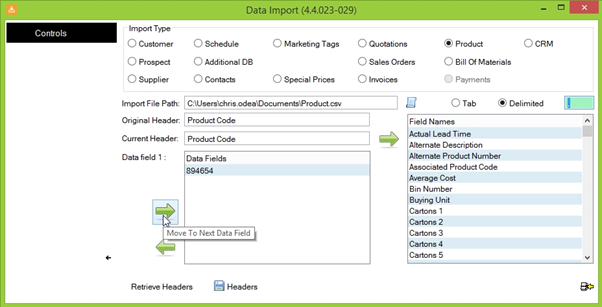
Once you’ve confirmed the headers, you will be taken back to the data import screen, except this time the Original/Current Header boxes will be populated. This gives you the opportunity to alter the title of any headers in your import. Click the green right-arrow towards the bottom-left of the screen to navigate through the headers.
STEP 6
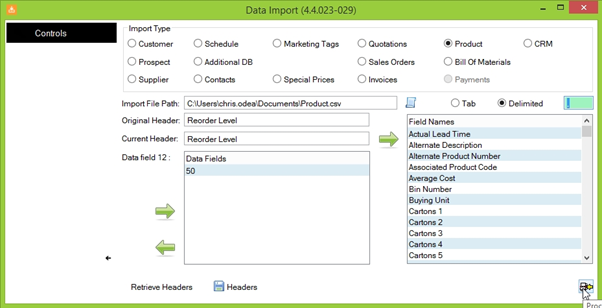
Once you have reached the end of the headers and are happy with your import, click the ‘Proceed with import’ button in the bottom-right.
STEP 7
You will then be greeted by the Product Import dialogue box. You can use this screen to add any data that is consistent throughout the products in your spreadsheet. For example if all your products are desk items, you can add the category to the products here to save time later on.
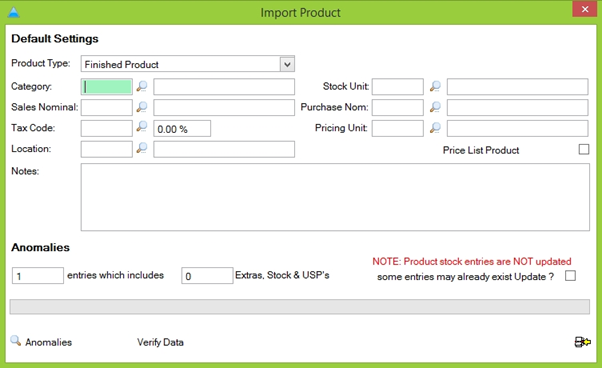
STEP 8
Once you’re happy with the information you’ve entered, click the ‘Proceed’ button

STEP 9
When you import is complete, the following pop up box will appear providing details of the information imported into the system.
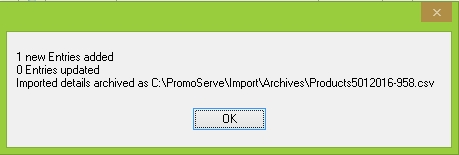
The import is now complete.
