CRM Job Management Center:Job Bag sales process
The following will guide you through how to do a stranded sales process in the CRM Center/Job Management Center
STEP 1
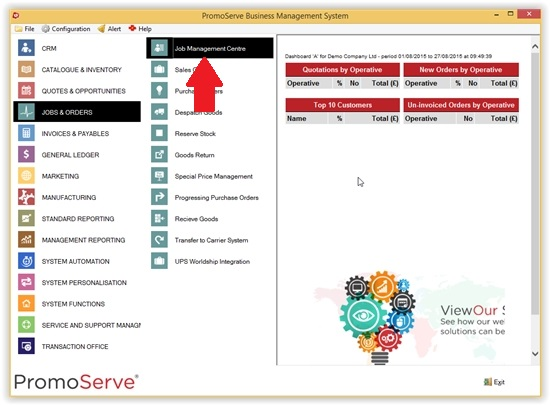
From the main menu, select ‘Job Management Centre’.
STEP 2
Initially, a list of outstanding jobs for the current user generates.

STEP 3
Select the ‘Job Number’ tab to the left of the screen. This shows jobs for all operatives.
To add a new job, click the blue plus at the bottom right of the screen, as shown.

STEP 4
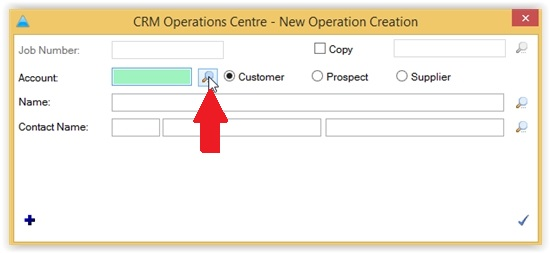
Select the customer you wish to raise the job for by clicking the magnifying glass next to the ‘Account’ field.
STEP 5
Select the desired customer and click the checkmark in the bottom right.

STEP 6
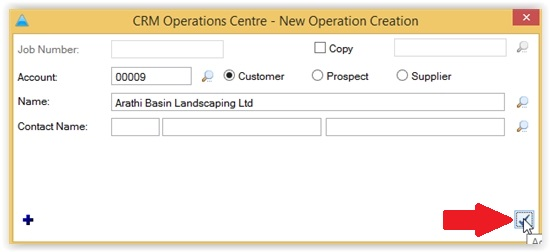
The ‘New Operation Creation’ page is now populated with customer details. Click the checkmark in the bottom right.
STEP 7
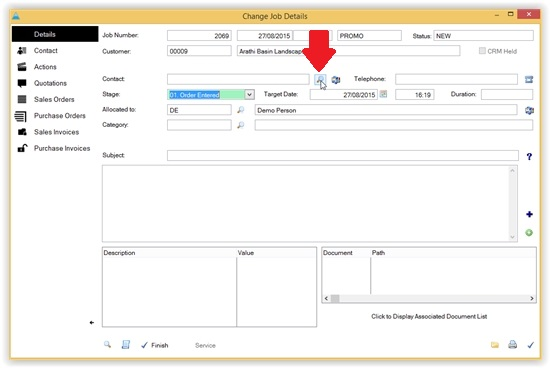
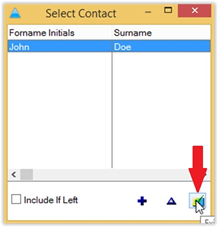
Now assign this job to a user. Click the magnifying glass next to the ‘Contact’ field. In the contact selection window, highlight the desired contact and click the green tick.
STEP 8
Select which stage the job is at, by clicking the down arrow to the right of the ‘stage’ field and selecting from the list.
NOTE: This list can be customised via system personalisation, should you wish to customise the options. A step-by-step guide of how to do this can be found [here].

STEP 9
Select the category for the job. This could be the customer’s desired product or the service you are providing. To do this, click the magnifying glass next to the ‘category’ field. On the ‘KB Ref’ window, select the category and click the green tick.


STEP 10
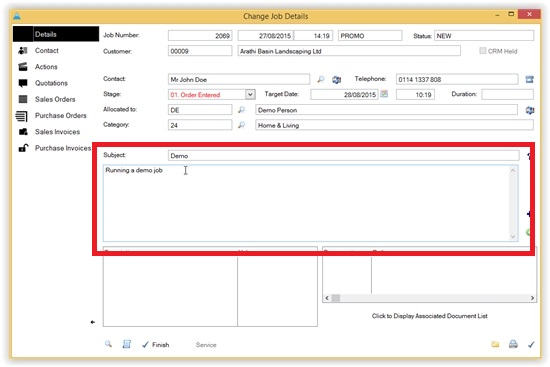
Enter a subject and short description of the job in the subject field and below.
STEP 11
To add further notes that may be helpful, click the green plus to the right of the description field. This is particularly useful for any information entered after the initial job creation, as these entries are timestamped.

STEP 12
Enter the desired information in the ‘Reason’ field and click the checkmark in the bottom right.

STEP 13
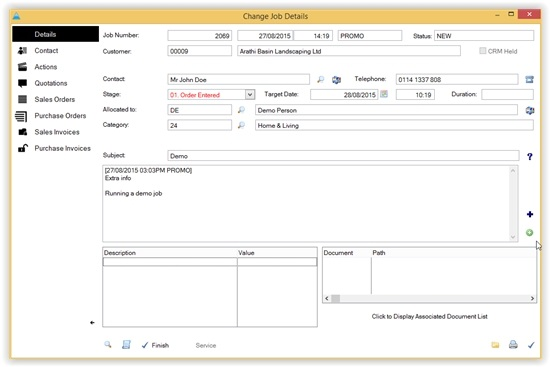
Your new job should now appear similar to this:
STEP 14
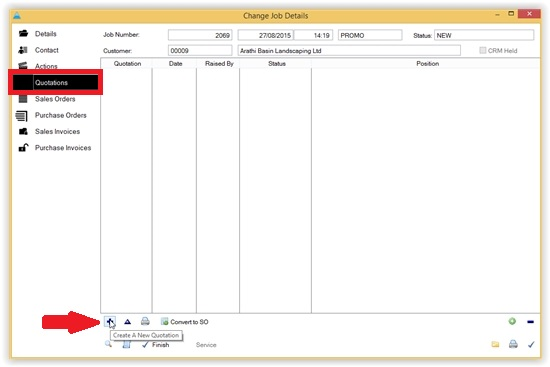
Enter a quotation with the products the customer wants a quote for. To do this, click the quotations tab on the left of the ‘Change Job Details’ screen, then click the plus sign in the bottom left of the quotations tab.
STEP 15
You are now able to change the customer if desired. When finished, click the checkmark in the bottom right of the ‘Add Quotation’ window.
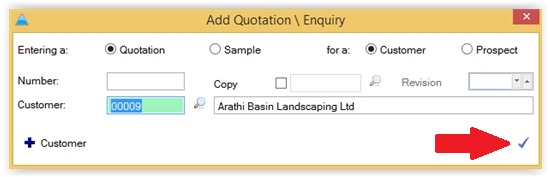
STEP 16
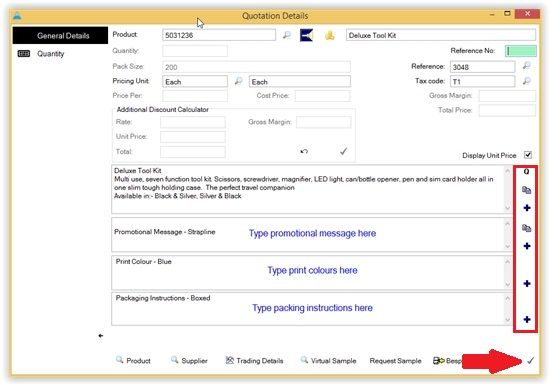
The ‘Quotation Details’ window appears. Complete as appropriate, and once you’re happy click the tick in the bottom-right.
NOTE: If you don’t have the product code to hand, click the magnifying glass next to the ‘Product’ field to generate a full list of options.
NOTE2: A number of standardised entries for the ‘Type (x) here’ fields can be found by clicking the blue plus sign to the right of each field.
STEP 17
The ‘Change Quotation’ window appears. Review the information entered and click the bottom-right tick when you’re happy.

STEP 18
You are now ready to send your quote. Click the print icon in the bottom right of the ‘Quotation’ tab and select whether you wish to print/fax or email the document.

STEP 19
When the customer accepts the quote and wishes to proceed with the sale, click the sales order tab on the ‘Job Details’ screen. To create a new Sales Order, click the plus sign at the bottom-left of the screen.

STEP 20
‘Create New Sales Order’ window appears. You can change the customer is needed, or copy an existing quotation/sales order. Click the checkmark in the bottom-right once complete.

STEP 21
Add or edit the sales order as required. When you’re happy with the order, click the printer button in the bottom-right of the Sales Orders tab and choose whether to print/fax or email the document

STEP 22
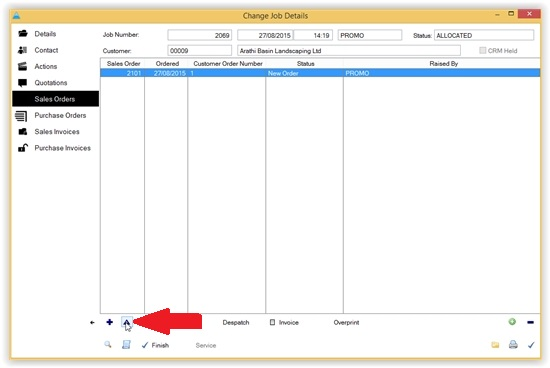
Next, a purchase order is needed to send off for the stock required for this transaction. To do this, go to the edit section of the sales order by highlighting the relevant order and clicking the blue triangle in the bottom-left of the Sales Orders tab.
STEP 23
In the ‘Change Sales Order’ window, click ‘Raise PO’ in the bottom-left

STEP 24
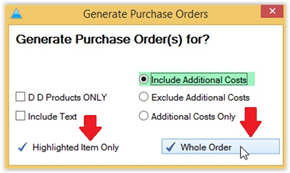
Select the items to raise as part of the purchase order. You can select a portion of the order and click ‘Highlighted item only’ or click ‘Whole Order’
STEP 25
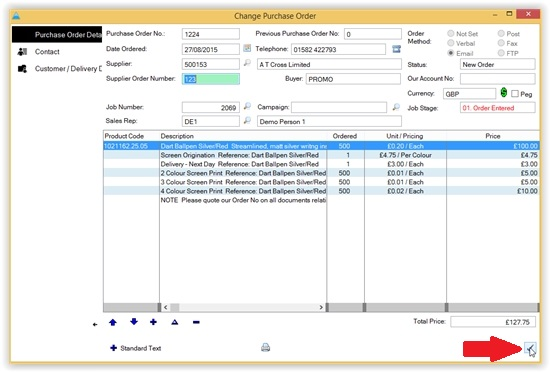
Your new purchase order should look something like this

STEP 26
Enter all the relevant information for the purchase order, then click the checkmark in the bottom-right.
STEP 27
Navigate to the ‘Purchase Orders’ tab on the Job Details window. Once you’re happy with the order, click the printer icon in the bottom-right to print/fax or email your document to the supplier.

STEP 28
To receive the stock from the purchase order, click ‘Receive’ on the Purchase Orders tab

STEP 29
The ‘Receive Stock Against #’ window shows the quantity of stock ordered/delivered. To receive all stock fr4om the purchase order, click receive all

STEP 30
After verifying the information in the ‘delivered’ column, click the checkmark to deliver the stock into the system.

STEP 31
You can now raise a purchase invoice for this purchase order by navigating to the Purchase Invoices section. Do this by selecting ‘Invoices & Payables’ followed by ‘Purchase Invoices’ @ the main menu.

STEP 32
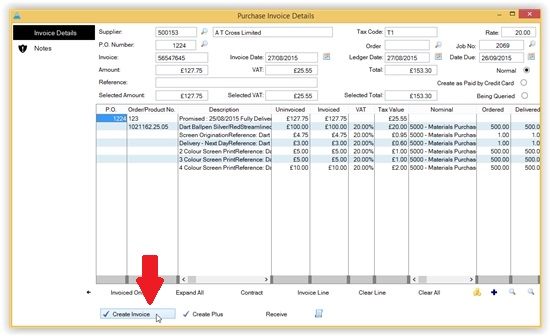
The ‘Purchase Invoices’ window appears. Click the ‘new invoice’ button towards the bottom-right of the screen

STEP 33
Enter the relevant information into the Purchase invoice window. Once you’re happy with the information entered, click the ‘create invoice’ button on the bottom-left of the window.
STEP 34
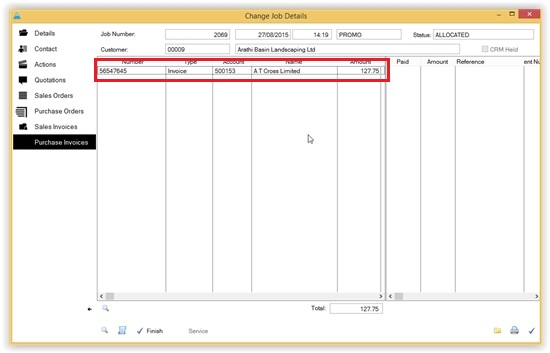
Navigating back to the Job Details screen for the current job, the ‘Purchase Invoices’ tab should now be populated with a single entry, as shown below. This shows the invoice was completed and applied successfully.
STEP 35
To raise the sales invoice, click the ‘Sales Order’ tab on the left of the ‘Job Details’ screen. Highlight the relevant sales order and click the ‘Invoice’ button at the bottom of the screen. This will populate the ‘Sales Invoices’ tab with each line of the invoice.


STEP 36
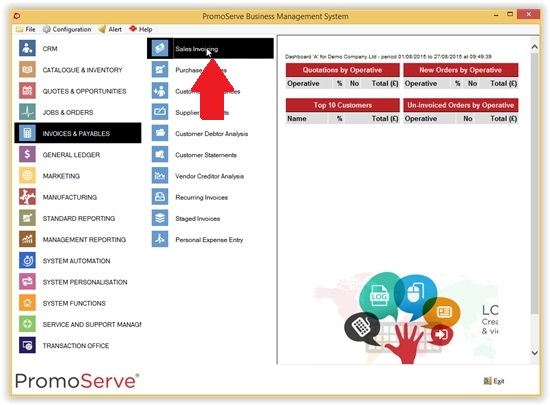
In order to email the invoice, navigate to the ‘Sales Invoicing’ section of the main menu.
STEP 37
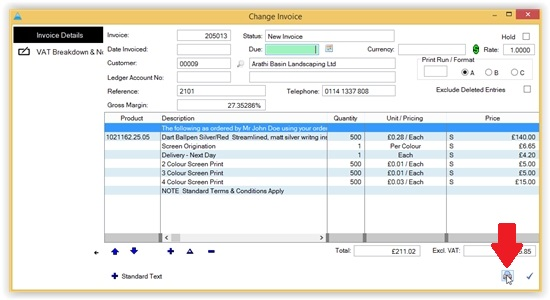
On the Sales Invoicing tab, click on the relevant invoice and click the blue triangle in the bottom-right of the screen to review the details.

STEP 38
Once you’re happy with the details of the invoice, click the print icon in the bottom-right of the screen and choose whether to print/fax or email the invoice.
STEP 39
Once the payment has been received from the customer, navigate back to the ‘Job Details’ page and click the ‘finish’ button in the bottom left of the screen. This will finish the CRM and close the job.
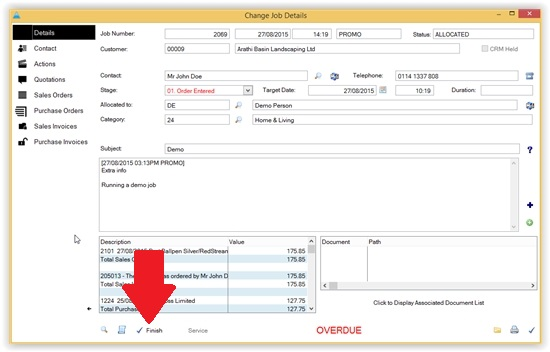
The job has now been completed.
