How to Add Social Media Links to your Web Store
As you may have noticed, the footer of your web site contains social media links for Facebook, Twitter, LinkedIn and Google+. These can be linked directly to your own social media account for these platforms. The following help sheet will map out the steps to getting these lined up
STEP 1
Firstly, we need to get your user account added to your contact details page. To do this, you need to head to the management section of your website by heading to
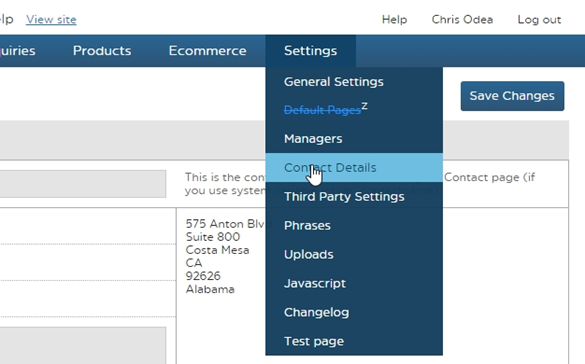
Once there, hover over the ‘Settings’ button on your navigation bar, and click on ‘Contact Details’
STEP 2
Once on the contact details page, scroll down until you find the fields labelled ‘Facebook’, ‘Twitter’, ‘LinkedIn’ and ‘Google+’.
You need to enter in your username for this service into the field. Once you have entered the details for all fields, hit ‘Save Changes’ in the top-right corner of the screen.
STEP 3
Once you’ve added your username to the field, the next step is to add the physical link to the page itself on the front end of the website. To do this head to Overall Layout Revisions within ‘Appearance’ and look for the entry labelled ‘live’. Click ‘Manage’ for this entry to be taken to the page editor.

STEP 4
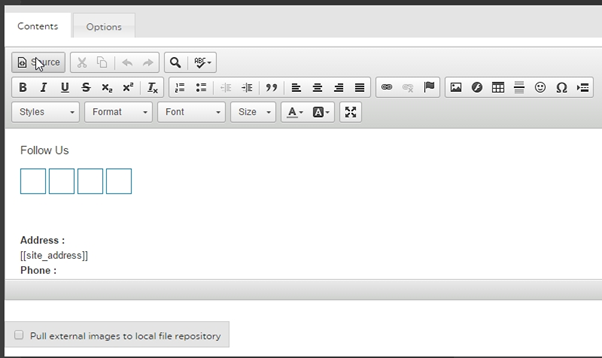
Once on the page editor, scroll down to the lowest portion. One of the lowest modules you should see is ‘social_media (Text/HTML)’. Hit the pencil icon in the top-right of this module to be taken to the module editor. Once there, you need to click the ‘source’ button towards the top of the window. This will alter the display below to the base HTML code that governs what is shown in that module.
STEP 5
Once in HTML mode, you are looking for the portion of code that reads ‘href=’. The url of your social media page will go directly after this, within the quotation marks. Make sure to add http:// to the beginning of each URL.
NOTE: Each of the four lines will appear on the same line of text, and this must be kept as such. You can click ‘preview’ in the page editor to check which order the buttons appear in (left-right).

STEP 6
Once you have added the links to their respective areas of the HTML, you can hit ‘Save’ in the top-right of the window to save your changes
NOTE: When you hit save, make sure you are still in source mode
Once the changes are saved, you can hit ‘Preview’ in the page editor to test your links and make sure they head to the right address. Once you’re happy, you can hit publish in the top-right to save your changes and push them live

All going well, this should complete the process. If the links still aren’t working, check the troubleshooting tips below
Troubleshooting:
- Are the links directly following a ‘a href=’ entry?
- Are the links contained within quotation marks?
- Did you remember to add http:// to the beginning of the link?
