How to Verify / Repair Database
The following will describe how to verify and repair your database
STEP 1
From the main menu, click on the ‘File’ button in the top-left and select ‘Verify & Repair’ from the drop-down list.

STEP 2
The ‘System Backup and Verify’ window will display as shown. Click the ‘continue’ button on the bottom right of the window.

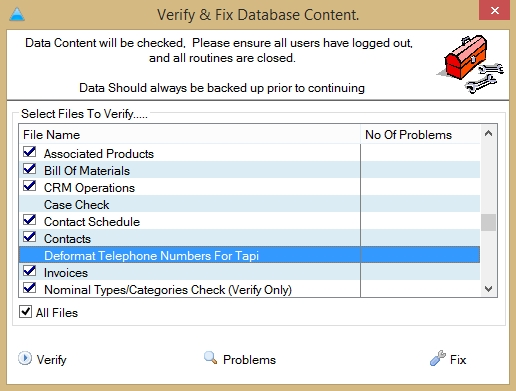
STEP 3
The ‘Verify & Fix Database Content’ window will appear next. This is where you can define which areas of the database you wish to repair/verify. Tick the ‘all files’ checkbox, then untick the ‘Case Check’ and ‘Deformat Telephone Numbers For Tapi’ options as shown. (You can select/deselect individual options by double-clicking them.
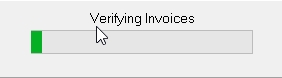
STEP 4
Now click the ‘Verify’ button in the bottom-left. A progress bar will appear to let you know when this is complete
STEP 5
When the files are verified, the number of problems will be displayed as a numerical value to the right of each option. Next, click the ‘fix’ button at the bottom of the screen. Another progress bar will appear as the sections are repaired.

STEP 6
Following the fix, the number of problems will be updated to reflect successful fixes
