Setting up the Xero Accounts Interface
This help sheet will guide you through setting up the accounts interface for xero.
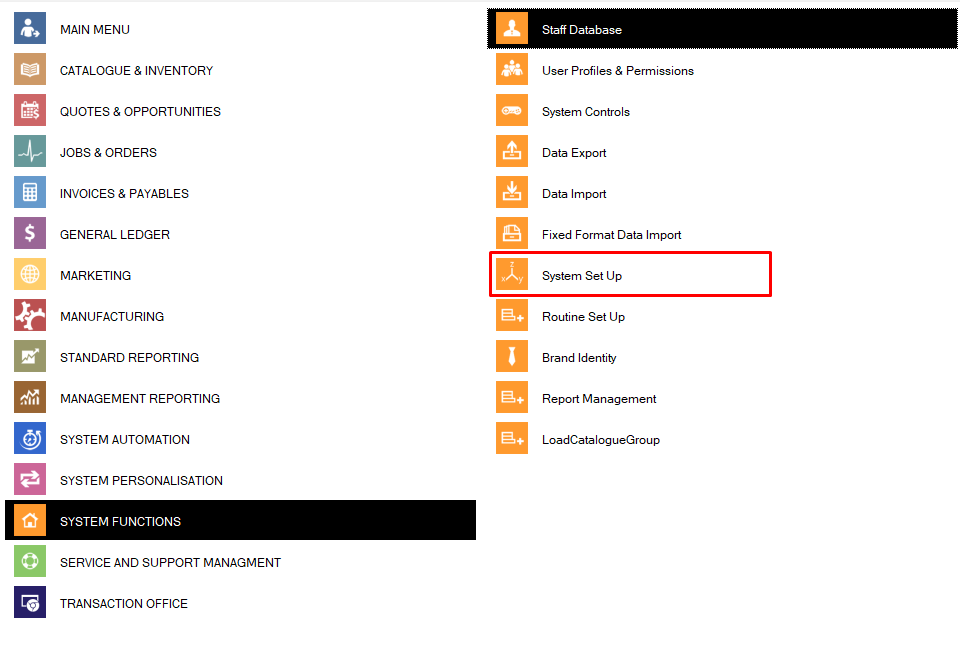
Step 1: Go to System Functions.

Step 2: Click into System Setup.
Step 3: Click into the accounts interface settings tab.
Step 4: Click on the package drop down and select Xero (NOTE: at this stage please make sure the import file paths are valid)
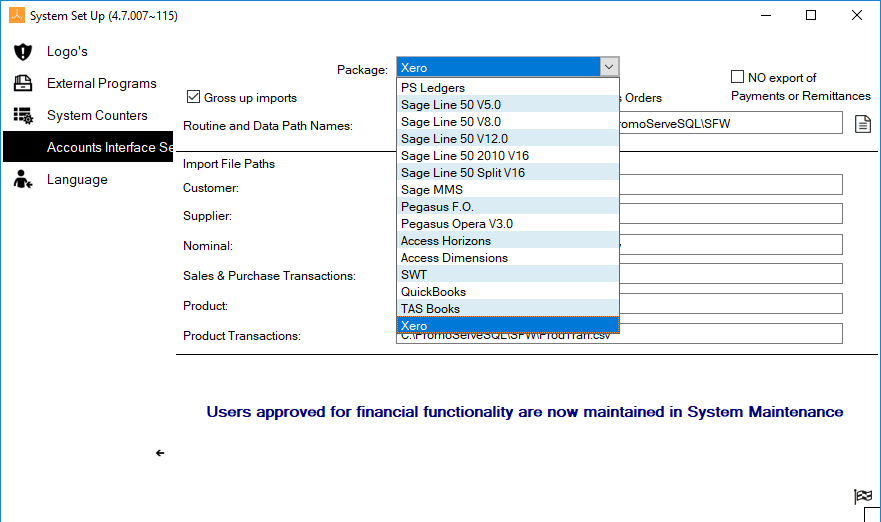
Step 5: When happy click save
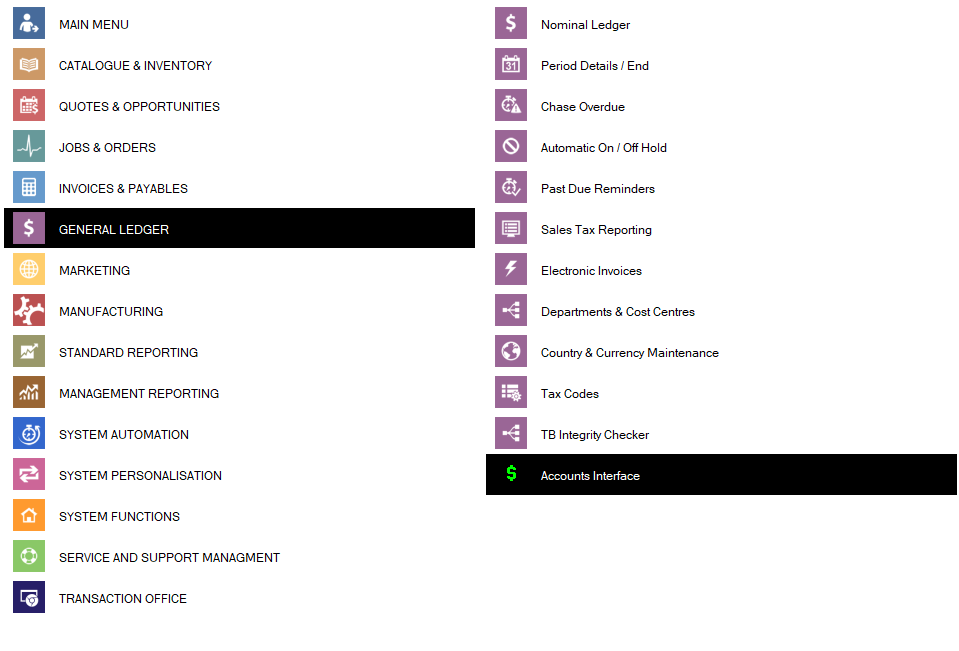
Step 6: Click into the Accounts interface.
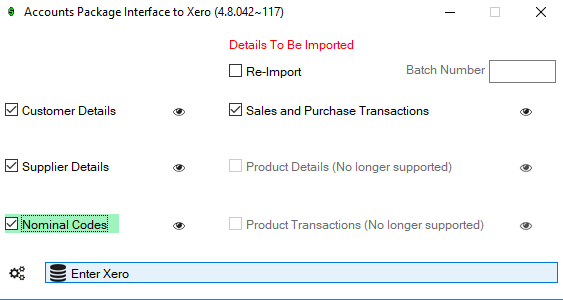
Step 7: You will now see the xero interface.

Step 8: Select the options you wish to export and when happy click the “Enter Xero” button.
Step 9 : At this stage the system will export the files. You will then be able to import them into Xero.
The Xero Part:
Step 1: The files you want to import will then be sent to the location you specified earlier as shown below.

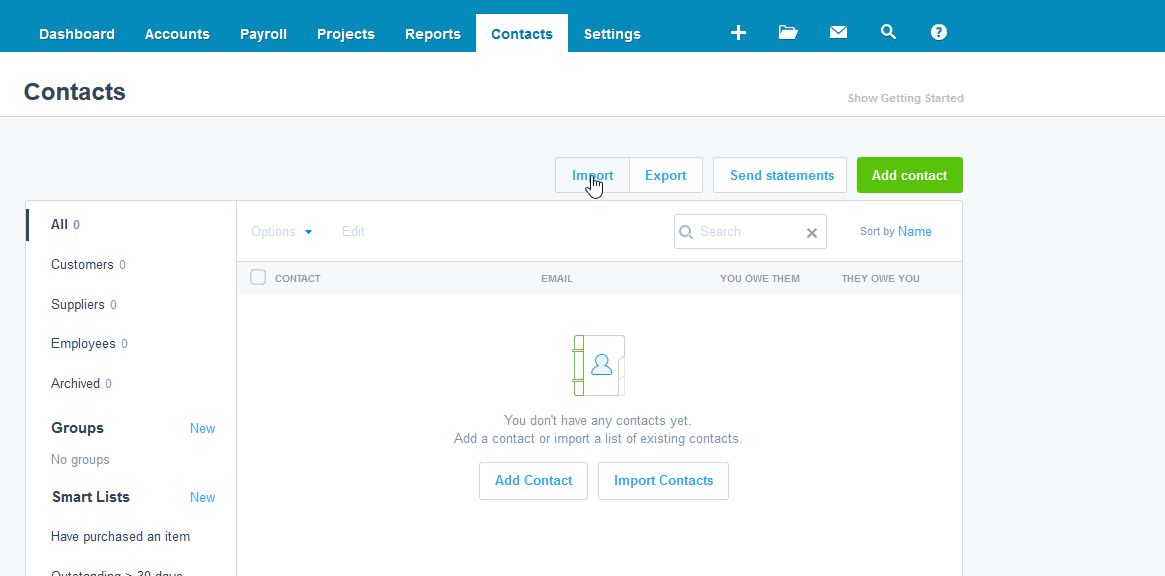
Step 2: You can then import the files into Xero by going to the relevant area and selection import. The below example shows how to import Customers into the Xero system. Go to the contacts tab and click import.
Step 3: Click the browse button and then find the spreadsheet you exported. Once you have browsed to the file select in and click import.

Vat code conversion setup process (This needs doing as part of the initail Xero setup):
Step 1: file sfwctrlxero.ini file. This file will be provided as part of the setup.
Step 2: This will need adding to the Inifiles folder on your servers main PromoServe location (Example: C:PromoServeSQLinifiles) (NOTE: if you are on the cloud system, we can upload this for you)
Step 3: Please check this file and make sure it converts the tax codes from Promoserve to Xeros format that are relevant to you.
