How to Mark a Credit Note As Paid – Enterprise
The following help sheet will walk you through how to flag a credit note as fully paid within the Enterprise system.
Please be aware that in order to mark a credit note as paid, it MUST first have the status of printed. If you are unsure how to progress your note to this stage, refer to the help sheet for creating and printing a credit note, which can be found here.
STEP 1
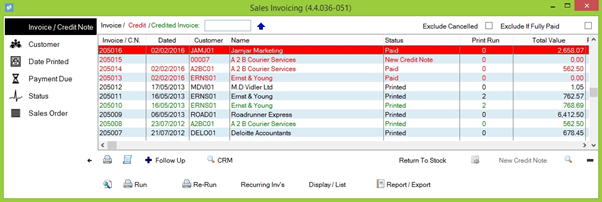
Assuming your credit note has previously been printed, return to the main ‘Sales Invoices’ screen. Highlight the credit note you wish to update, then click on the small document icon next to the ‘Return to Stock’ button, as shown below.

STEP 2
The Payment / Refund Details screen will be displayed. Here you can define how the credit will be paid, as well as enter the source (reference) for the payment. Click the checkmark in the bottom-right when you’re happy.

STEP 3
You will now be returned to the Sales Invoices screen. You will note that the credit note is now marked as paid in the system.